 My sister is a button fanatic. She has a huge button collection, and many of her creations prominently feature buttons, either functional, or as decoration. Her blog regularly features button finds, and because of her I am always keeping my eye out for button related stuff.
When I came across a short but excellent article over at Ped’s & Ro describing an experiment in making buttons from leather, I was intrigued. The process seamed simple and the result elegant — the key ingredients of any good design. I decided to try my hand at creating some of my own leather buttons.
Please read the Ped’s & Ro blog for the detailed instructions. I will just add a couple of tips here regarding cutting out the buttons and finishing.
It is difficult to cut smooth curves in leather at the best of times. Combine thick leather and a small radius circle and you are just asking for trouble. The standard solution would be to use a round punch to create the button shapes, but typical round punches only go up to about 1/2″ in size, which is only good for smaller buttons. I didn’t have a round punch this size, and didn’t want to buy one for this exercise, so I economized and used my 1/2″ strap-end punch to make the circles (the “circles” are just really short 1/2″ straps!) I made some 1″ buttons with my 1″ strap-end punch, but it’s curve is not perfect so the buttons are not absolutely round.
I subsequently found (and purchased) a (rather expensive) versatile large punch set at Lee Valley (several punch sizes can even be used concentrically to create washers, etc.) The Lee Valley round punch set includes dies for cutting 3mm to 30mm holes. A good find.
I suppose there is no law that says buttons must be round, so if you are without a punch you could try other shapes.
I burnished all the surfaces of my buttons quite a bit, using gum tragacanth and a wooden edge slicker. The result is a smooth finish, but the process is a bit tedious given the small buttons and my big fingers.
After the buttons dried I finished them with a satin acrylic coating to protect them from the elements and hopefully keep them smooth longer.
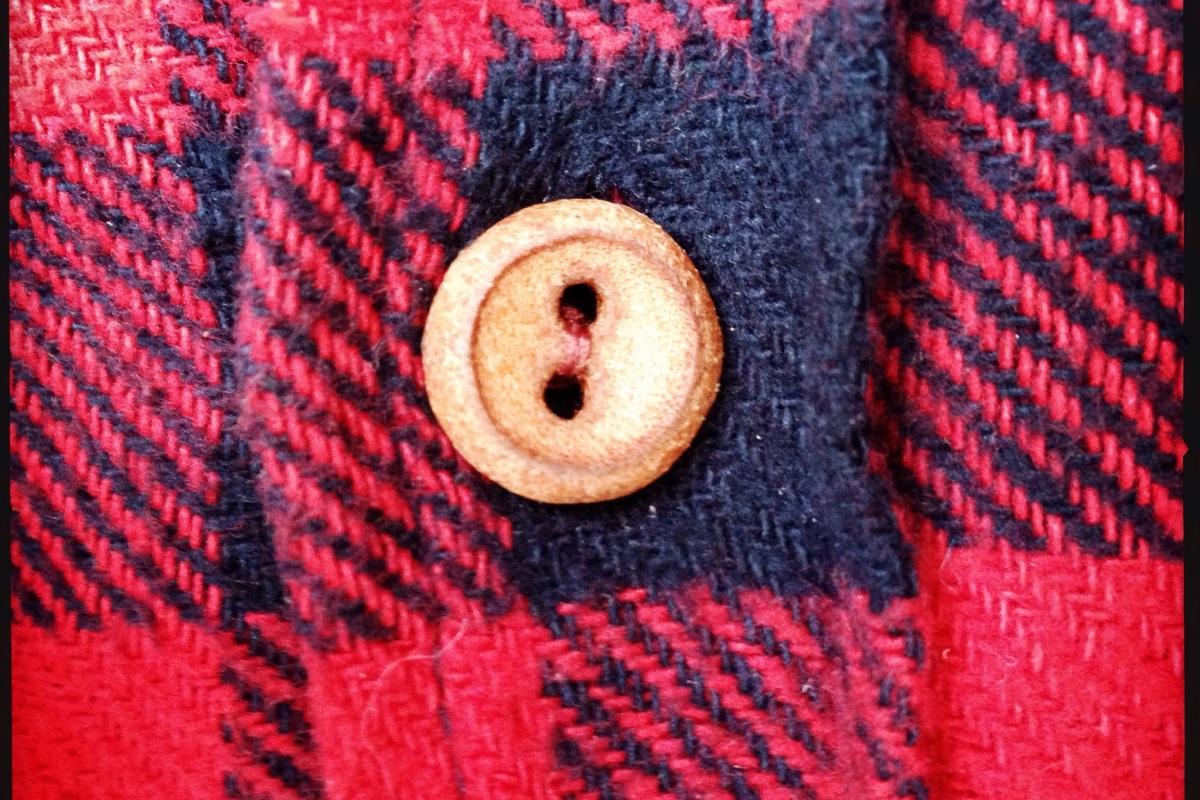
I used one set of buttons on an insulated flannel shirt that I bought last fall. I wear this shirt all the time — outside in moderate weather, and inside on cold days. It’s great for slipping out to get some wood for the fireplace, etc. There was only one problem with this shirt — the original buttons were a tad too small and became undone whenever I moved, breathed, or the wind changed direction. The replacement leather buttons are a perfect fit, stay closed the way they are supposed to, and complement the existing leather accents.
I will definitely be making more leather buttons and working on refining the process.


