
I’ve been testing several calibration tools for correcting digital camera images in a RAW workflow. These tools are designed to help set-up exposure and white balance, create camera and lighting specific colour profiles, and/or automate the processing of image batches.
ColorChecker Passport
The first tool is the ColorChecker Passport by X-Rite. This ColorChecker Passport is a folding plastic calibration target with three panels: 1) color target, 2) creative adjustment target, 3) neutral white balance target. I won’t go into full details here about how to use the ColorChecker Passport. Check out the X-Rite site for an excellent and straight forward how-to video. I’ll just provide a very quick overview of its functions. The colour target is used in conjunction with the ColorChecker Passport desktop software to create custom camera calibration profiles specific to your camera and lighting conditions. The creative adjustment target allows you to apply warming or cooling adjustments in post-processing. The white balance target helps you create an in-camera custom white balance during your shoot. All the targets are valuable in a RAW workflow. The white balance target is also valuable for a JPEG workflow.
I wish an 18% grey card was included for setting exposure. I know most people use the camera histogram for setting the exposure, but I get the sense that most camera histograms plot what would appear in a processed JPEG, and do not represent all the data available in a RAW file. I could be wrong, but I often find it difficult to evaluate critical whites based solely on the histogram. In my experience a good old 18% grey card gets me the exposure set faster and more accurately.
SpyderCUBE
The second tool is the SpyderCUBE by DataColor. I recently had to upgrade my old Spyder2 monitor calibration hardware as its software is no longer supported as of OS X Lion. I also wanted to upgrade my printer calibration tool so I splurged and purchased DataColor’s SpyderSTUDIO bundle which includes the Spyder4ELITE display calibrator, the SpyderPRINT output calibrator, and the SpyderCUBE camera calibrator, all packaged in an attractive and functional case.
The SpyderCUBE is a small (approximately 2 x 2 x 3 inch) device with the following features: 1) chrome ball for capturing and evaluating specular highlights; 2) two 18% grey facets for evaluating exposure and white balance (most likely in post-production as the facets are practically too small to us in-camera); 3) two white facets for evaluating highlights; 4) black facet for evaluating shadows; 5) black light trap for evaluating the black point; 6) tripod mount and small lanyard which provide options for placing the device in your set-up shots.
DataColor also produce a product called SpyderCHECKR which is similar to the ColorChecker Passport color target and which works with the SpyderCUBE. The ColorChecker Passport is a smaller physical package and provides greater functionality than the SpyderCHECKR. It would be nice to see a side-by-side comparison of the two products to judge the results.
Again, I’ll refer you to the DataColor site for full details on how to use the SpyderCUBE.
The Results
For color correction, there is no doubt that the ColorChecker Passport will give you better results than the SpyderCUBE. However, there are times when the SpyderCUBE will shine and outperform the ColorChecker Passport. In particular, the SyderCUBE seems to handle non-frontal lighting situations better than the ColorChecker Passport. With very strong side-lighting or back-lighting the ColorChecker Passport becomes unusable, but the SpyderCUBE still generates very usable (perhaps essential) information for processing such images. With such dramatic images colour is usually not as critical as modelling, so getting the highlights and shadows right is more important than ensuring subtle and accurate colour rendition.
Both of the devices are compact enough that there is really no excuse not to carry them in your camera bag. At this point, I consider them complimentary and will use one or the other as the situation dictates. I plan to take them with me on a two week journey to Argentina and I’m interested to see how they perform in the field (and with my wife patiently waiting for me to get the shots done so we can go shopping).
All of the samples provided below were processed in Adobe Camera Raw (CS6) with perspective correction applied in Photoshop. ACR lens correction was also applied.
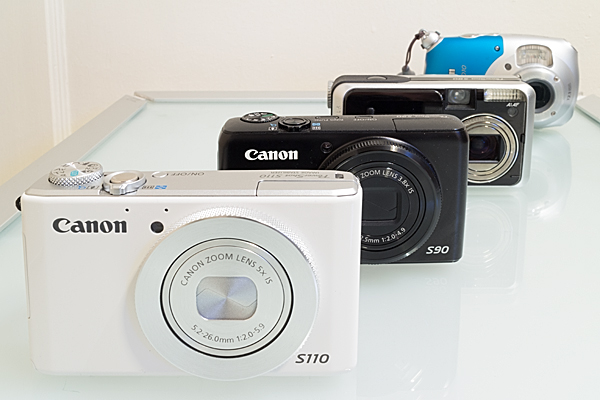
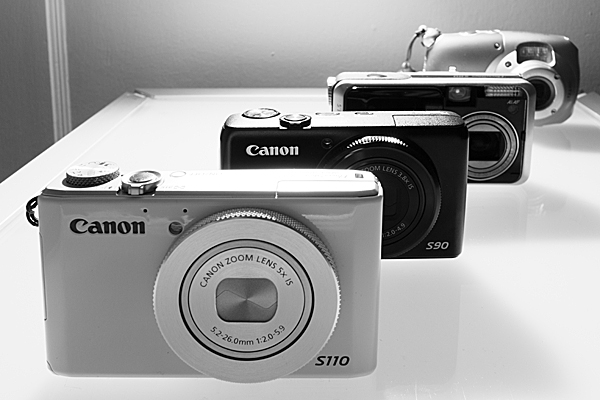
ColorChecker Passport – Soft Frontal Lighting
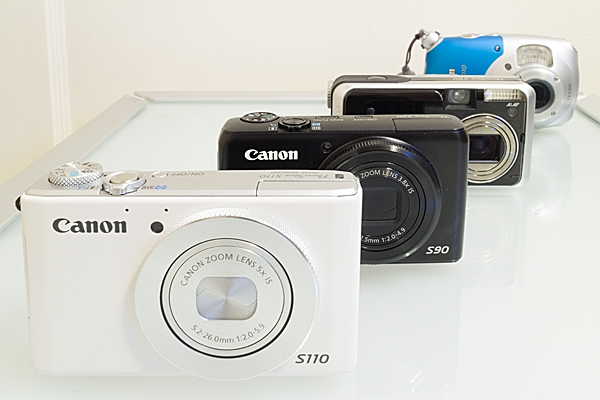
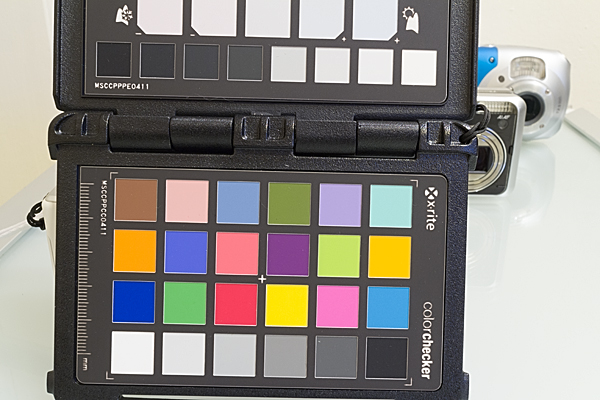
Canon EOS M, EF-M 22mm ƒ/2 @ f/16, 20 seconds, tungsten lighting, exposure set with 18% grey card
In-camera custom white balance was set using the neutral white balance target, but final white balance was set using the neutral square in the top row seen at the edge of the frame. A custom colour profile was created using the ColorChecker Passport desktop application and applied to the image. White and black points were set to minimize clipping.
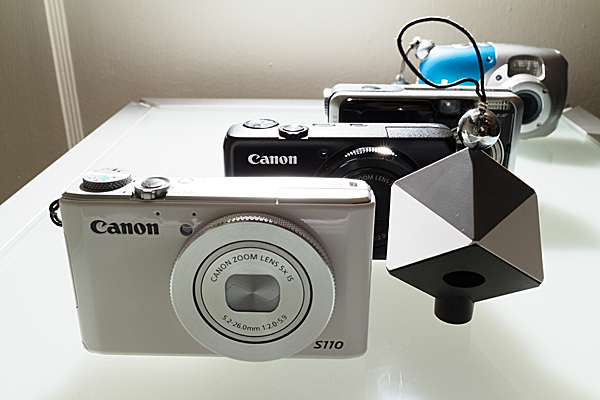
SpyderCUBE – Soft Frontal Lighting
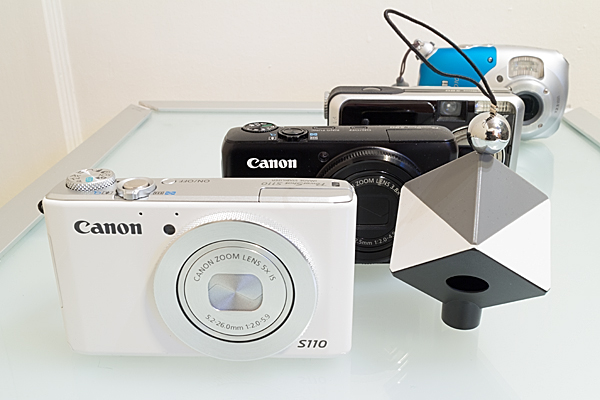
Canon EOS M, EF-M 22mm ƒ/2 @ f/16, 20 seconds, tungsten lighting, exposure set with 18% grey card
Note how the black shadow facet on the bottom of the cube caught a lot of reflected light from the glass table. I used the black camera surfaces to evaluate shadow detail instead. Other dimensions (whites, highlights, white balance) were adjusted as per DataColor’s instructions.
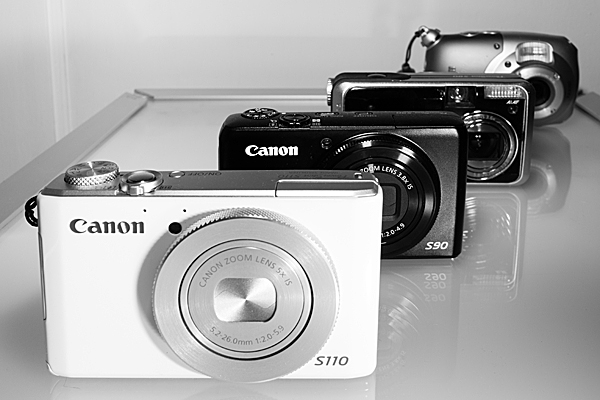
SpyderCUBE – Backlit
Canon EOS M, EF-M 22mm ƒ/2 @ f/11, 1/60 second, dual Canon Speedlights set to ETTL exposure with manual ratio adjustment
All dimensions (whites, highlights, blacks, shadows, white balance) were adjusted as per DataColor’s instructions. Additional curve contrast adjustments were performed after black and white conversion.
SpyderCUBE – Side-lit
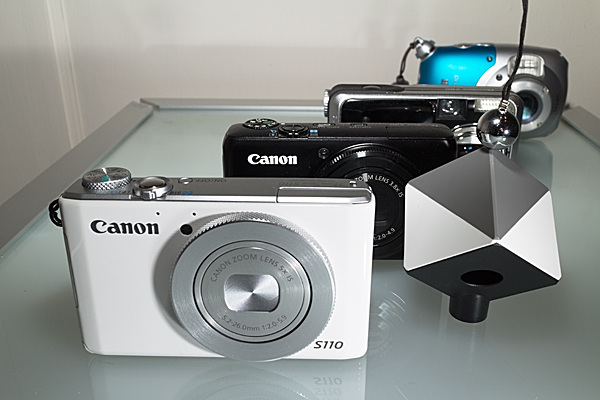
Canon EOS M, EF-M 22mm ƒ/2 @ f/11, 1/60 second, dual Canon Speedlights set to ETTL exposure with manual ratio adjustment
All dimensions (whites, highlights, blacks, shadows, white balance) were adjusted as per DataColor’s instructions. A graduated neutral density adjustment was performed to lighten the image from left to right to correct for side-light fall-off (the side Speedlight was quite close to the right edge of the frame). Additional curve contrast adjustments were performed after black and white conversion.
