Using JaVaWa GMTK To Fix Open Street Map Garmin Files

I am a big fan of Open Street Map (“OSM”) Garmin-compatible maps available from garmin.openstreetmap.nl. Whenever I travel, I download OSM maps of where I am going and install them on my GPS receiver.

There is one problem with OSM Garmin-compatible maps: you can only view one OSM map at a time in BaseCamp or on your device. This is because all OSM map files share the same map name and ID. (This is probably a result of how the maps are auto generated, especially ad hoc views which allow you to create a custom map by manually selecting tile segments.)

OSM Custom Map Built On Demand

OS - File Download

The excellent cross-platform JaVaWa GMTK (Garmin Map Toolkit) to the rescue. With JaVaWa GMTK you can perform a lot of map management tasks, including changing of map name and ID properties.

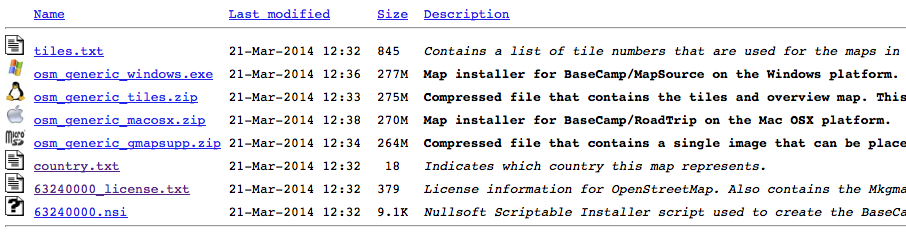
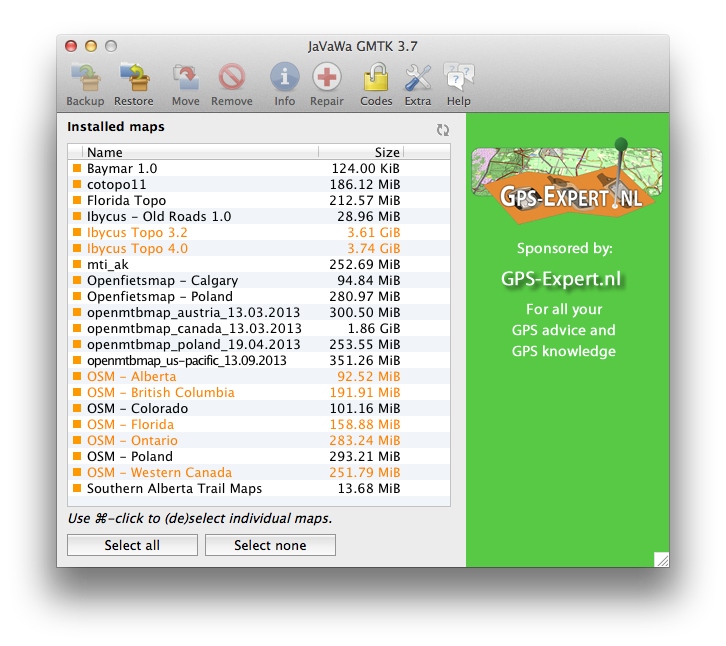
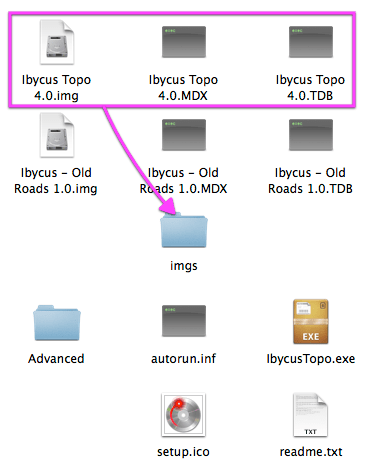
As you can see in the following screenshot, I have multiple OSM maps installed on my computer hard drive (I have renamed each of the .gmap files so I can have several in Garmin’s Maps directory). However, only the first listed OSM file would normally be available in MapManager, MapInstall, and BaseCamp.

Finder - Garmin Maps
Finder – Garmin Maps Folder
MapManager - Before
MapManager – Before

The process for changing a map’s name and ID is pretty straightforward. Make sure you quit BaseCamp/MapSource and MapManager first. I am doing this on a Mac, but it should be similar on Windows.

  1. Download and install JaVaWa GMTK.
    JaVaWa GMTK - Install
  2. Launch JaVaWa GMTK (on OS X 10.8 and later, right-click on the JaVaW MapConverter application icon the first time and choose the “Open” menu item — this will ask you if you want to bypass OS X’s developer signing restrictions — click the “Open” button).
  3. JaVaWa GMTK will scan your installed maps. (On OS X, map files used by BaseCamp are installed in the directory /Users/[username]/Library/Application Support/Garmin/Maps. Any problem maps will be highlighted in orange or red.
    JaVaWa GMTK - Before
  4. Click the map you want to edit and then click “Extras” in the toolbar and choose “Change map name and ID” from the drop down menu.
  5. In the dialog, set a unique Family ID (this must be unique across all your maps — GMTK will warn you if you enter a duplicate ID), and descriptive names to be displayed in BaseCamp and on your GPS receiver.
    JaVaWa GMTK - Modify
  6. Click the “Modify” button to save your changes.
    JaVaWa GMTK - After

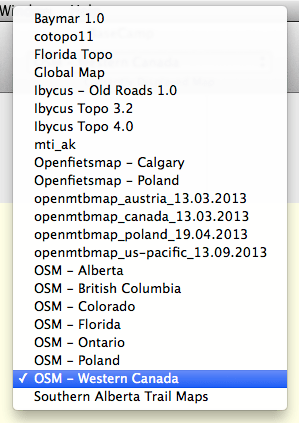
That is it. Repeat steps 4 to 6 with the rest of your OSM maps. Quit JaVaWa GMTK and launch MapManager, BaseCamp, or MapInstall. All of the OSM maps will be available for viewing on your computer and installing on your GPS receiver.

MapManager - After
MapManager – After
BaseCamp - After
BaseCamp – After
eTrex 30 - After
eTrex 30 – After

Convert Garmin Windows Map Files To Mac BaseCamp .gmap Format

For some legacy reason, the file formats for Garmin-compatible maps differs between Windows and Mac OS X. Even Garmin’s own Mac BaseCamp application does not support Windows’ BaseCamp maps.

There are two methods for converting Windows Garmin-compatible maps to BaseCamp for Mac: 1) on a Windows XP or later computer, or 2) on a Mac.

On a Windows XP or later computer

If you have maps on a Windows computer already, and would like to move them to a Mac, then you are in luck. Simply download and install Garmin’s MapConverter on your Windows computer. Apparently it can convert your maps to the Mac format.

On a Mac

If you only have a Mac computer, there are two free utilities available to that convert Windows Garmin-compatible maps to the Mac BaseCamp-compatible format: JaVaWa MapConverter and Gmapibuilder. Both have a graphical user interface, but I found JaVaWa MapConverter easier to use. You will of course need Java installed on your Mac, which it may not be by default.

I use the Ibycus Topo Canada map as my main map for off-the-beaten-path adventures. Because this is a very large map, Ibycus does not distribute the files directly. You need to download a copy using BitTorrent. I was able to find a copy of version Ibycus 3.2 for Mac, but I could only ever find the Windows version of Ibycus 4.0. Today, I was able to convert Ibycus 4.0 to Mac .gmap format, and I thought I would use that as an example of converting Garmin Windows maps for use on a Mac. (Caveat: since JaVaWa is a free tool and not supported by Garmin, it is not guaranteed to work, and I have no idea how it works with locked maps). I will assume you have your Windows map files already.

  1. Download and install JaVaWa MapConverter
         Installing JaVaWa MapConverter
  2. Launch JaVaWa MapConverter (on OS X 10.8 and later, right-click on the JaVaW MapConverter application icon the first time and choose the “Open” menu item — this will ask if you want to bypass OS X’s developer signing restrictions — click the “Open” button).
    gk_en_2
  3. Ibycus Topo  4.0 is downloaded as an ISO file (this is a DVD disk image). Double clicking the ISO file will mount a new disk on your computer.
    Finder - ISO
  4. Copy the entire contents of the Ibycus Topo  4.0 disk image to folder on your hard drive — you are going to move some files around and the disk image is read-only.
  5. Move the following files from the folder you created in step 3 and into the “imgs” folder.
    • Ibycus Topo 4.0.img
    • Ibycus Topo 4.0.MDX
    • Ibycus Topo 4.0.TDB
      Finder - Move Files
  6. Now, drag the “img” folder onto the JaVaWa MapConverter window.
    JaVaWa MapConverter - Start Screen
  7. When asked to select the “.img” file, choose “Ibycus Topo 4.0.img” from the drop down menu.
    JaVaWa MapConverter - Select the correct file
  8. JaVaWa MapConverter should now be ready to convert the file. Click the “Convert” button and choose where to save the .gmap file.
    JaVaWa MapConverter - Ready To Convert
  9. After JaVaWa MapConverter is finished, in the finder, go to the saved .gmap file. Double-clicking it will open Garmin’s MapManager application which will ask you if you want to install the map. Click “Install”.
    Finder - .gmap filesMapManager - Install
  10. You can now relaunch BaseCamp and use the map. You can also run Garmin’s Map Install application to install Ibycus Topo 4.0 map segments onto your GPS receiver.
    BaseCamp - Map Select
    MapInstall - Map Segment Select

You can now eject the disk image mounted in step 3 and delete the folder created in step 4. You might want to keep the “IbycusTopo40.iso” and the “Ibycus Topo  4.0.gmap” files for later.

There is another map on the ISO that you might want to convert as well. Repeat steps 2 through 10, this time with the files named “Ibycus – Old Roads 1.0.img”, “Ibycus – Old Roads 1.0.MDX”, and “Ibycus – Old Roads 1.0.TDB”. This Map contains old roads that were removed from the Government of Canada datasets between versions of Ibycus Topo. Personally I don’t have a need for the “old roads” map, but it is there if you want it.

Depending on the source of the Windows Garmin map, the file and folder layout may differ slightly. As the JaVaWa MapConverter documentation states, it is simply critical that the .tdb and .img files be in the same location. The .mdx and other files are optional, but if they are provided, JaVaWa MapConverter will use them. For JaVaWa MapConverter all the files need to be in a single folder. Gmapibuilder seems more flexible — you can locate the required files individually.