Trying out techniques suggested by YouTube photographer Max Kent for dreamy photos. I’ve used all these techniques before but I felt inspired to do something different this day as my previous photoshoot was very “straight”.
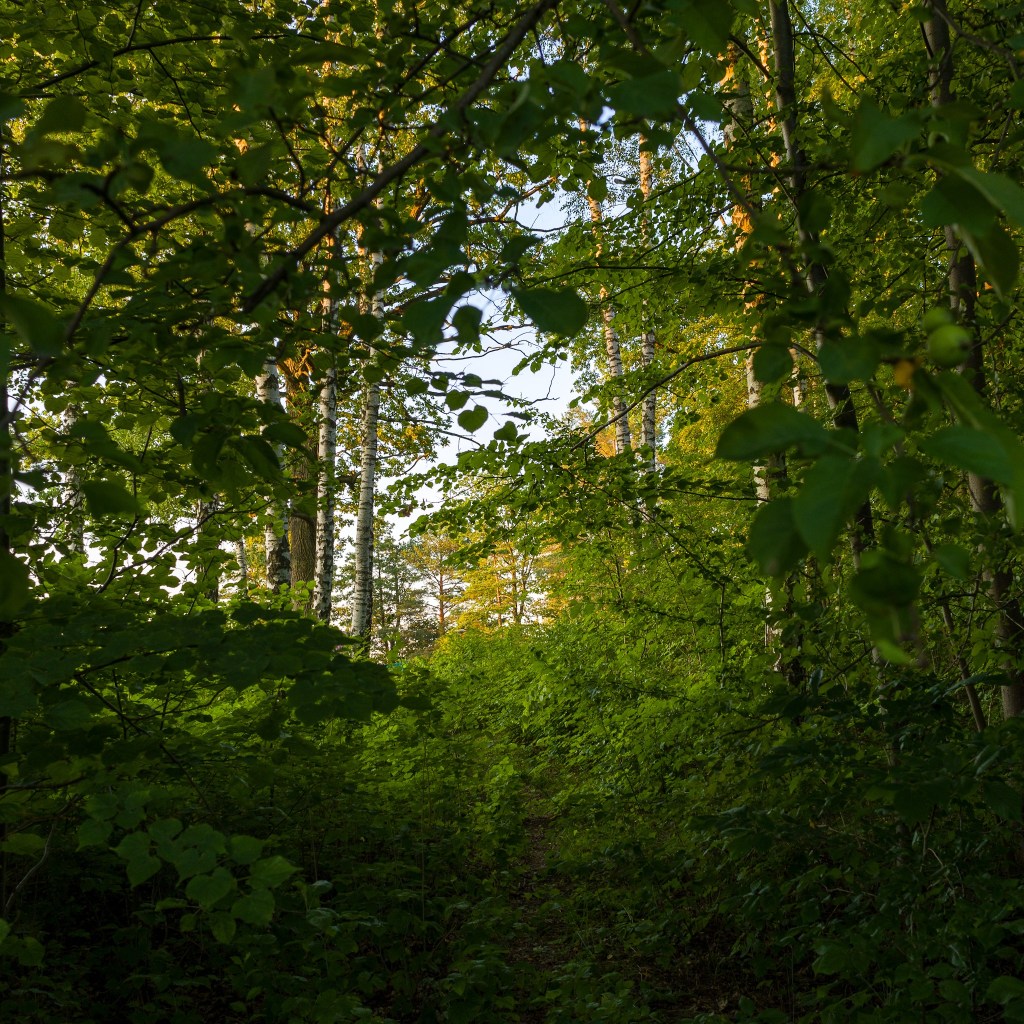
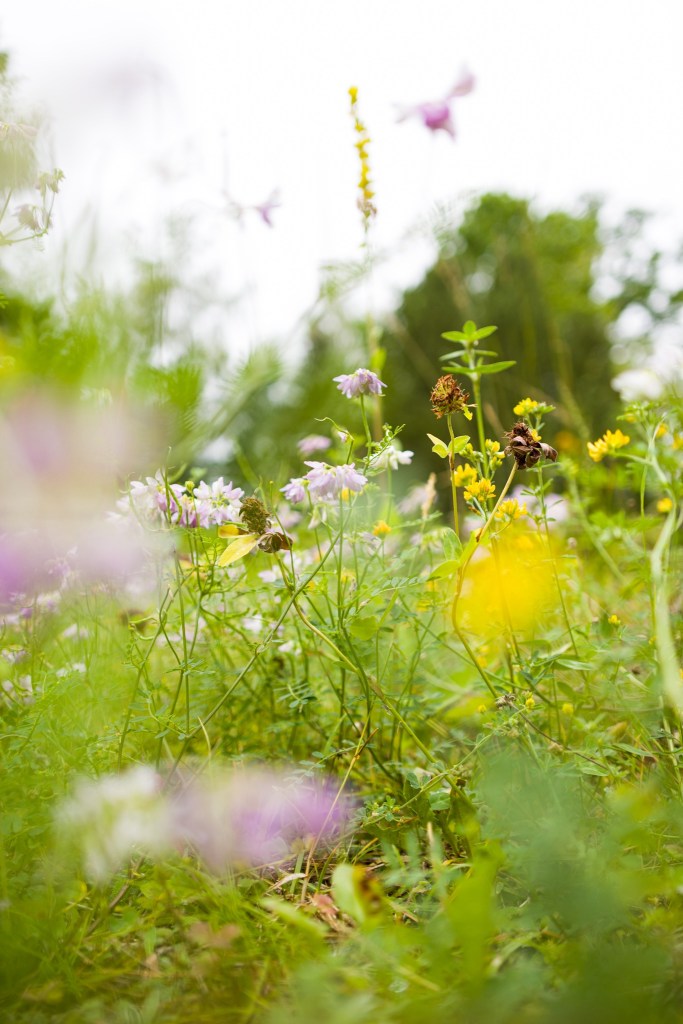
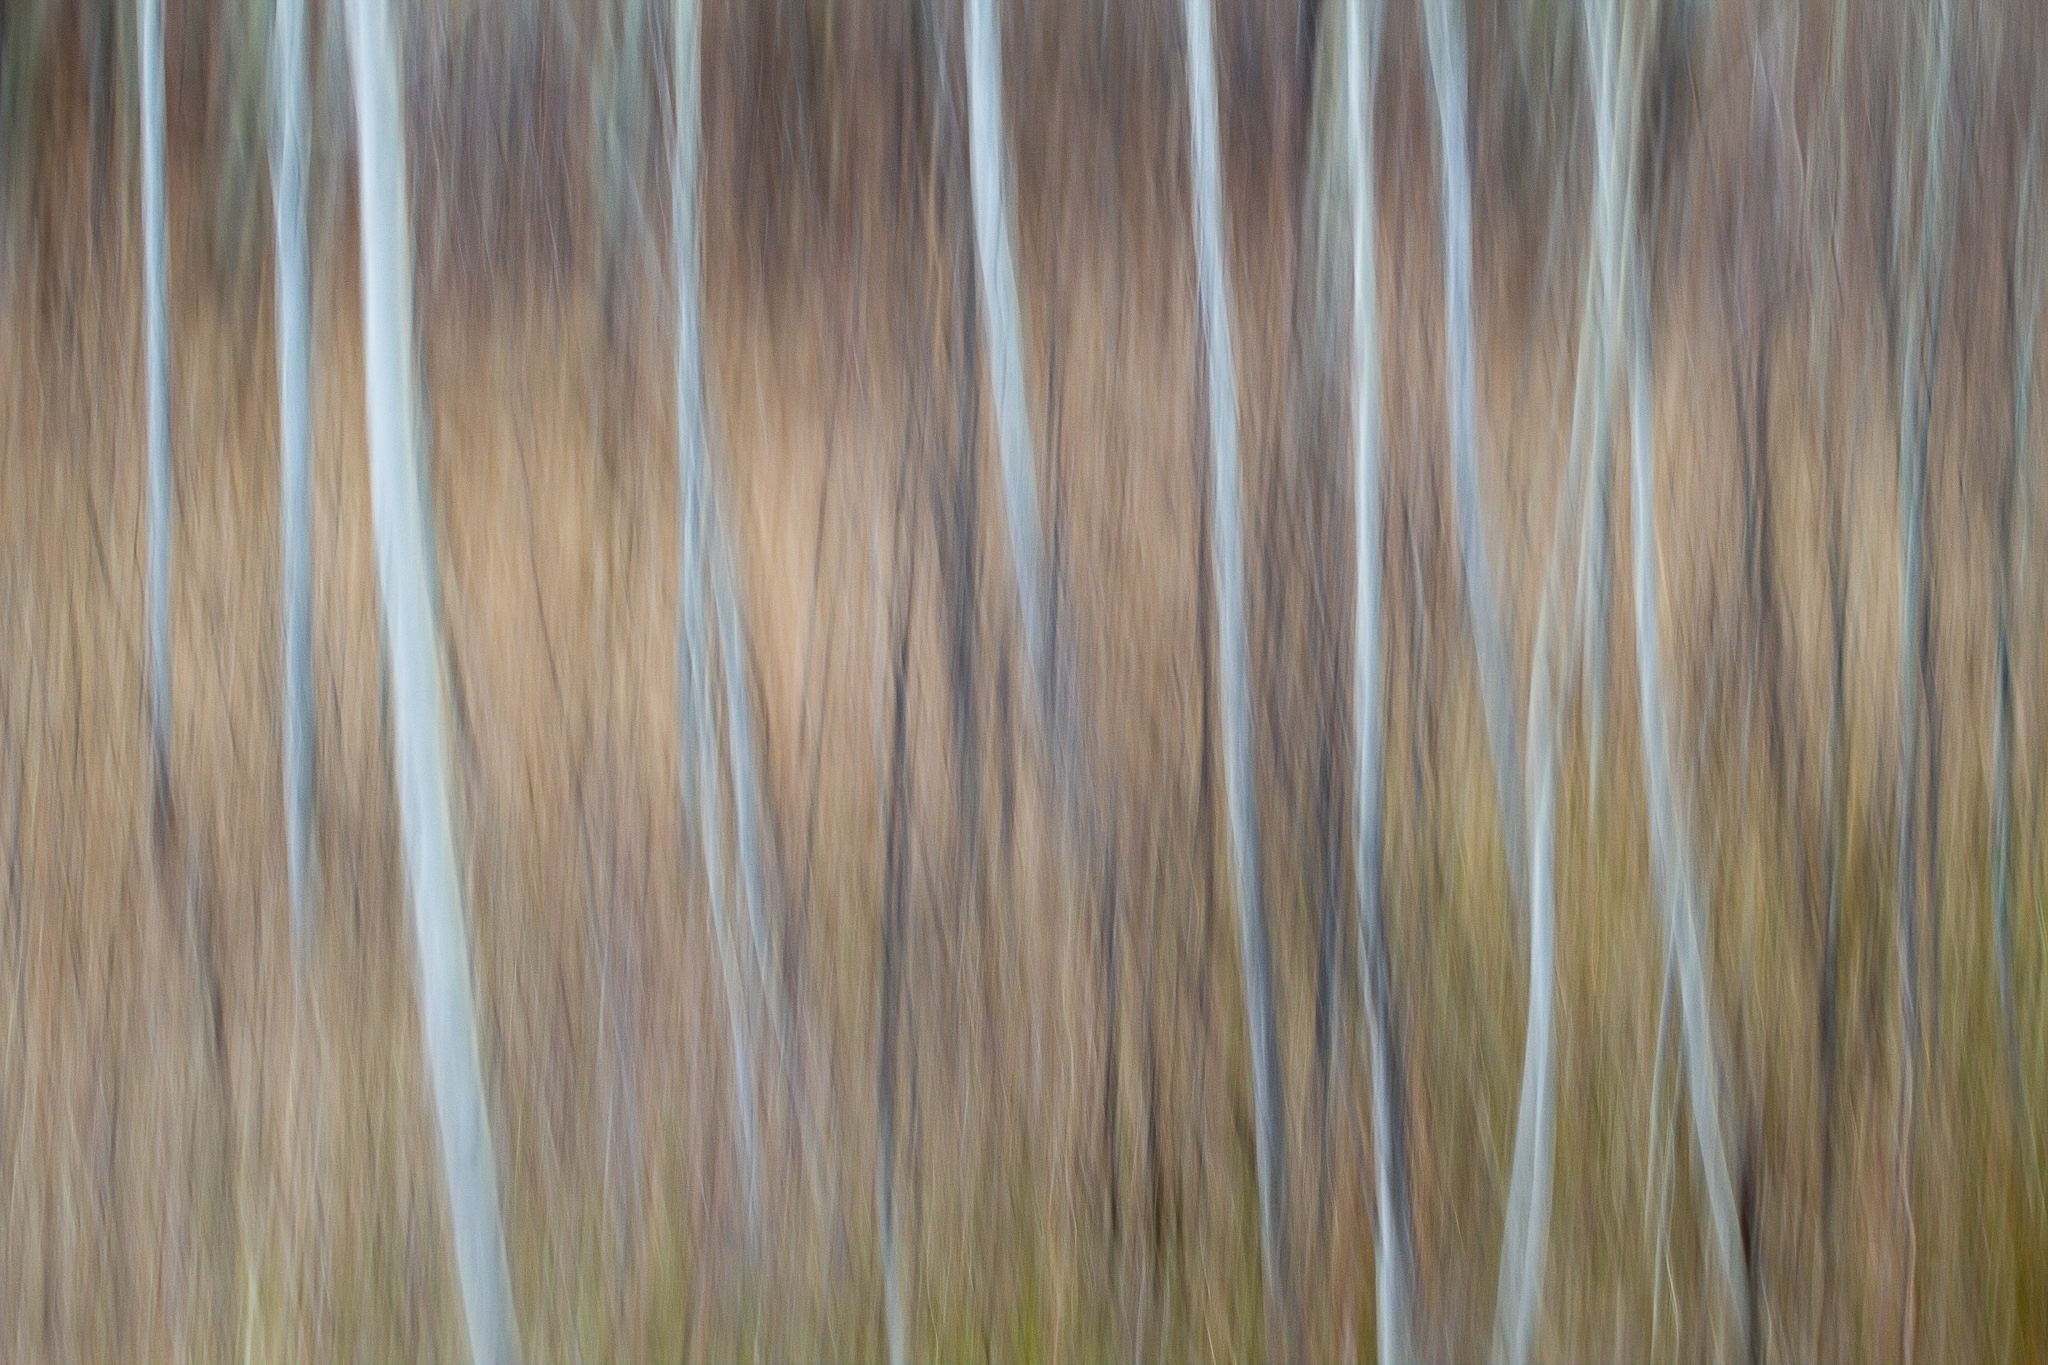
TL;DR Dreamy photos have movement, compressed layers, and/or depth (usually derived via selective focus). That is, not everything in the scene is rendered perfectly sharp and legible—some things are left to the viewer’s imagination. Dreamy photos often reflect the Japanese concept of wabi-sabi—the acceptance of imperfection and transience.
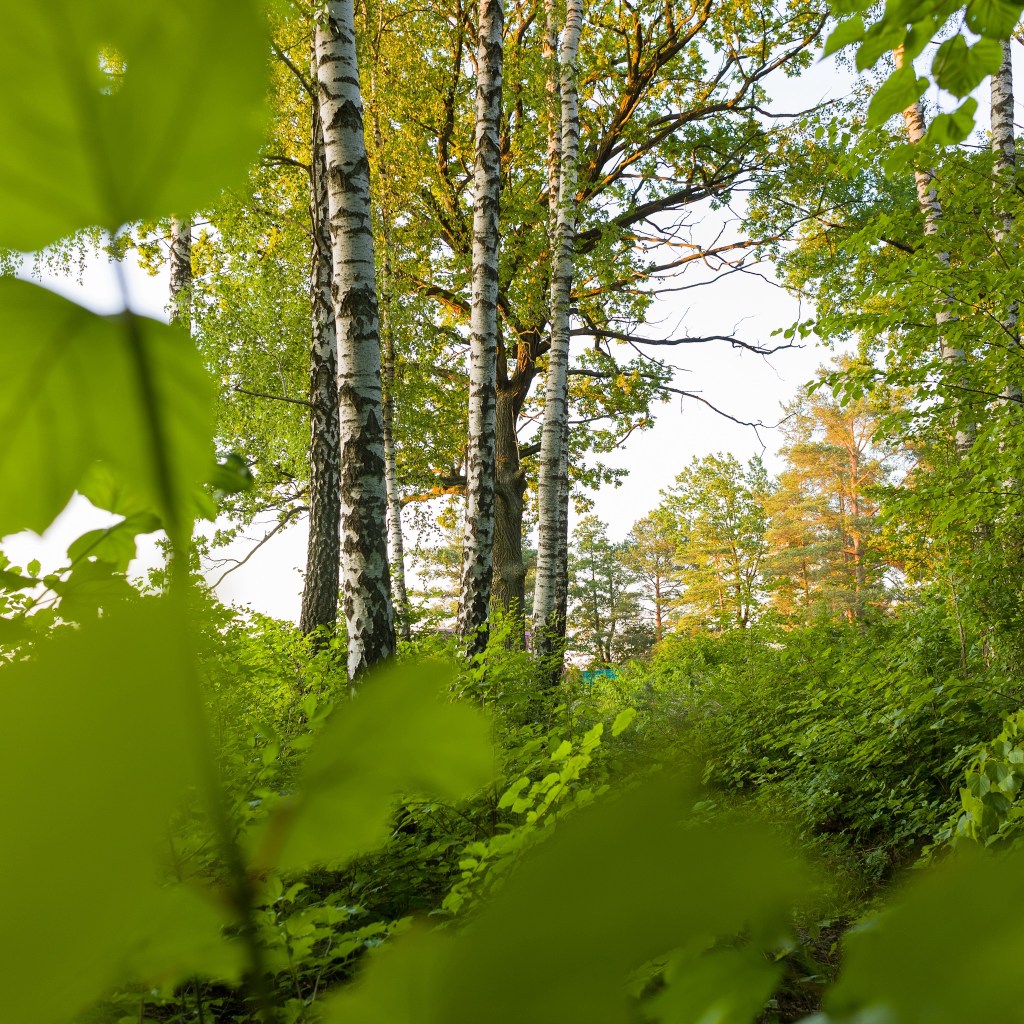
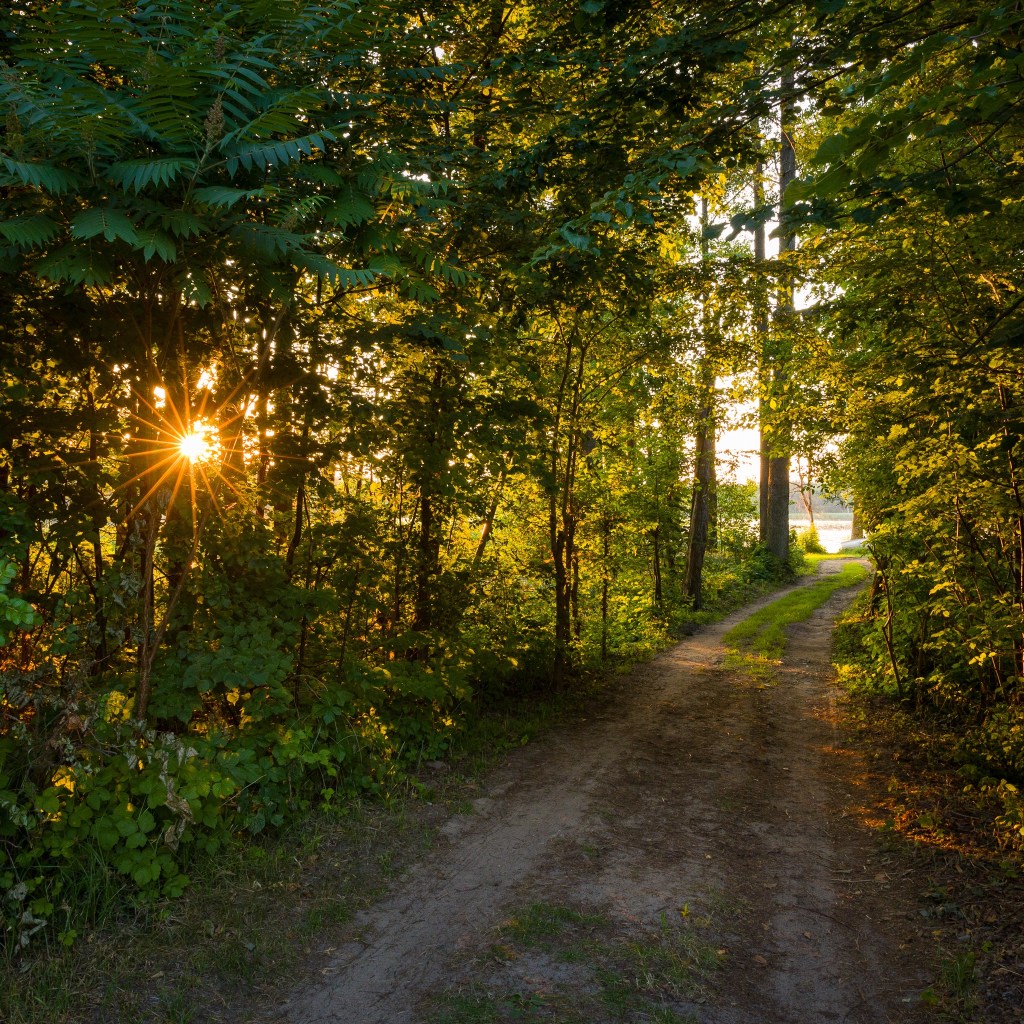
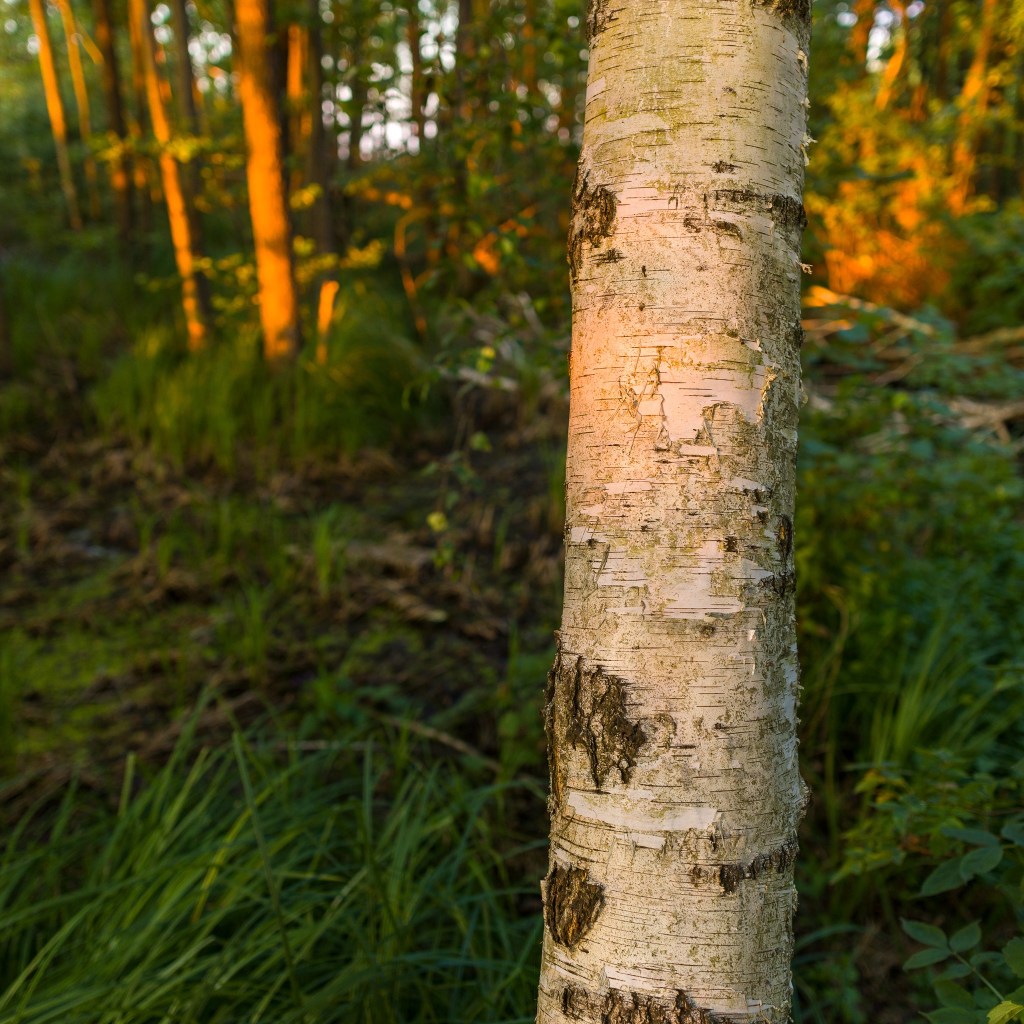
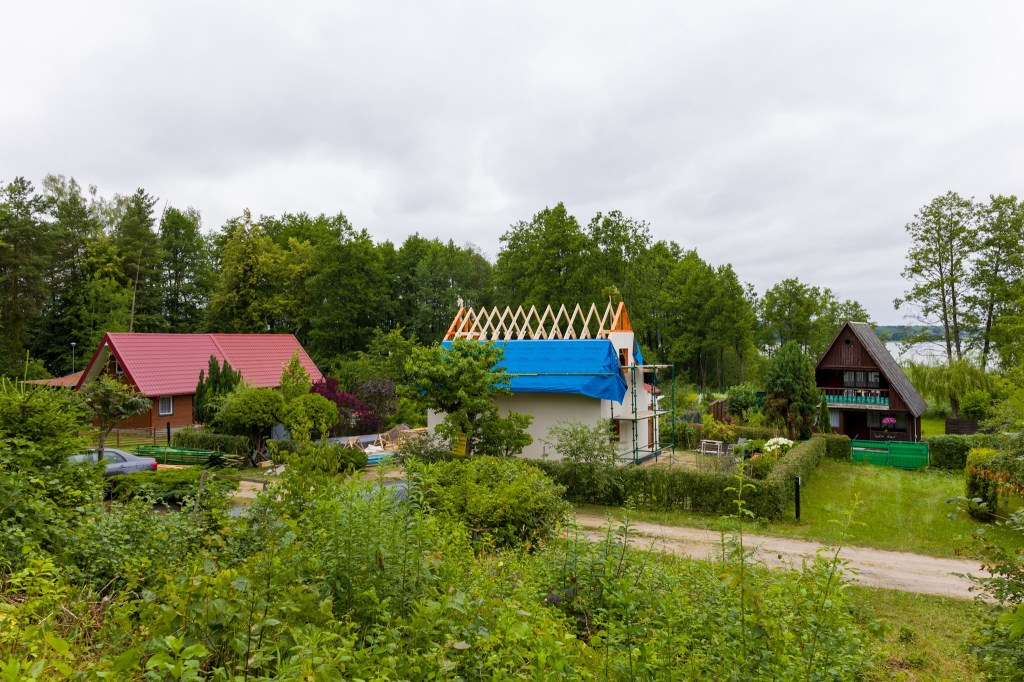
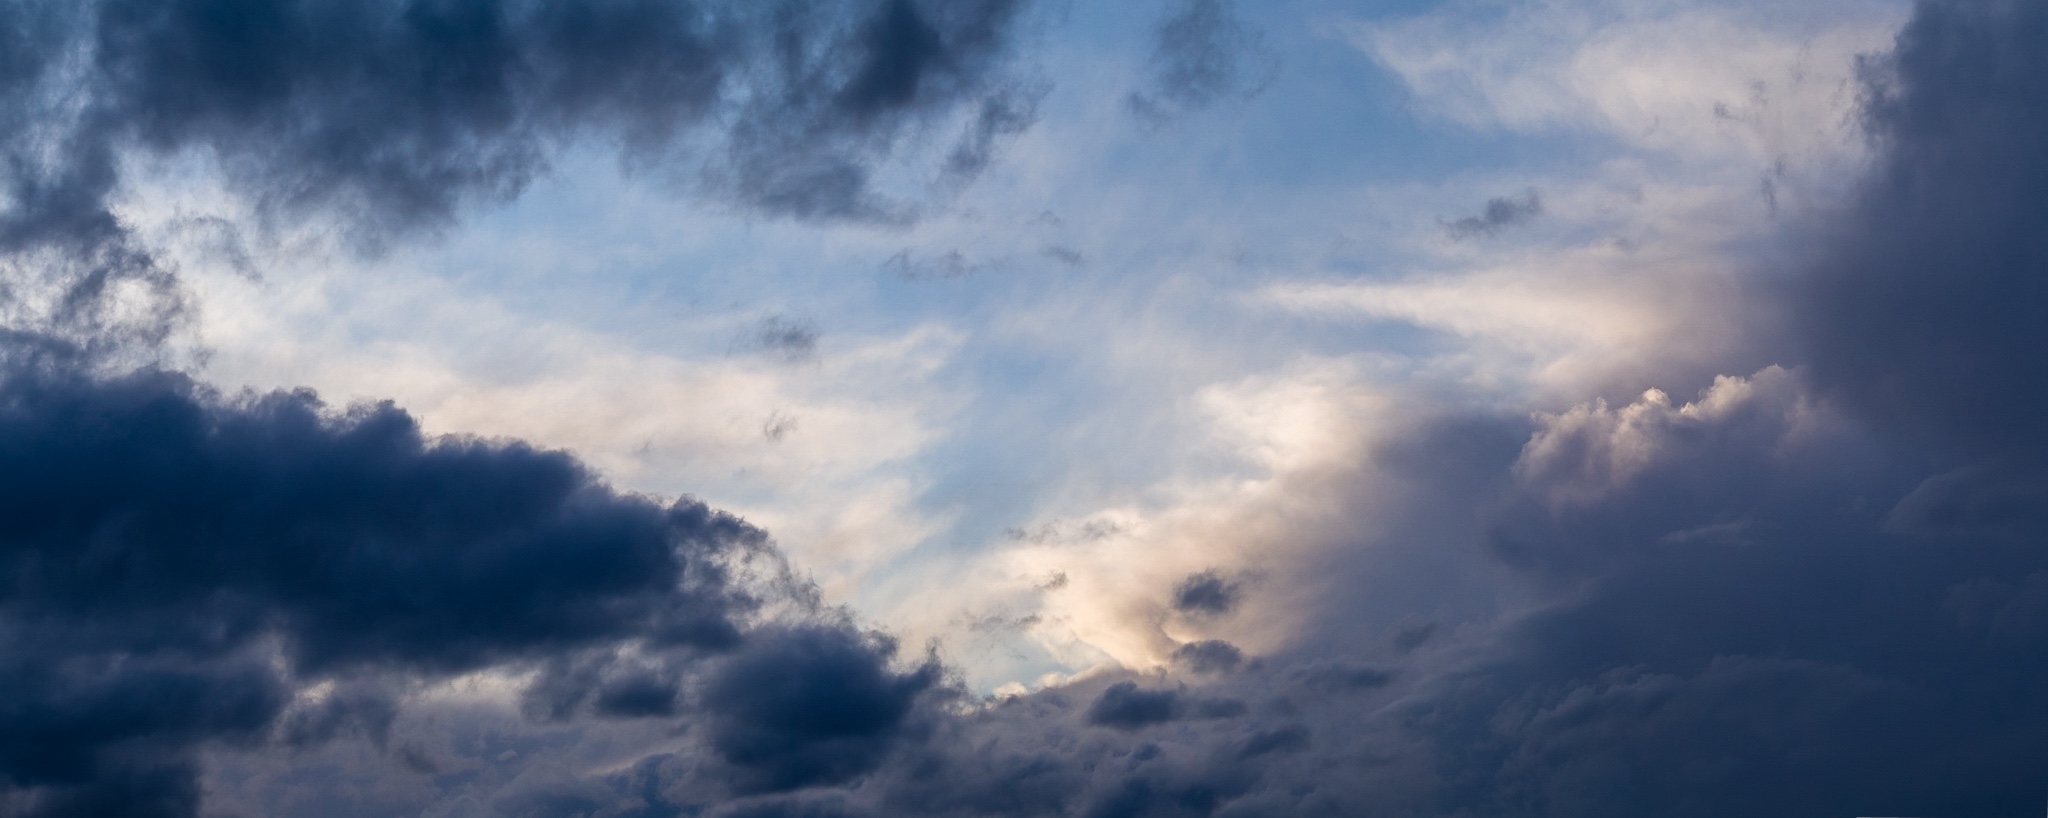
The setting sun in a clear sky was illuminating the trees. Went into the stand of birches and oaks across the road and took a few photos. Then headed down the road to our little beach to photograph near the water.
I used some of Max Kent’s tips for “dreamy photos.” The longest lens I currently have on hand is not very long—24mm—but it has a relatively fast ƒ/1.8 aperture.
To get a tighter image crop and thus a more compressed field-of-view, I shot with a square 1:1 aspect ratio. Of course I shot RAW, so I had the option of shifting the crop slightly in post (which I did for a few photos), but the final images are all square if they were square in-camera.
Shooting with the foreground out of focus is fairly easy—just get close and use a moderate to fast aperture (ƒ/2.8 to ƒ5.6). Getting distant backgrounds out of focus when shooting with a wide-angle lens is a little more difficult if the in-focus subject is more than a few metres away. In those case, I needed to shoot with a fast aperture almost wide-open, and perhaps focus slightly closer than the actual subject (the closer the focus plane is, the narrower the depth of focus, regardless of the aperture used).
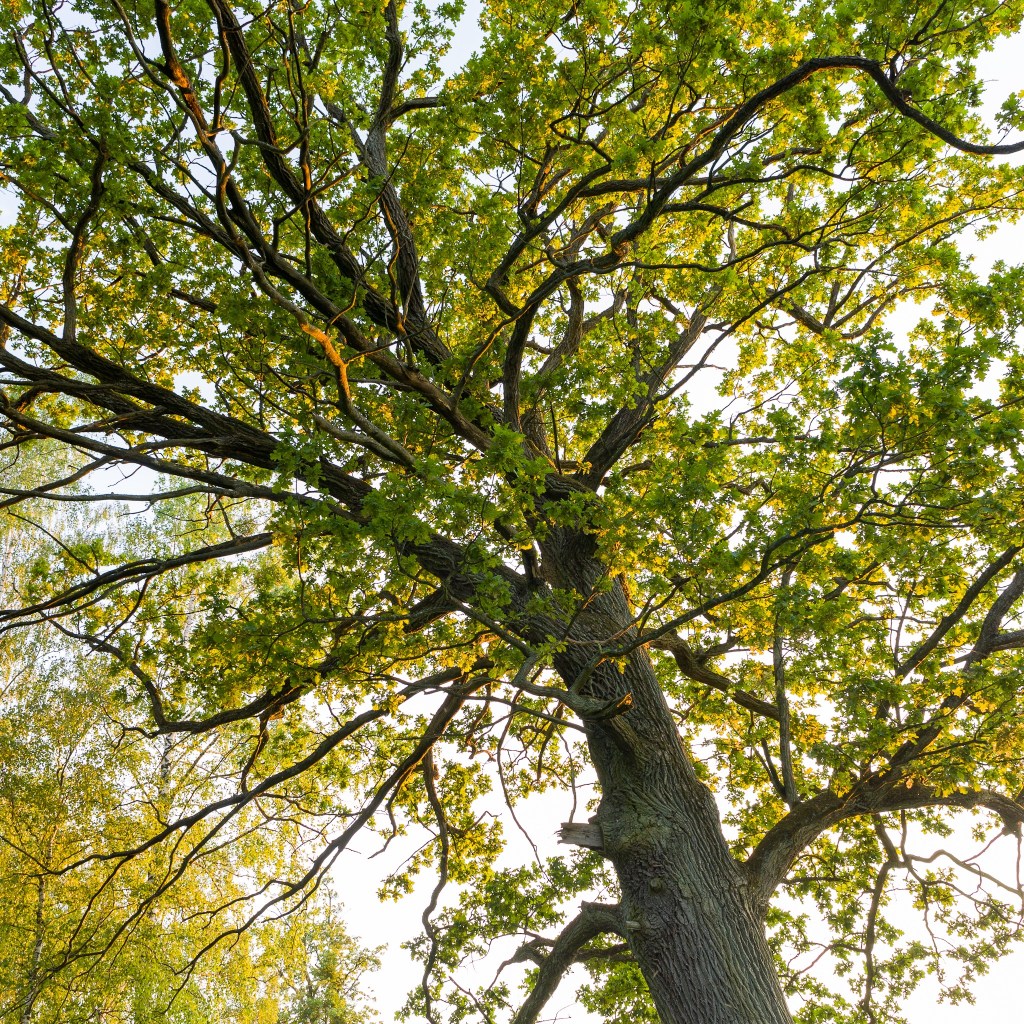
I didn’t use all the techniques in every photograph. The photos shot looking up at the sunlit oaks are very straightforward. But the lines and the shapes and perhaps the shooting angle give the images an ethereal quality.
There is no need to try to recreate a vintage look in photography. If you take the best camera and lens available today and make the most perfect photo you can, in ten or fifteen years that photo will look vintage.
The following was a response to Kim Grant’s video, Ready To Learn Something New, back in March, 2023. I thought I would post it here as well.
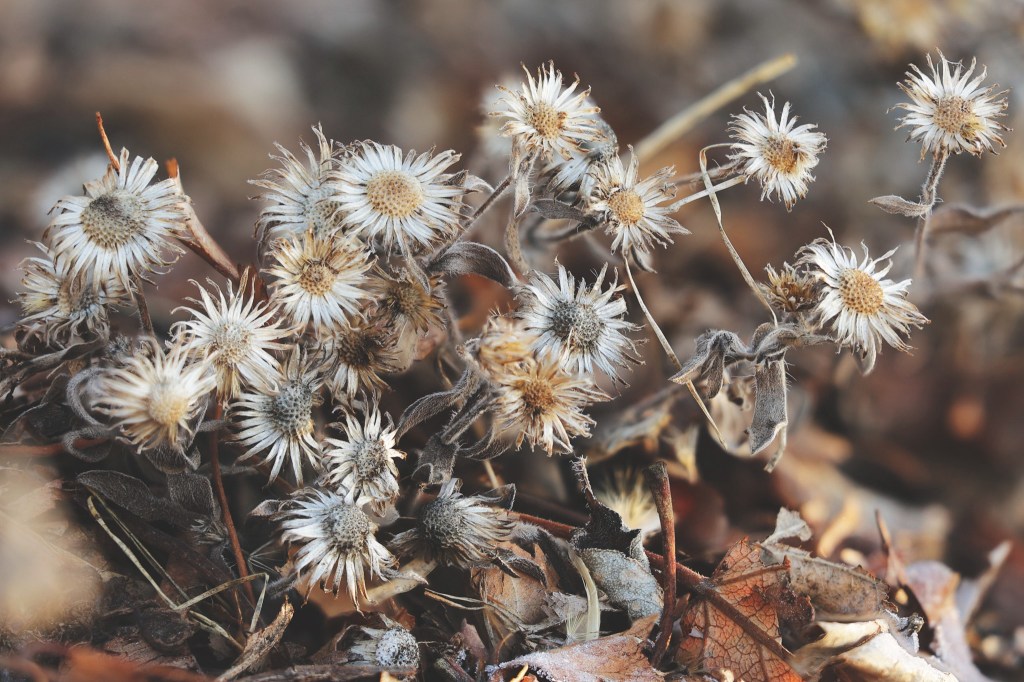
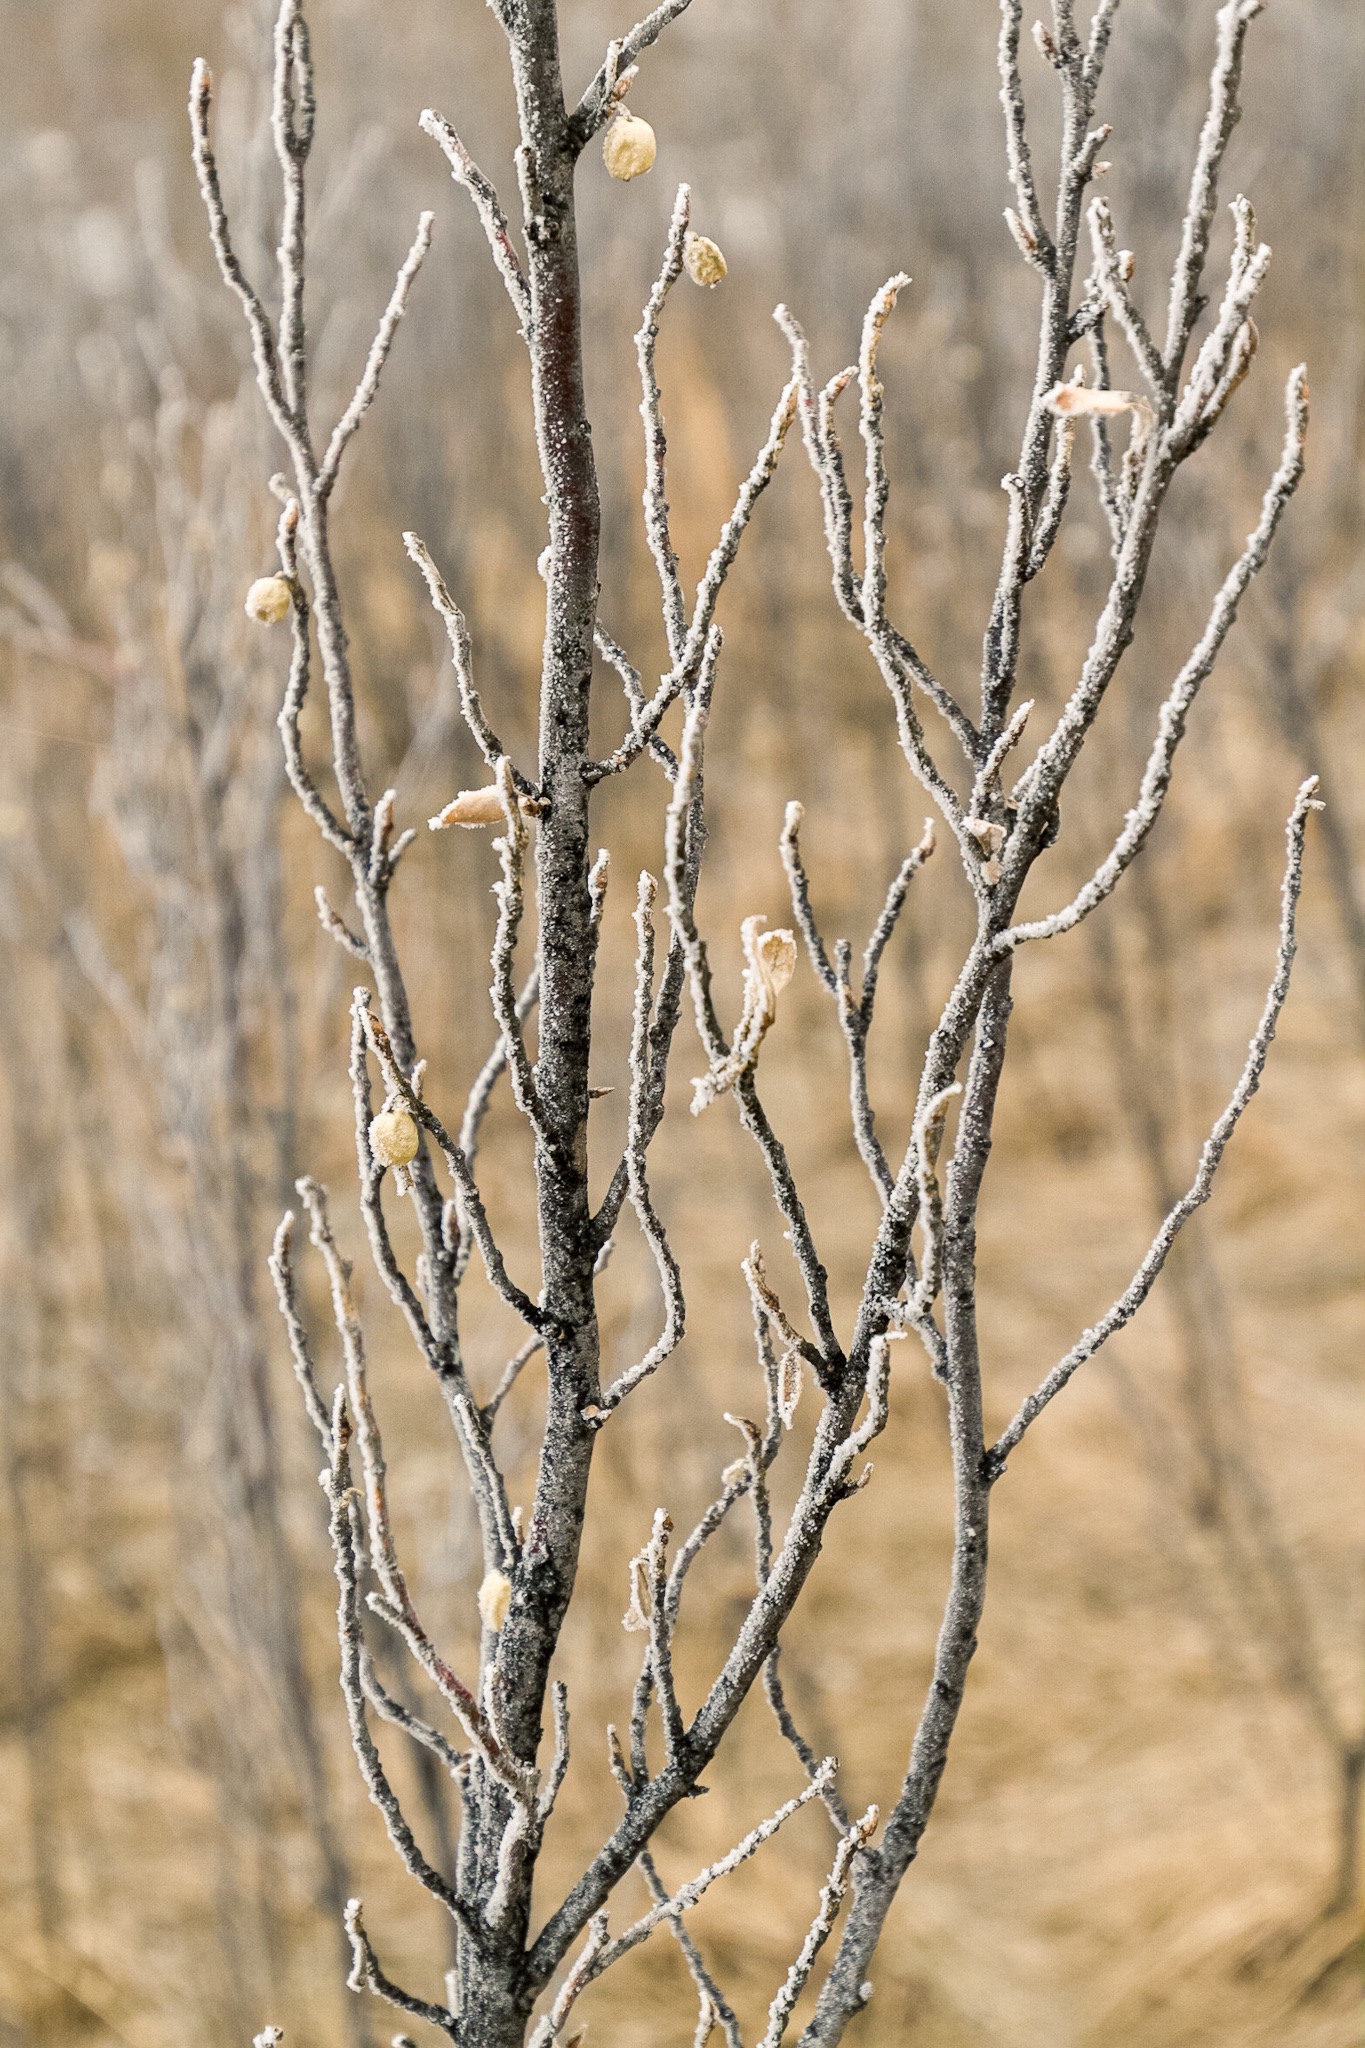
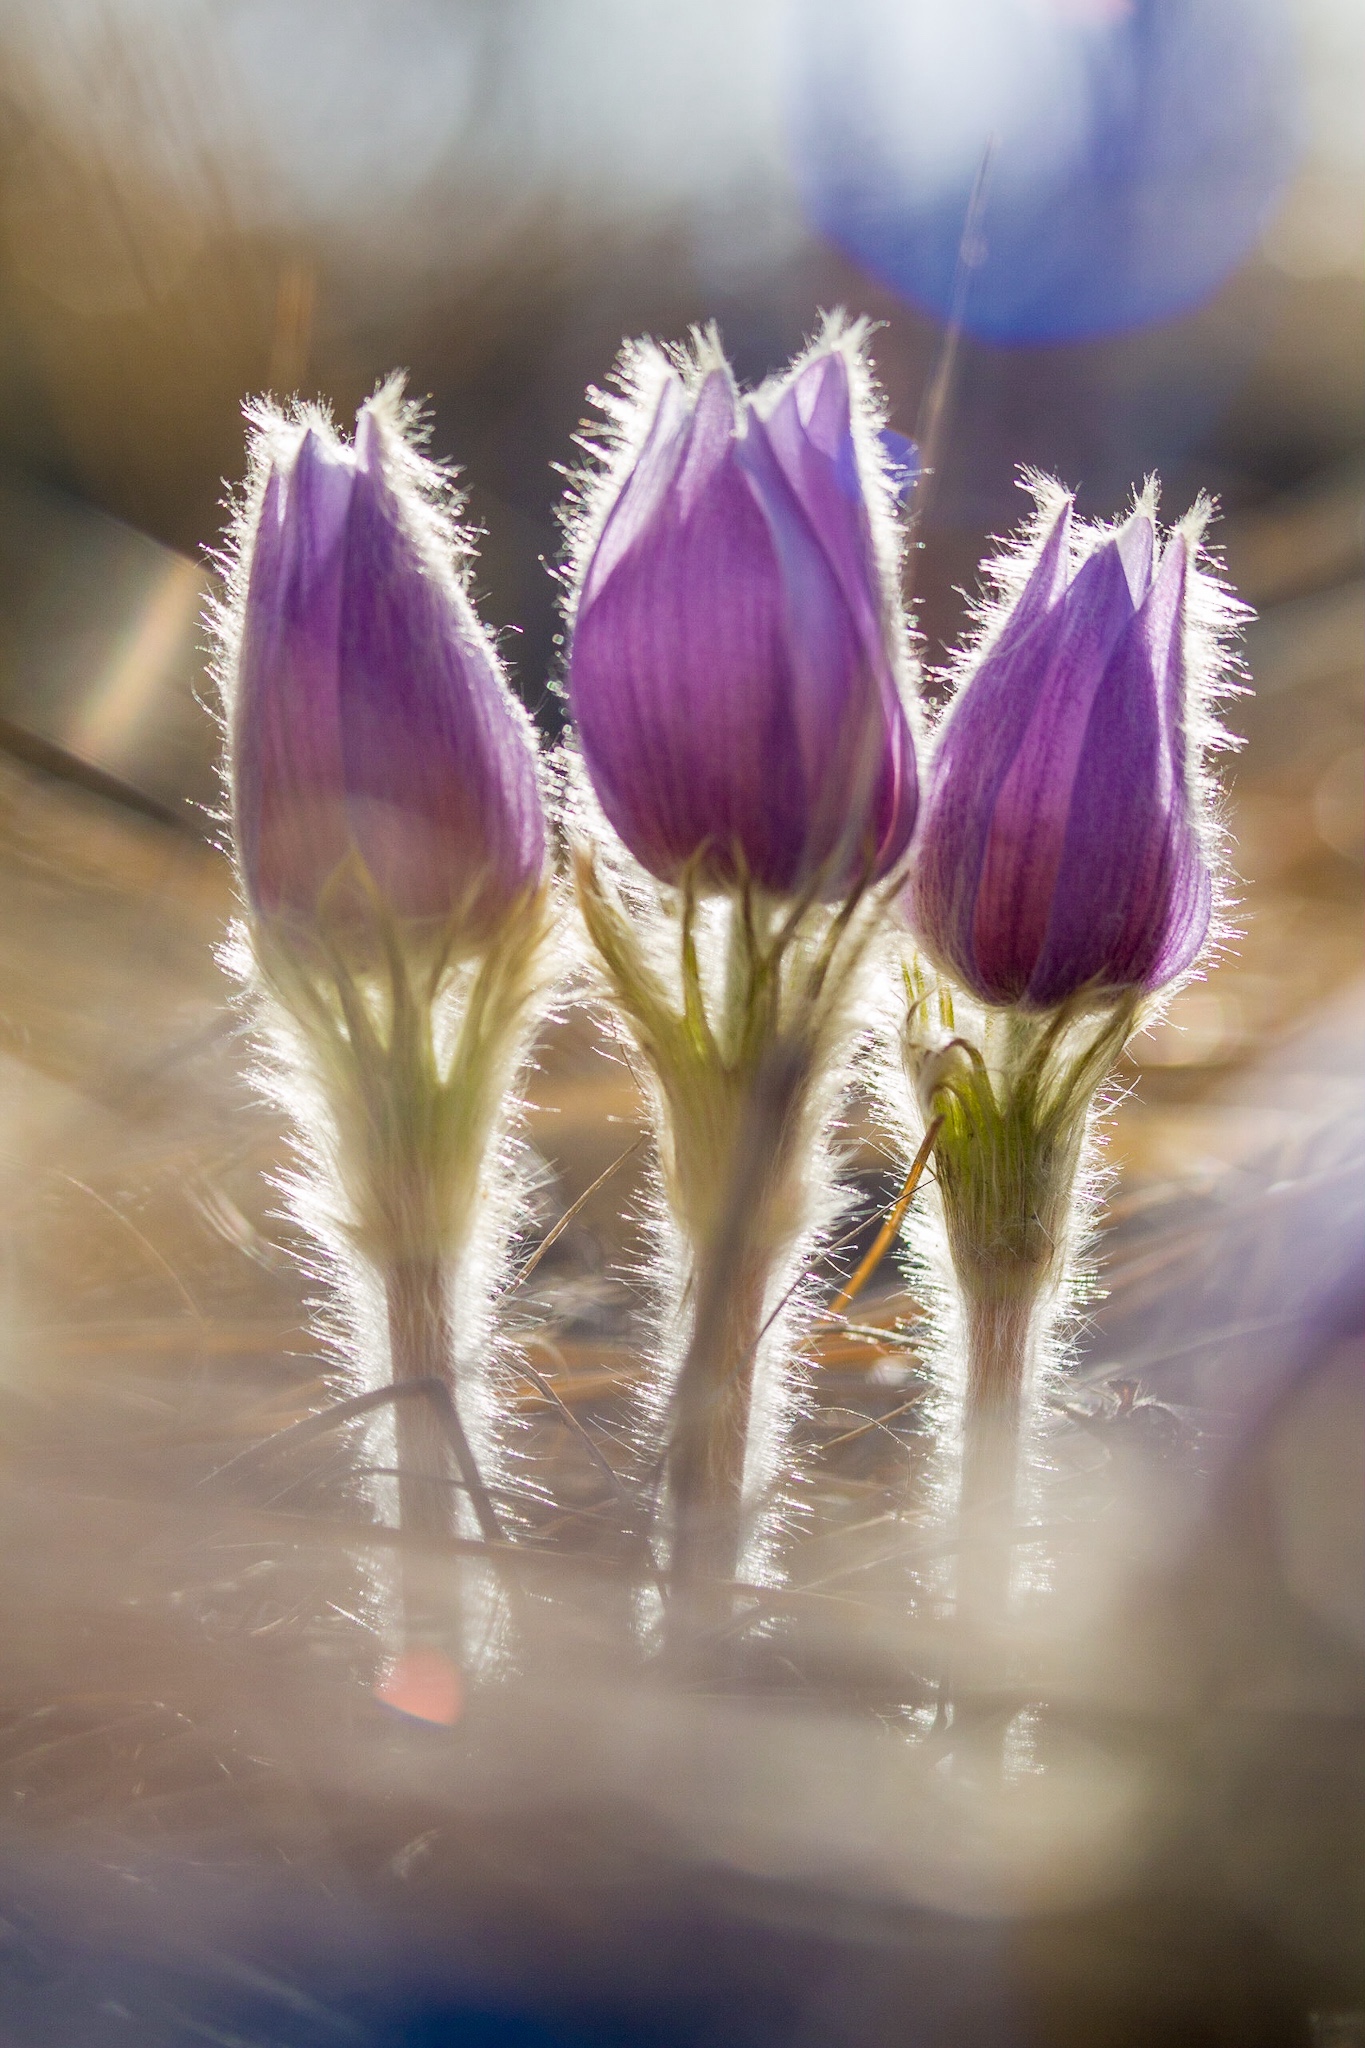
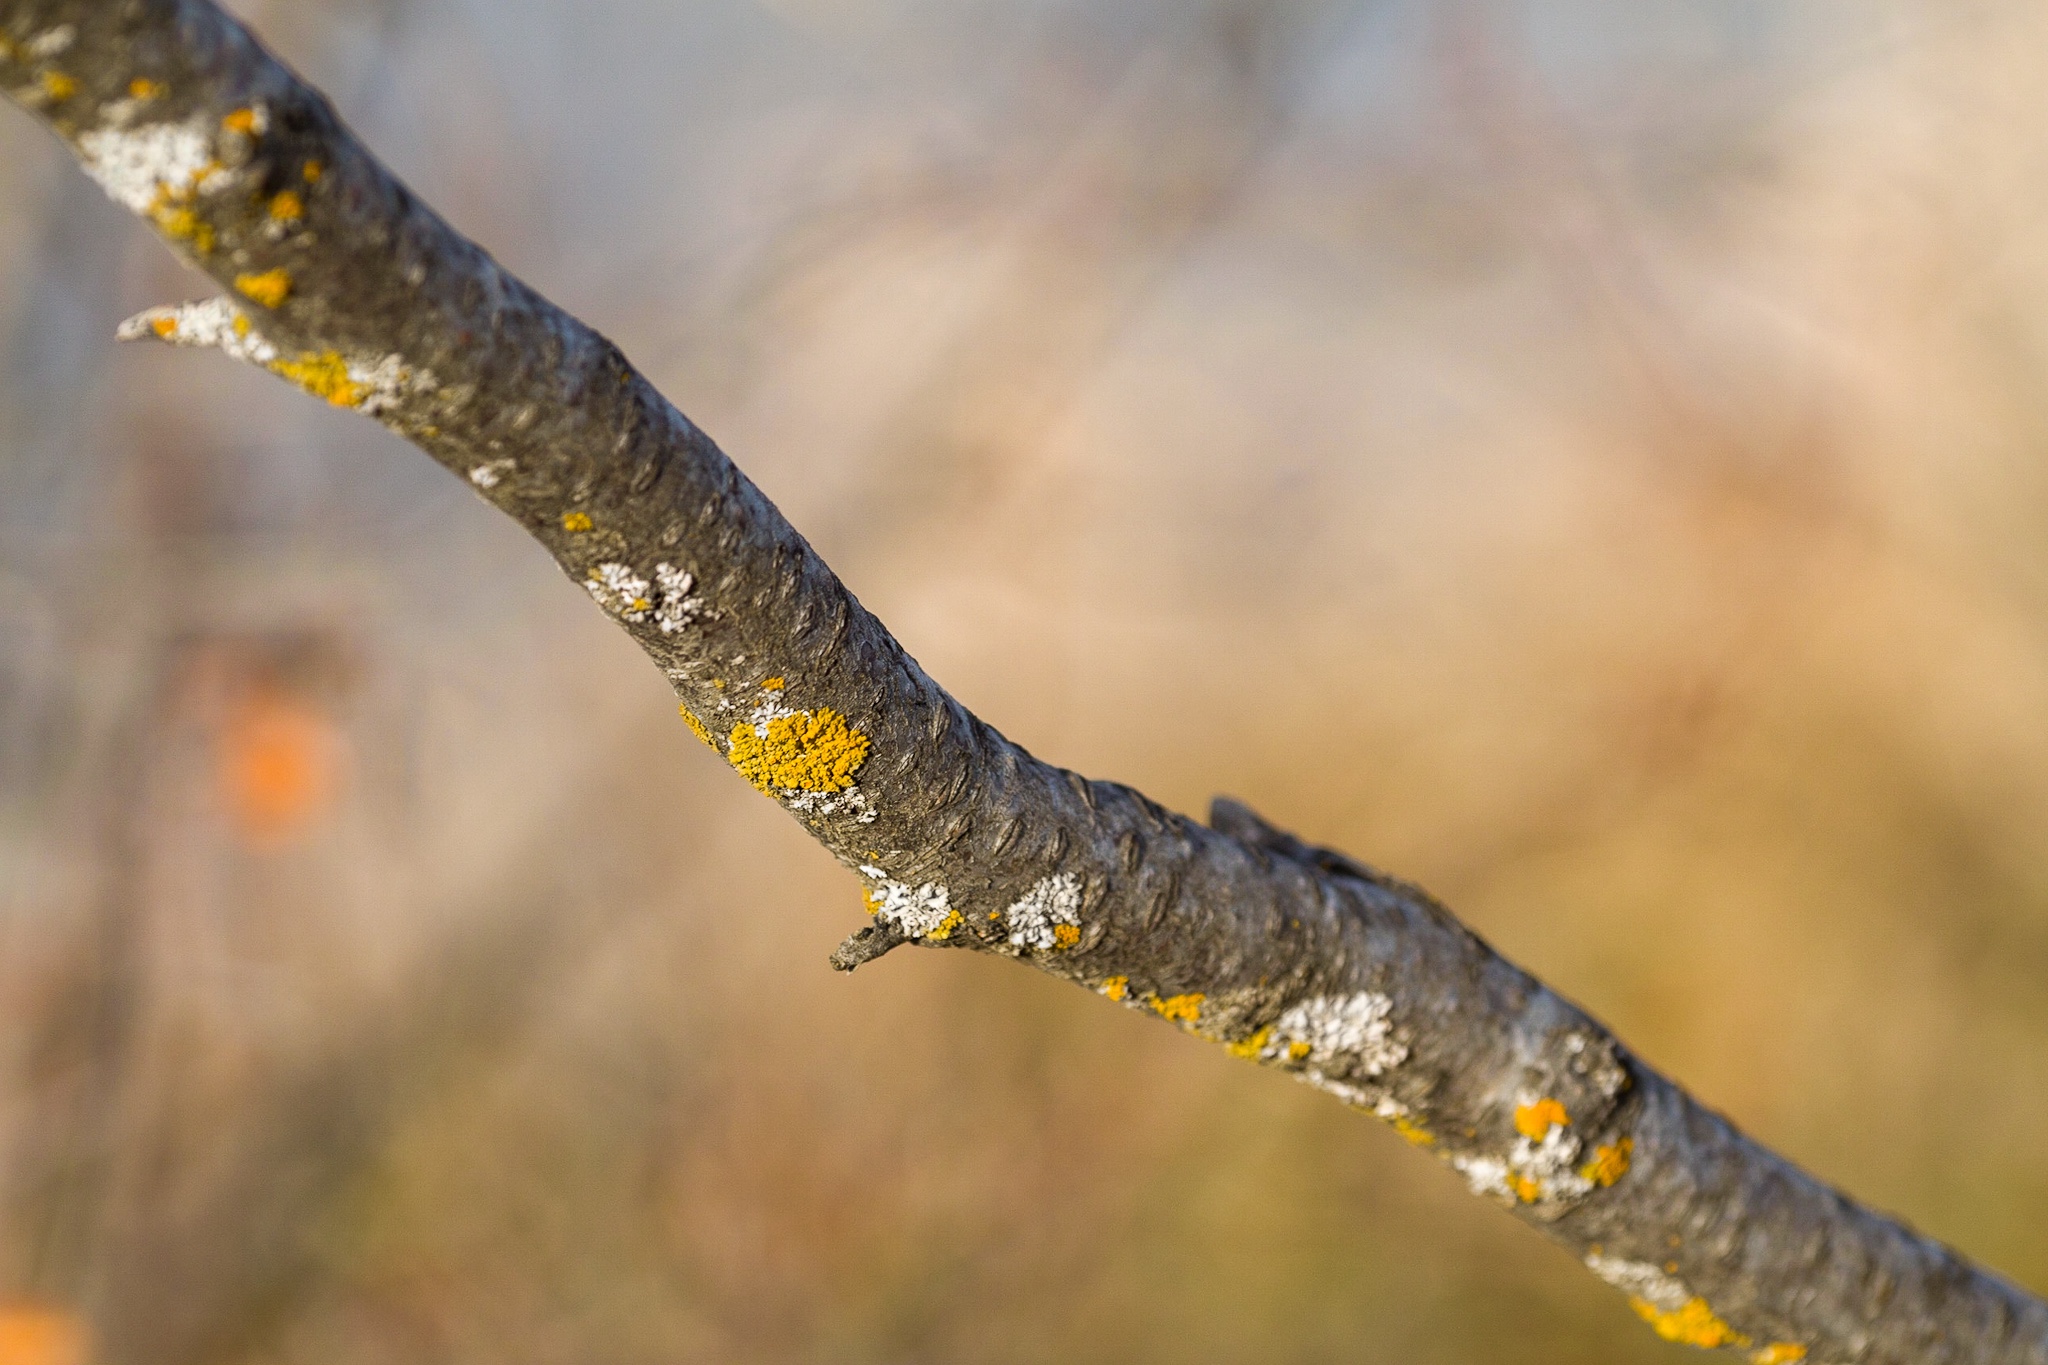
Fortuitous timing for this video. I got a new lens yesterday afternoon (Canon RF 70-200mm ƒ/4) and took it outside to do some test shots at sunset. As I was coming back in the house I saw some nice close-up subjects (dried flowers) in our dormant garden which I wanted to test the lens with, but the light was failing. A short time later I watched your video. This morning I went out early, while the garden was still in the shade (-8°C), and photographed the dried flowers.
I have only had my Canon EOS R6 Mark II a few months, and while I recalled it had auto focus bracketing, I didn’t know it could do in-camera focus stacking! It worked amazingly! It was so nice to see the final results on the screen so I could make adjustments on the fly.
I still have the raw files for more in-depth processing, but the focus stacked JPEGs were good enough for quick sharing. I’ve used focus stacking before, but just learned how to do it in-camera. That’s a feature I will also certainly be using again!
JPEGs from the in-camera focus-stacking function of the Canon R6 Mark II, processed to taste in Adobe Lightroom…
In March of 2023, YouTube photographer James Popsys posed the question, “Are jpegs still terrible?” I think it was a good question and his video is worth watching.
I wrote and posted the majority of the follow as a comment on Mr. Popsys’ video. I recently flushed out a few points and post the result here for your edification.
Notes on the sample photos:
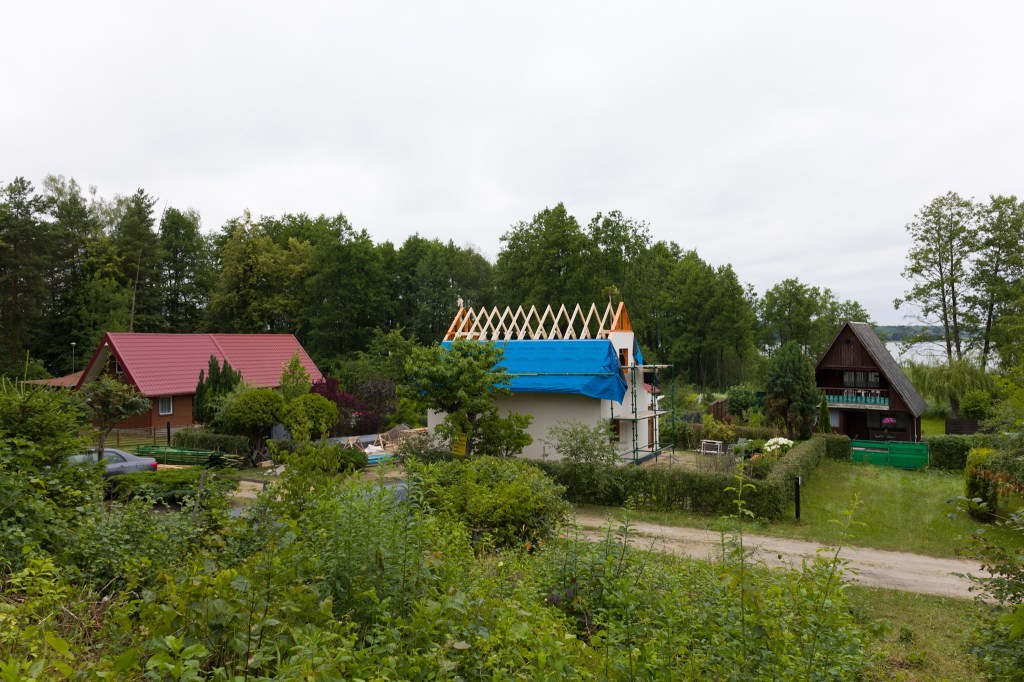
Photos in this article were not shot under the harshest conditions, though it was dull and overcast which often presents a challenge for cameras trying to balance the subject and sky.
I always use Evaluative Metering, though in reality I shoot in full Manual mode 99% of the time and pay more attention to the histogram and (when shooting RAW) follow the precept of expose-to-the-right (ETTR).
I almost always have the camera set to the Neutral Picture Style, or a custom Picture Style. I don’t like the EVF/screen image or file previews to look over-cooked. When shooting RAW, I apply a custom Camera Profile during the Lightroom import so the other in-camera Picture Styles are meaningless to my editing workflow. (When specifically shooting for black-and-white, I use the Monochrome Picture Style.)
For the JPEG captures in this article, I used the Neutral Picture Style, though admittedly, a punchier setting, like Standard or Landscape, would make the colours pop more.
On JPEGS As A Capture Format
I also am habitually a RAW shooter. For a time, on some cameras I shot RAW+JPEG when travelling because my iPhone/iPad OS at the time could only import and edit JPEGs. Now that Adobe Lightroom Mobile and Apple Photos can import and edit RAW files I have gone back to shooting only RAW. My newer cameras also have RAW editing built in so I can create tweaked JPEGs after the fact if I want to.
JPEG – Neutral – Auto Light OptimizerRAW – Custom Camera ProfileRAW – Lightroom AutoCanon R6 Mark II
While I often do like the stylistic look of Fujifilm’s in-camera film simulations, in the case of James Popsys, I prefer his RAW edits. Why? Because the film simulations, while nice, are generic and anybody can use them, while Popsys’ RAW edits exude his own unique style and vision.
Would I, or should anybody, just capture JPEGs and forget about RAW editing? Maybe. Sometimes.
To me, shooting JPEG/film means working within a certain limitation. It means giving up certain creative control to help hone my ability to see.
Shooting RAW, on the other hand, gives me the freedom to tweak a photograph’s look after the fact, hopefully to match my initial vision.
We all see the world differently. What draws each of us to a scene varies.
Ideally, as photographic artists, we each will have a clear and unique vision of what the final rendered image should look like. This is when RAW capture is ideal.
JPEG – Neutral – Auto Light OptimizerRAW – Custom Camera ProfileRAW – Edited To TasteCanon R6 Mark II
On the other hand, sometimes adding constraints (camera type, focal length, picture style) can force us to learn to see differently. This is a good opportunity to discard our preconceptions and freshly approach the essence of our subject while respecting certain mechanical limitations.
HEIC (4.1 MB)RAW (39.9 MB)RAW – HDR (37.6 MB)iPhone 12 Pro Max – Wide Camera – Un-edited
I can only think of two situations where using canned JPEG simulations (or built-in Picture Styles) on a regular basis would be preferable: photojournalism (which aspires to as little “manipulation” as possible), and point-and-shoot photography. I’m not disparaging either.
For me, I use my iPhone for the latter, skipping the cumbersome dedicated camera altogether. And nowadays those iPhone photos are HEIC/HEIF, which are indisputably better than JPEGs (better compression, higher dynamic range, non-destructive edits). It would be nice to see more dedicated cameras using superior HEIC/HEIF as well. My Canon EOS R6 Mark II saves HEIF files, but only in HDR.PQ mode.
If you want to simply mimic the nostalgic, flavour-of-the-day look and dynamic range of “film”, then, for most scenes, JPEG is a fine capture format. Just don’t let your highlights blow out and don’t expect to recover much shadow detail.
If you aren’t going to be editing your photos after the fact, then JPEG can be an acceptable capture format. I’m actually quite impressed with the JPEG engines in contemporary cameras. They do a good job of compressing a lot of dynamic range into a small bit space, and the roll-off of highlights and blacks is quite pleasing. In days gone by, blown highlights were less subtle, probably due to the tendency of the JPEG engines attempting to recover highlight data that just wasn’t there.
On JPEGS As A Delivery Format
A few years ago, I would have said that JPEG as a web delivery-format is not going anywhere. However, with many more display devices capable of rendering HDR images, we need to rethink whether or not an 8-bit per channel delivery format is part of the future. Or, is HDR content, like 3D, simply a gimmick that adds very little to the emotional impact of still or moving images? (High-brightness screens, on the other hand, obviously have value, allowing you to view content in bright outdoor situations.)
On Editing JPEGs
Can you edit JPEGs at all? Sure you can. And sometimes quite aggressively. I was going through some of my archives and found some older photos from a canoe trip, shot on my JPEG-only Canon D10 waterproof point-and-shoot camera. I was able to balance shadowy hills and colourful skies quite easily. Just don’t expect RAW-level flexibility.
With HEIF files on my iPhone I regularly edit exactly like I would RAW files though ProRAW/DNG files allow more edit-ability (if I am shooting in difficult conditions on my iPhone and I know I will edit the file later, I turn on RAW mode temporarily).
I don’t know of a camera brand whose in-camera photo histograms are NOT based on 8-bits per channel.2 So, if like me, you are a habitual histogram user, you are basing your exposure on what is essentially JPEG data, even if your camera viewfinder is capable of displaying an HDR image. The same is true of file preview images shown in camera, unless you capture in an HDR-specific image-format (HDR.PQ for example).
JPEG – Neutral – Auto Light OptimizerRAW – Custom Camera ProfileRAW – Edited To TasteCanon EOS R6 Mark II
To get the viewfinder/screen image (and saved file preview) to more closely match my style of editing I usually create a custom representative Picture Style on the computer and load this into one of the camera’s User Picture Style slots. Alternatively I tweak a built-in Picture Style (usually Neutral) and save it as a User Picture Style.
In Lightroom I use custom Camera Profiles created using a Colorchecker Passport target under various lighting types (sun/shade, cloudy, tungsten/led, flash, etc.) for each camera I own. This way, no matter which camera I shoot with on a given day, my editing starts from a standard, neutral base.
In post-production, once the custom Camera Profile is applied, I perform my standard workflow, which includes making basic contrast adjustments and maybe applying one or more Custom Presets I have created.
Footnotes
Pronounced wizzy-wig. What You See Is What You Get. A good phrase which deserves a renaissance. ↩︎
Video histograms are a different matter when shooting in a LOG format. ↩︎
Released in 2009. I inherited this camera from my brother. He was not himself a hard-core photographer though he worked his entire career in the graphic design and stock imagery industry1.
When I received this camera in 2020, I was well beyond DSLRs, having been using Canon M-series cameras for several generations. But I did shoot with the 7D a bit for fun and found it a delight to use (for a DSLR) with very good image quality (held back only by high ISO performance which sensors of the era lacked).
My most advanced DSLR at that time was a Canon EOS 30D which I then only ever used for nostalgia’s sake.
The 7D was a definitely a step up from the 30D in almost every aspect:
18 megapixels vs 8.2 megapixels
8 fps vs 5 fps
Dual DIGIC 4 vs single DIGIC II
19 AF-points vs 9 AF-points
3-inch vs 2.5-inch LCD screen
In a lot of ways, this camera is from the apogee era of the DSLR, right at the beginning of the hybrid stills/video revolution. Even as I write this in 2024, the successor EOS 7D Mark II (2014) would still be a viable camera body for 80% of use cases.
The 7D records Live View HD video at up to 30 fps (the only DSLR I own that can record video). I don’t think I have ever actually used it to shoot video though, so can’t comment on the quality or shooting experience.
In 2020, the demise of the EOS M-series was seemingly assured. I also had a desire for a higher-end hybrid full-frame camera, which I felt would eventually come in the form of an EOS R-series body. My short time with the 7D convinced me that a larger enthusiast-oriented EOS body was what I should be waiting for. When the EOS R6 Mark II was eventually released I didn’t hesitate to make that my upgrade.
My brother, three years my senior, started working at Image Club Graphics while still in high school, continued there when they were sold to Aldus and merged with Adobe; helped start EyeWire which was bought by Getty Images; and co-founded Veer which was purchased by Corbis. I meanwhile, went to art school, worked in the graphic arts industry, did some commercial photography, and eventually became the first full-time employee of Veer-competitor iStockPhoto. I remained with iStockPhoto when they were purchased by Getty Images, rising eventually to CTO and then retiring as VP of RD. Needless to say, though my brother and I shared a lot of interests, while working most of our careers as competitors we didn’t talk a lot about work. ↩︎
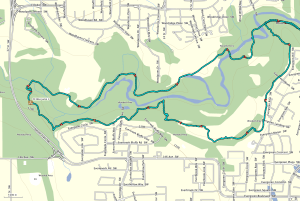
Today I went for a walk in at Fish Creek Provincial Park with a friend and I brought my GPS receiver (GPSr) along. I almost always run my GPSr when walking, cycling, or canoeing — even in familiar areas. My friend was curious so I shared my thoughts on GPS, the benefits of non-commercial maps and my enthusiasm for geocaching, geotagging, navigation, athletic training, etc.
I wanted to share today’s GPS track and data with my friend. I thought I would make it even more useful by sharing it here, as I think it is a good explanation of why I like using a GPS to record my adventures (no matter how close-to-home or seemingly insignificant).
Cheap GPS
When I first bought my GPS, I made it a goal not to pay for maps. I had three reasons for this:
commercial maps are expensive (and, from what I have heard, often not very good quality);
I believe that map data from government sources should be freely available to citizens (i.e., it was already paid for with taxes);
Open Source maps, updated and prepared by millions of people, are better than most commercial maps, and more up-to-date than most government data.
Free and Almost Free Maps
I have a Garmin eTrex 30 GPSr and use the following free maps:
Open Street Map (global Open Source map data, compiled for Garmin devices, generic and cycling versions)
Ibycus Topo (complete Canadian topographical map based on NRC data)
Other free topo maps for countries, states, and cities as found at gpsfiledepot.com
I also subscribe to openmtbmap.org because I think the operator does a worthwhile service packaging up OpenStreetMap based mountain biking maps.
My wife just complete a canoe trip along the Gulf coast in the Florida’s Everglades National Park. Before she left I found a free Florida topographic map that contained depth soundings for the area she was going to be in. Just today I discover OpenSeaMap, an open source initiative to provide free global nautical charts — they have Garmin downloads, but I haven’t tried them out yet. Looks interesting.
Of course, each map source provides different features. There is no ideal map — the best map to use will depend on your activity.
(Not strictly GPS related, but I today I also discovered OpenWeatherMap — an Open Source weather mapping initiative. See the embedded sample at the bottom of this post. Just yesterday I completed the build of a Phidgets-based weather station. I will have to look at OpenWeatherMap in more depth.)
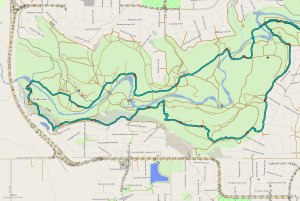
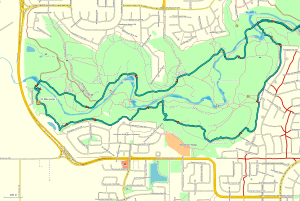
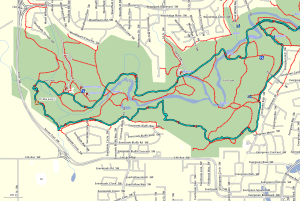
Global Base Map
Ibycus Topo 3.2
OpenMTB Map
OSM Cycle Map
OSM Generic
Southern Alberta Tail Maps
Track Data
As you can see in the above screen shots, once you get home it is easy to review the GPS track (recording of where you went with the GPSr), but what else can you do with such a track? Well, I like to take a look at the speed and elevation plots of the track just to get a sense of of my performance, especially after a bike ride. I don’t use my GPSr as a religious training tool, though a lot of athletes do. I also use the track data to geotag any photos I take on my adventures. I use PhotoLinker to merge my track location data with any un-geotagged photos. In the case of today’s walk, I only shot a few photos with my iPhone, so those were already geotagged by the camera.
Here is the track data from today’s walk:
GPX (GPS Exchange format — compatible with most GPS receivers and software)
(Note: Below, the second spike in the Speed graph up to 8 km/h, is me sliding on my butt down a frozen, mossy, leaf covered hill in the trees then coming to a sudden stop with my feet against a log just before I would have hit a tree. The dangers of walking on icy, north facing trails never ends. The subsequent lull in movement for 15 minutes is my GPSr sitting idle under the aforementioned log while my friend and I continued our walk, unaware that the GPSr had been ripped off my belt. When I realized it was missing we knew exactly where to look for it. Previously, I always carried my GPSr in a pocket or in my pack, and I will do so from now on. The first spike might be an error, because I don’t ever remember running that fast — and I only fell down a hill once.)
Track Points
Speed
Elevation
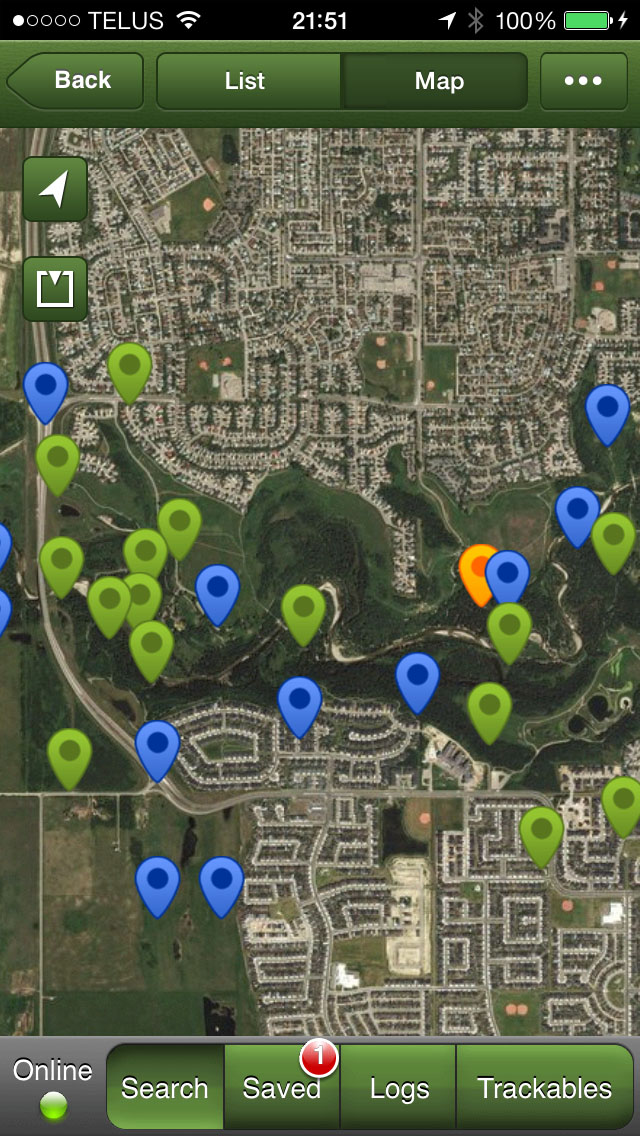
Geocaching
Geocaching is a great way to get familiar with a new GPSr. If you expect your GPSr to save your butt on a glacier in a whiteout, then its use better be like second-nature to you. Geocaching is also a fun hobby in its own right. When I go looking for geocaches I always learn something new about an area — wether it is half-way around the globe or in my own back yard — even if I don’t actually find the cache I am looking for (which happens quite often). Today, I didn’t have geocaches in Fish Creek Park loaded on my GPSr, so I just used the Geocaching iOS app, which is a great place to start if you just want to try out geocaching but don’t own a dedicated GPSr.
In Search of the Holy Grail of Mobile Photo Editing
I occasionally use iPhoto on iOS to clean up pictures to share while I am on the go. That is, if I am using an image from the built-in camera app or uploaded from my Wifi-capable Canon PowerShot S110. If I shoot something with Hipstamatic I usually just share the shot without any editing, and then clean it up later on my Mac in Photoshop if there is something I want to change or improve.
I’ve been travelling a lot recently and I’d like to have a fully mobile, professional-quality, photo processing solution with me on the road. Usually I do all my post-processing on my desktop Mac after returning home from a trip. But for longer trips, I’d like to being to do some post-processing on the go. For example, I’m going to Europe for two months this spring and will only be taking my cameras, iPhone, and iPad — no laptop (well, I don’t own one anyway). Normally, I don’t even carry my iPad while travelling, but this time we will mostly be staying with friends and family, so I don’t mind lugging it along.
There is one serious limitation to using an iOS-only post-processing photography workflow — there are no RAW photo editing iOS apps. While the iPad can import RAW files via the camera adaptor kit, there is no software available on iOS with which to take full advantage of the RAW camera data. (BTW, Macworld has a nice article about using the iPad in your photography workflow.) The holy grail would be the equivalent of Lightroom or Adobe Camera Raw on iOS.
In the absence of the holy grail, I decided to compare a few iPad photo editing apps to assess there strengths and weaknesses. My basic evaluation criteria was to what degree I could use each app to do my basic post-processing operations:
color balancing;
contrast adjustment;
selective dodging and burning (lightening and darkening for you new-school photographers);
cropping;
vignetting or de-vignetting;
sharpening;
black and white conversion;
batch processing; etc.
The ability to apply filters or effects was secondary in my evaluation. I didn’t even consider sharing capabilities. Again, I’m looking for something I can use to make my images look as good as possible (100%) using only an iPad (or iPhone), so I can shoot, edit, and share professional-quality photos I can be proud of while on the road.
The Apps
Photos
The built-in Apple Photos app has some editing features, so let’s start there. The tools at our disposal are: rotate, enhance, red-eye (reduction presumably), and crop. The crop tool is useful, as is rotate for those times when your cameras orientation sensor gets confused (looking up or down at an extreme angle). But rotate only works in 90° increments so it does not work for straightening slightly crooked photos. The improvements offered by the enhance feature are minimal (basic contrast correction as far as I can tell). I can’t speak to the quality of the red-eye feature as I so rarely use flash that my subjects never have the chance to get red-eye. That, and the fact that my wife blinks a lot, so even if I use a flash, hers eye are probably going to be closed anyway. (Pro tip I learned from Steve McCurry who shot the last roll of Kodachrome ever manufactured and who needed to make every one of thirty-six exposures count: give your subject a countdown from 3 to 1, tell them to pre-blink on 2, and then take the picture on 1).
iPhoto
iPhoto was the first serious photo editor released for iOS. And in many ways it is still the best. The UI is a bit confusing and clunky, but generally usable. The functionality is excellent and for a $5 upgrade over the built-in Photos app you get an advanced straightener; contrast and saturation correction sliders; a crop tool with free, constrained, or ratio modes; local adjustment brushes; and effects including gradient neutral density, vignette, black and white, vintage, toning, etc.
I try to get things right in camera as much as I can. Correct composition and crop. Proper white balance and exposure. But I still consider images just out of the camera to be about 75% complete. With iPhoto I can elevate that to about 85% complete.
Photoshop Touch for iPad is quite a capable photo editor. On the one hand it supports layers, which can be a good or bad thing depending on how you look at it. I do very little compositing. On my Mac I, when editing photos, I using Photoshop layers almost exclusively for adjustments tweaks after doing most processing in Adobe Camera Raw. The layers feature in Photoshop Touch is just in the way. Now if I could add adjustment layers, I’d be a fan. But not yet.
One of the tools I use a lot on my Mac, be it in Adobe Camera Raw or in Photoshop, is the curves adjustment tool. This goes way back to my days as a scanner operator in pre-press. Thankfully, Photoshop Touch has curves and levels adjustment tools.
Photoshop Touch’s crop and rotate tools are superior to iPhoto’s due to the fact that you can enter numerical adjustments. Skew and reflect tools are also available. There is a comprehensive choice of selection, drawing, cloning, and touch-up tools. I can’t say much about the supplied effects, except that there are some.
With Photoshop Touch I feel I can get done about 90% of what I usually do on the desktop (accepting the fact that RAW processing is missing).
Snapseed
Snapseed, by Nik Software (a Google Acquisition), is an innovate app with a large suite of both basic tools and powerful effects. The UI is unique among apps I have tried, but is highly usable once you understand the basics. It has almost all the features of Photoshop Touch minus layers and the drawing and selections tools. And in a lot of ways the Snapseed offering is better. It has a nice Structure function in its Details suite (equivelant to Adobe Camera Raw’s Clarity function). I often prefer to use this type of local contrast enhancement instead of making global contrast changes (which I usually do with curves).
For basic photo post-processing, Snapseed seems like it could get me to 93% completeness. There are still several things missing though.
In particular, a histogram would help to ensure whites and blacks are not being clipped and make overall analysis easier.
The white balance tool leaves something to be desired. Why can’t they just offer an eyedropper for sampling neutrals?
The effects suite of Snapseed is better than any I have seen elsewhere. For the occasions when I want to get a little messy this is going to be my go-to app. One of the reasons that the effects are so good is that they are all parametrically driven. Every aspect of an effect can be adjusted.
This brings me to a suggestion that would make this a 95% app. Since all the adjustments and effects are parametric, having the ability to store personal presets would be amazing. Well, in the mobile app world this would be amazing. In the real world, the ability to store presets and batch process images is a necessity. So far I have not seen any iPad/iPhone app with such essential capabilities, with one exception. Which brings us to B&W Lab.
B&W Lab
Between 5 and 10% of the images I shoot I end up converting to black and white (or some sort of monochrome).
More photographers should explore black and white. Just because most digital cameras capture color images all the time, does not mean this is the best way to represent a scene or the photographers vision. When the photo is about shape, line, texture, or structure, it would probably be a more powerful image if rendered in black and white.
B&W Labs is the best app I have found for making black and white conversions on the iPad. It surpasses Snapseed’s Black and White suite. In Beginner mode there are very usable presets provided. Additionally, after you choose a starting filter you can modify every parameter of the preset via sliders. (The method of choosing a starting point in Expert mode is a little different). There is even a useable Tone Curve tool. You are limited to five handles on the curve, but that is more than enough for most situations. Performance is little slow, but not horrendous.
B&W Lab allows you to load the settings from any previously edited image into the current session. The feature, labeled History, is a little counter intuitive as are most of the UI elements. I’ve gotten used to the idiosyncrasies though and have no problem making great black and white conversions with this app. If they could allow you to batch apply History settings, then this app would be amazing. A histogram wouldn’t hurt either.
For black and white processing only, this app actually gets me about 98% completeness.
Image Blender
Image Blender is a little different from the other apps reviewed here, designed purely for compositing two images together.
The art of multiple exposure is almost lost in this era where every click of the shutter button results in a separate image file. In the age of film, creating multiple exposures was easy. Most cameras had the option to cock the shutter without advancing the film. Other cameras, like my 4×5 field camera, required the photographer to change film after each shot, and if they didn’t they could keep exposing the same piece of film over and over. (There used to be studio techniques involving multiple strobe flash bursts, one after the other, that required the ability to do in-camera multiple exposures. Alas, those techniques are lost to us digital photographers.) But I digress.
Much like Photoshop Touch layers, Image Blender allows you to set the blending mode between two images as well as the opacity of the top image. The output file always has the resolution of the smallest input file (not a problem if both inputs are the same size). Image Blender also has some masking features that I haven’t played around with yet.
Image Blender wouldn’t ever be my first choice for general post-processing of course. That’s not what it is designed for. But if I want to make a conceptual multiple exposure from two images, I would probably use it over Photoshop Touch layers. And if I need to make an illustration or banner for a blog post, I might use its masking features, although I might just go to the more familiar Photoshop Touch instead.
Conclusion
All of the main photo editing apps mentioned here — iPhoto, Photoshop Touch, Snapseed — were released over a year ago. That’s not to say nothing new is happening in this space. These apps are actively being maintained with updates coming out about quarterly. They keep getting better, but in my view as a photographer, looking for a professional mobile editing and workflow solution, there is still a lot of room for improvement. Whichever developer first releases a RAW processor with camera profiles and lens correction capabilities is going to make a lot of money.
In terms of display quality, processor power, and connectivity, I still believe in the promise of the iPad as a professional, mobile, post-processing solution. But at the moment, even after editing and sharing some of my creations while on the road, I will still be going back into Adobe Camera Raw and Photoshop on my Mac to re-edit images in an effort to eek out those few remaining percentage points of quality. Nothing but 100% will do.
Samples
For each app reviewed, I used an image from my iPad camera as a starting point and pushed the software to see what it could do. In iPhoto and Photoshop Touch, I just tried to improve upon the output of the iPad’s camera. I didn’t necessarily do the same operations in each app. I just used the tools at hand to maximize the image’s potential (not that it was a great image to begin with). I did the same in Snapseed, but have provided here a sample of one of the Vintage filters instead. The B&W Lab and Image Blender samples are self explanatory, I hope.