I don’t consider myself a camera collector. I buy cameras to take pictures with them. When it’s time to upgrade, I do so generally do so because newer technology has far out-classed my current camera and/or my photographic needs have changed. Lenses tend to have a much longer useful life than camera bodies and interchangeable lens cameras outlast fixed lens models.
I am by nature a sentimental person (or maybe I have inhereted something of my grandfather’s hoarding habits) and so when a camera is retired from primary use I keep it in my collection. Photography is essentially about memories after all. Some people treat cameras like socks—buying, trading, discarding—without so much as a thought. I can’t do that.
To the average person, the list below might constitute a great number of cameras, but keep in mind that it represents, at this point, a 35 year journey in image making. The term “photography enthusiast” exists for a reason.
I’ve grouped the cameras by type as that seemed the most logical. Within types, the cameras are generally sorted chronologically in the order of acquisition. I cross-reference other cameras where necessary. I also mention lens and other equipment acquisitions relative to each camera if relevant.
Welcome to my on-line Photography Museum. I do not strictly classify myself as a collector of photographic equipment, but as an avid photographer I have amassed a considerable collection of gear since becoming serious about photography around 1991. I thought it would be fun to document this gear and share its history.
I love functional gear and don’t hesitate to acquire something if I will use it a lot. I do feel guilty if I buy something and it just doesn’t get used sufficiently. Thus I am quite spare in my purchases.
For most of my photographic journey taking pictures has been a hobby. The return on my investment comes in the form of satisfaction of creating images. Lacking financial justification I have avoided buying full-on professional cameras for the most part.
Lenses are another matter and I don’t mind paying for good quality glass, though I often put a higher priority on compactness and portability than on outright performance (try hiking or travelling with a suite of ƒ/2.8 zoom lenses and you’ll understand).
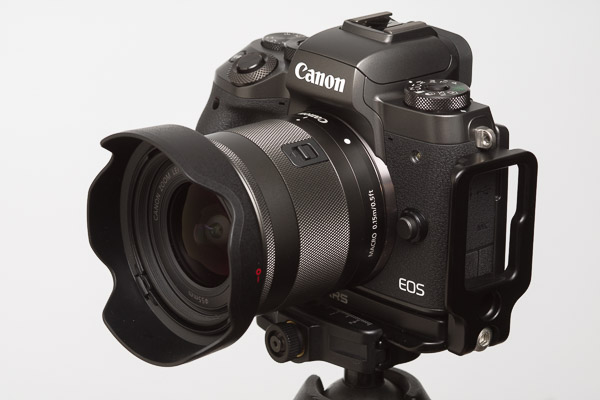
I’ve been a fan of the Canon EOS M-series since it was introduced in 2012. After several iterations the camera bodies and system have come a long way, but in some respects still lag behind competitors.
Cautious Optimism
When the EOS M5 was announced September 15, 2016, I was intrigued, but did not instantly consider an upgrade from the M3. I mostly shoot landscape photographs. The EOS M5 sensor size and quality is essentially unchanged form the M3 and while the addition of dual-pixel (phase-detection) auto-focus (DPAF) to the M5 is fantastic I wasn’t sure if it would benefit me.
One of the best (and for some photographers, most annoying) features of the M3 is the optional/detachable tilting electronic viewfinder (EVF). I spent many years shooting exclusively with my iPhone and the Canon PowerShot S-series of compact cameras. When I started shooting with the original EOS M I did not miss a viewfinder at all, and, unlike many, had no problem shooting exclusively with the fixed rear screen. Thus, I felt the M3 gave me that best of both worlds: an ultra-compact inter-changeable lens camera (ILC) and the ability use a viewfinder when needed. I cannot understate how amazing the tilting function of the EVF is on the M3. It works so wonderfully at chest-level, when using a compact tripod, or for shooting ground-level landscapes and macros.
While I was looking forward to a more substantial grip on the M5 (I do occasionally shoot with larger EF lenses via the EF to EF-M adaptor), I was concerned about the added bulk of the built-in EVF and the lack of EVF tilting.
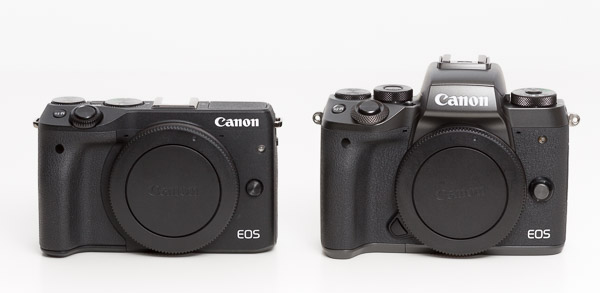
Canon EOS M3 w/ EVF vs. Canon EOS M5 (Front)
The other area of concern turned out to be a non-issue exacerbated by poor reviews. The M3 rear screen tilts up 180 degrees and down 90 degrees. While I have no interest in selfies, having a screen that tilts both up (for use on small tripods, at chest level, and low angle) and down (for shooting high-angles) is now essential for me. On the M5 the screen now tilts down 180 degrees, but every review (while quick to point out the selfie compatibility and video-blogger incompatibility of this camera) omitted wether or not the screen tilted up at all. A screen that does not tilt up seems like nonsense, but I thought maybe the EVF eyepiece interferes with tilting up in someway. This would have been a deal breaker for me. Alas, the M5 rear screen does tilt up 85 degrees (90 degrees would be better but the EVF would then be in the way a bit).
Wishes Granted
In early 2016, a thread on canonrumors.com asked, “What Do You Want to See in the EOS M System?”
Having a very compact option already in the form of the M3, I was most interested in the M-series including a beefier premier body that borrowed more form Canon’s enthusiast DSLR bodies.
Let’s review my wish-list from last year and see if the M5 delivers.
built-in EVF — check
…with 90 degree tilt — nope, but I didn’t really think it would happen
built-in GPS or support for the GP-E2 (but built-in might kill the battery, so this is optional) — no
very slightly larger body — check
…at least slightly different back button layout (my palm often hits the menu button accidentally) — better and definitely more intuitive, but my palm still presses the menu button when holding larger lenses
vertical grip option with support for two batteries — nope, and this is still one of my major wish list items since I plan to use this body with a longer lens
use the same battery size as M3, please — check, yeah!
more pronounced back focus button (I use back button focus about 90% of the time and the one I can assign on the M3 is hard to locate by touch, especially with gloves) — better, the thumb-grip is more pronounced and the still-flush buttons are easier to locate
better than 4 frames RAW buffer (unlimited would be ideal) — check, 17 RAW or 26 large JPEG shots.
better than 4 frames per second continuous shooting (7 frames would be better) — check, 9 FPS or 7 FPS with Servo-AF
way faster autofocus — check, DPAF is a dream compared to the old sensor and on par with the Canon 80D DLSR from which it is borrowed
There were a few things I didn’t like about the M3 that I wanted changed:
the EVF contacts in the hotshoe broke support for the GP-E2 GPS receiver (doesn’t even work attached via USB) — GP-E2 mounts on the M5 but is still not recognized by the camera
button function assignment was not as flexible as it should be — much improved, almost any button can have any assignment (except the * button which is either exposure lock or focus in several different combinations along with the main shutter button). The multi-function top control dial and DIAL FUNC. button borrowed from the G-series and S-series is a brilliant addition.
not all menu items were saved in the Custom shooting mode, making it pretty useless — fixed, all shooting menu settings and anything added to MyMenu, including Custom Function items, can be saved in either C1 or C2.
autofocus with the screen magnified always switched the display to a zoomed out view — fixed
Canon EOS M5 w/ Canon EF-M 11-22mm 1:4-5.6 IS STM (Back)
Big Brother Is Watching
Canon is not a company with a reputation for pandering to user requests. They are firmly entrenched as the professional DSLR
market leader (particularly in sports and editorial segments) and seem loathe to make radical changes to there camera body lines for fear of alienating their user base or, worse, messing up their profit margins. This is the common opinion in the blogosphere anyway. In some respects I agree, but am a little more lenient.
While Canon does seem to be a little cautious, they have actually been iterating quite quickly for the past three years. Proven features from pro-/enthusiast-DLSR bodies are trickling down the line and innovative functions from lower camera lines are being adopted by higher-end bodies. To me, the M-series is the middle ground where proven DSLR tech and innovations like touch-UI or the multi-function control dial can merge.
Canon don’t often offer firmware updates with feature additions, unlike, for example, Fujifilm. Canon firmware updates usually address performance issues (like the update to the original M which significantly improved AF). As cameras continue to be more about software choices though I can see this changing for Canon.
The fact that 11 of my fourteen wish-list and gripe-list items have been addressed in the EOS M5 show that Canon is, in some way, listening to its customers. (Also, none of my favourite features were removed. Yeah!) The three items that were not address (built-in GPS, tilting EVF, and vertical grip) are mostly forgivable omissions. I’d really like the grip, but understand the market for this accessory might not be substantial.
Auto-focus Overhaul
The DPAF system is a welcome if obvious improvement on the M5. The flagship M-body should always have Canon’s flagship live-view technology. Full-stop.
When shooting with the EVF the M5 allows you to use the touchscreen as a touch-pad control of the autofocus point (Touch & Drag AF). You can choose to use the full screen as the touch-pad, half the screen, or any quadrant. You can also choose to select the focus point via absolute position (like touching a smart phone display) or by relative position (like a laptop trackpad). I use the right-half of the screen in absolute mode and it is brilliant.
The M5’s subject recognition and tracking is pretty good, but Touch & Drag AF makes it so much better we will soon wonder how we ever shot without it. At the moment it is class leading. (Canon’s touchscreen adoption has always been one of the primary reasons I have chosen their MILC and compact cameras over Sony’s).
The M5’s improved auto-focus system (especially with adaptor-mounts lenses) combined with the EVF and easier to hold body led me to bight the bullet and acquire a Tamron SP 150-600mm f/5-6.3 Di VC USD G2 super-telephoto zoom lens. I’ve wanted a lens in this class for a while but it never made sense on the smaller M-Series bodies. With he M3 I could really only wrap two fingers around the grip while my index finger was on the shutter button. With the M5 I can wrap three fingers around the grip — a big improvement that facilitates hand-holding this long lens.
The M5’s increased FPS and shot buffer also facilitate more action oriented shooting.
Other Noteworthy (Minor) Features
Bluetooth
Canon’s smartphone integration has always been okay (better than competitors I understand) but not brilliant. The inclusion of Bluetooth LE and ability to use the iPhone as a wireless remote control is a nice addition to the M5. The Bluetooth remote is much faster than initiating a Wifi connection and even faster than digging my wireless remote out of the camera bag.
Shooting Display Settings
I don’t do a lot of studio shooting these days, and when I do I use my Speedlites 90% of the time, but occasionally I need to use my studio strobe lights. With the M3 it was difficult to use strobes because, while the exposure was set to match the flash, composing and focusing used the much dimmer modelling lights and the screen/viewfinder image appeared very dim. With optical viewfinder (OVF) cameras the viewfinder is always as bright as it can be. The M5’s “Exposure simulation” setting allows you to turn of screen dimming with slow shutter speeds or smaller apertures so the screen/viewfinder remains bright under the modelling lights.
The M5 EVF shows a nice combination of information. It is not huge though and with glasses on I struggle to see the corners of the image in the EVF. Luckily the “VF display format” setting allows you to shrink the sensor image display by about 80% for greater eye relief. (The side shooting info icons stays in the same absolute position when the image display is shrunk, now displayed on black for better contrast. The bottom shooting exposure data is always displayed on a black bar at the bottom of the EVF.) It’s little customizations like this that make an EVF more flexible compared to an OVF.
Auto ISO
The M5 is the first in the M-series to include Auto ISO. The control of this feature is limited however, providing only the ability to set the maximum automatic ISO. This is very far behind the competition.
Frankly, I have never understood what all the fuss of Auto ISO is about. I shoot in Manual exposure mode 99% of the time. Occasionally I use Aperture or Shutter priority but I am rarely satisfied with the results. I understand Auto ISO gives you better creative control, letting you to lock in both the shutter speed and the amount of desired depth of field while allowing the camera to deal with changes in scene brightness, however, I feel that if you want that level of control you are better off switching to full manual exposure. People who swear by Auto ISO also tend to put a high importance on a dedicated Exposure Compensation dial, as this seems to be how they control the brightness of the image. Doesn’t an easy to change ISO dial do the same thing?
If Auto ISO (or Av or Tv) was so brilliant then I’d expect it to handle gross scene brightness changes such as the subject moving from direct light to shade and during burst shooting each frame should have relatively similar exposures. This is not the case though and when I shoot auto-anything bursts I too often end up with the best composed frame being over or under exposed and the best exposed frame being the one with less than perfect composition/timing.
On the M5 the top control dial can be set to default to ISO adjustment. Thus a photographer can have a dedicated shutter speed dial (front main dial), a dedicated aperture dial (rear dial), and a dedicated ISO dial (top dial). Adjust for brightness using the ISO dial rather than the exposure compensation dial.
I judge exposure via the histogram 99% of the time. I make sure the whites are not clipping (except if a light source is in the scene) and boost my shadows in post-processing if needed (which is most of the time for average- or high-contrast scenes). I don’t understand why there is not an option to indicate over/under-exposure on the histogram.1 I can’t quickly check both the histogram and exposure indicator since they are always on opposite sides of the display. Thus I use the over/under-exposure indicator as a secondary indicator at best and don’t often use the exposure compensation dial.
If I did use auto-exposure more often then perhaps I would care if Auto ISO had more configuration options. As it is, I don’t.
In-Camara Raw Processing
New to the M5 is in-camera RAW processing (also added to the G7 X Mark II which makes a tempting upgrade). I shoot RAW 99.99% of the time. The only time I shoot JPEG is if I use the built-in HDR function or if (in the past) I needed a faster burst rate. When Canon started including Wifi on there bodies I switched to shooting RAW+JPEG when travelling without a laptop so I could easily transfer images to my iPhone/iPad for mobile sharing. I’d delete the JPEGS once transferred to the computer. Adobe Lightroom Mobile’s support for RAW images and processing largely make the RAW+JPEG workflow redundant. Now, with in-camera RAW processing I can just shoot RAW and generate JPEGs in camera for the few images I want to share but don’t want to bother processing in Lightroom Mobile. Less wasted card space. Less wasted buffer and camera processing. Faster desktop offloading.
(The first step in my RAW workflow is to apply a custom Camera Calibration created specifically for a given camera with an X-Rite ColorChecker Passport calibration target. For in-camera JPEGs I create a custom PictureStyle which mimics the custom Camera Calibration profile and install that Picture Style on my camera. In other words, I never use Canon’s built-in JPEG colour processor.)
Video
The M5 is limited to 1080p video. I personally think 4k video is overkill the majority of the time and frankly I maybe shoot 3 minutes of video a year (and use about 15 seconds of that), so video features mean little to me. I can imagine that Touch & Drag AF would be particularly useful for shooting video as other reviewers have stated. The M5 does include 5-axis in-body image-stabilization (IBIS) for video only, adding stabilization to non-stabilized lenses, or better stabilization to compatible already stabilized lenses. I have not tested this functionality but it is nice to know it is there.
Room for improvement
After several weeks of almost continuous use I haven’t found too many problems I’d like to see addressed in future iterations or firmware updates. The M5 is a solid camera.
Tilting EVF
I so rarely use the built-in flash I wouldn’t mind sacrificing it to have a tilting EVF. Besides low-angle macro/landscape work, a tilting EVF is handy for chest-level shooting. I am a bit over average height and shooting people from eye-level means either looking down on my subject or getting a soar back. This is a major reason why many famous photographers, including Diane Arbus, Cecil Beaton, Robert Capa, Robert Doisneau, Alfred Eisenstadt, Vivian Meier, Imogen Cunningham, and Richard Avedon used Rolleiflex TLR cameras — people should generally be shot straight-on and this means lower than photographer eye-level. Of course, on 35mm or APS-C, a tilting EVF would not help in portrait orientation, and a solid hot shoe is always a higher priority.
Being forced to use the eye-level viewfinder now I was also “forced” to acquire a new larger tripod (Manfrotto MT055CXPRO3). (Honestly, I needed a stiffer tripod for use with the Tamron 150-600mm, so I can’t completely blame the EVF.)
EVF/Liveview Blackout
Even though the AF and drive system of the M5 is much improved over its predecessors, the M5 still lags (pun intended) behind the competition when it comes to screen blackout during continuous shooting. EVF will never replace OVF for sports and action until this is sorted out. Its an industry-wide problem, but Canon should be at least as good as the strongest MILC competition at this point.
EVF/Screen Auto-switching
By default the M5 is configured to automatically switch between the EVF and the rear screen display when the camera is raised/lowered. This is facilitated by a proximity sensor near the EVF. The auto-switching function works great if the rear screen is used in the flat/stored position. If I tilt the screen up, then my thumb tends to trigger the proximity sensor often, which is nothing but annoying. In reality, the camera should switch to the rear screen anytime the screen is moved from the stored position as the EVF physically cannot be used. This is something that can be fixed with a firmware update and has been noted by other reviewers. For now, I have turned off the auto-switch and assigned a manual switch to the trash button during shooting (I have to remember to switch screens before entering playback mode).
DIAL FUNC. In Playback Mode
In playback mode the DIAL FUNC. button is inactive and the top control dial is dedicated to increasing/decreasing magnification, which defeats the purpose of having a MULTI-FUNCTION dial. And since I can assign magnification to the * and AF Point buttons I would like to be able to assign another function, such as EVF/Screen switching to the top control dial. During playback other possible assignable functions of the top control dial include star-rating, image protection, rotation, creative filters, etc. And off course magnification.
Touch Actions In Playback
The G7X has a nice feature in Playback mode called Touch Actions. When viewing a recorded image you can touch and drag up or down and then towards one of the screen corners to select a user-assignable action (e.g., favourite, protect, erase, rotate, send to connected device, or jump through images). For the travelling photographer these functions are very handy as a lot of image editing and management takes place in-camera. I am shocked that the M5 does not have this feature. Touching the big, beautifully touchscreen during playback does nothing but scroll through images or an image index. The EVF is not a barrier to adding Touch Actions as the rear screen could still be used as a touchpad, vis-a-vis Touch & Drag AF,during playback.
Lenses
The EF-M lens line-up continues to grow but there a few obvious gaps.
The lens that came in my M5 kit, the 8.3x super-zoom EF-M 18-150mm 1:3.5-6.3 IS STM, is another nice addition. With this lens I don’t have to choose which zoom range to carry, though probably with the trade-off of a bit of speed and sharpness. This lens is not natively supported by Lightroom yet and I am still in the process of creating a custom lens profile so I haven’t come to any hard conclusions about it.
The compact Canon EF-M 28mm F3.5 Macro IS STM is also interesting lens, but I have not yet had a chance to try it out.
The big gap in the EF-M lens line-up is obviously fast-anything. The 22 f/2 is the lone prime in the line-up but it is relatively slow focusing.
The following wide/normal primes in f/1.8 or f/2 would be welcome options: 15mm, 18mm, 35mm (equivalent to 25mm, 28mm, and 56mm respective in FF).
A fast f/1.4 or f/1.8 portrait lens would also be appreciated, in the 55mm range (an 85mm FF equivalent).
The current line-up of image-stabilized zooms are compact and good for all-round photography, but for lower light and action (indoor and sports) a fast f/2.8 suite would be ideal: 11-22mm (2x), 18-55mm (3x), 55-165mm (3x).
The majority of the Canon EF-M lens lineup as of the end of 2016. From left to right: 22m f/2 pancake, 11-22mm f/4–5.6 wide-angle zoom, 18-55mm f/3.5–5.6 standard zoom, 18-150mm f/3.5–6.3 telephoto super-zoom, and 55-200mm f/4.5–6.3 telephoto zoom. The EF-M 28mm f/3.5 macro and 15–45 mm f/3.5–6.3 zoom are not shown.
Conclusion
The Canon EOS M5 is a significant update over its predecessor, the M3, and is arguably Canons first formidable entry in the MILC market. It is also a very well-built, adaptable, and enjoyable camera in its own right. Initially I hesitated to upgrade, but now I will not likely be using my M3 except when I need a very compact camera body or a back-up (the M3 image quality is essential the same as the M5).
I’d still be interested in a full-frame mirrorless interchangeable lens (MILC) body from Canon. We mays see this in 2017 or early 2018. There are currently rumours of a Canon EOS M6 announcement slated for this month, but not many details about what that body might entail.
The over/under exposure indicator is a logarithmic scale while the histogram is a linear scale, so one indicator can’t really take on both rolls. However, it would be nice to see at least a pointer indicating mean exposure as part of the histogram. For centre-weighted average exposure metering the pointer would essentially indicate the weighted-mean of the histogram. For spot metering, the pointer would indicate the location of the measured spot brightness relative to the rest of the histogram.
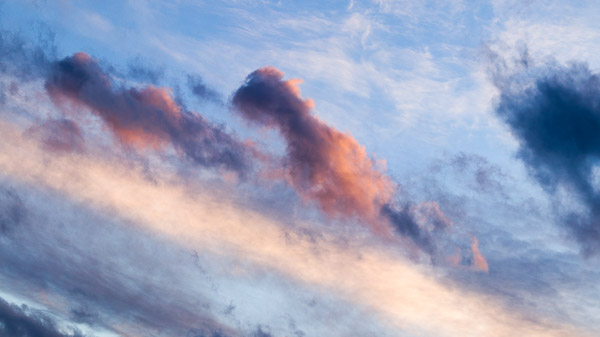
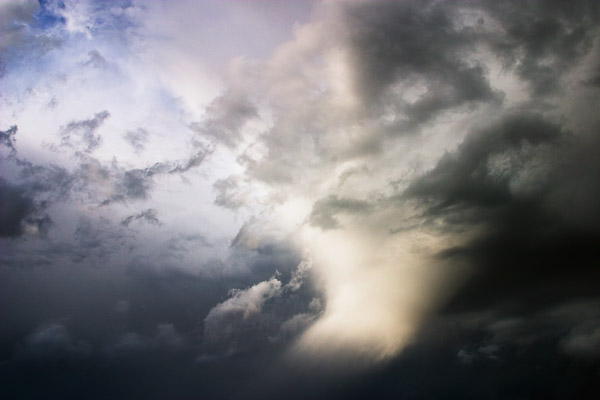
Cloudscapes is a photographic series that builds upon my previous Sky Panoramas series1. The photographs depict portions of the sky containing interesting clouds, colours, lighting, etc. I consider cloudscapes a sub-genre of landscape photography, but with my lens pointed towards some point in the sky instead of the ground.
Light and colour are often the main subjects, rather than just an aspect of sculpted solid surfaces as in landscapes. Clouds replace mountains. The inky blue of space replaces lakes, rivers, or seas.
One could say that photographing clouds is the same as photographing water. Clouds are a fluid medium that reflect and filter light.
Unlike the land, which is sculpted by light but remains substantially static (at least during the instant of a photograph), the sky is extremely dynamic. The shape and position of clouds changes from second to second. The position of the sun is constantly moving. Land is frozen. The sky is liquid.
When photographing the land, vantage points and compositions can be very limited (depending on what one is trying to capture). Move a few centimetres left or right, a few metres forward or back, and the composition changes or disappears. A branch fails to frame a pond. A rock no longer lines up with the mountain peak. A leading line doesn’t guide the eye into the scene.
In a wide-open space the sky is viewed as an uninterrupted hemisphere, 180 degrees across and 360 degrees in circumference. A photographer can point their camera towards the sky in any direction. They can shoot with a wide angle or telephoto lens to crop or expand the captured scene. There is no horizon that must be kept level. No trees that must remain upright. Clouds move and create an ever changing canvas of colour and light. But in all this freedom there must be constraints. Choices must be made. Balance must be found.
Some skies lend themselves to a painterly presentation. Colourful gradients, soft edges, and limited depth create an impressionistic or abstract quality. Some skies are dramatic, with raking or filtered light. Some skies seem less dramatic, but with a telephoto lens the photographer can isolate crisply detailed structures in fluffy cumulus clouds — distant sculptural castles floating in space.
Cloudscapes are ephemeral. They sometimes exist for a fraction of a second. They can be captured by the camera’s lens in that one instant and will never be seen again.
Sky Panorama #3, 2007
I first became aware of photographing the sky while studying photography in university. In a photography history class I became acquainted with Alfred Steiglitz’s cloud photos — the so-called Equivalent series.
“I wanted to photograph clouds to find out what I had learned in forty years about photography,” wrote Stieglitz in an artist statement2.
While Stieglitz’s reasons for photographing clouds differ from my own, I immediately had an affinity for his subject matter.
Silverview 2017-01-06 08:29
I have another on-going photographic series called Silver View in which I record the ever changing view out my living room window which looks out on a natural park. In those photographs the scene is often dominated by an interesting sky or atmospheric phenomenon (e.g., fog, a rainstorm, a snowstorm, or a dramatic sunrise), but always the sky is shown in relation to the land. The Silver View series is very much rooted in place. It is about recoding the view from one particular location.
The Sky Panoramas, and by extension the Cloudscapes, question the notion of place and our identification with it. Does the sky represent the land over which it hangs? Can the sky over my house be differentiated from the sky over a Parisian suburb? Can we recognize the sky as belonging to a place or is the sky a separate space all together? Are we travelling through the sky as we are rooted to the land? Are we shaped by the sky (does it mold our identity) as we so often seem to be shaped by the land?
Cloudscape 2017-01-30
As with many series, there is no actual limit to how many Cloudscapes I can photograph or for how long I can continue exploring this theme. Therefore I impose limits in other ways. The primary limits appear in post-processing.
Images are not just taken out of the camera and printed or shared. While it is often difficult to capture the dynamic range of both the land and the sky in a single photograph, the dynamic range of a small portion of the sky may be extremely limited. Atmospheric perspective may reduce contrast to the point were a portion of the sky appears as a flat, featureless field. This would be a boring photograph indeed.
To add dynamic range and contrast I primarily manipulate the white and black points of the image. Delicate colours that are nearly invisible to the casual viewer begin to appear as the contrast increases. Structures with shape and modelling begin to form. While each final image can be considered dramatic it must still be a realistic representation of the scene. An image not pushed far enough will be flat and featureless. One pushed too far will be destroyed. Knowing how far to push an image is the art.
It is sometimes hard to know at the moment of capture if an image will stand up in post-processing. Some images that seem dramatic in the viewfinder are just too contrasty to tame. Some images that seem mildly intriguing become favourites when a little processing starts to reveal subtle colours or playful compositional relationships. Therefore I shoot a lot of frames and keep only a few of the very best results.
Spring Shower 1, 2006 (Sky Panoramas series, but really also the first Cloudscape)
To be clear, I do not look for recognizable shapes in clouds. I look for abstract compositions in the sky.
The average landscape photographer knows that there are select few hours around sunrise and sunset that are “best” for shooting. Trust me, I relish those times. I can’t always schedule my day to shoot during those “golden hours” so I have learned to make the best of any time of day. On sunny days I shoot black and white and capture the dramatic shapes and shadows of trees and rolling hills. On overcast days I focus on the colours and delicate details in close forests.
With the sky as the subject, selecting good times to photograph is more difficult. On blue-sky or overcast-sky days there is nothing to photograph. Better then to shoot traditional landscapes or macros. Sunrise and sunset are not guarantees of finding a good sky subject either. The sun might be too intense and colours too saturated. Clouds might not be in the right place in relation to the rising/setting sun to filter or reflect the light in a compelling way. In other words, opportunities to shoot images for the Cloudscapes series are not overly common.
It is hard to say what compels me to pick up my camera at any given moment and point it towards the sky. I can’t schedule a Cloudscapes photography session. In a very zen way I have to wait for the right moment. The sky dictates when it wants to be photographed.
Sky Gradient 2016-01-08 #4
Sky Panoramas is a series of stitched multi-frame panorama photographs. The images have a very high aspect ratio (up to 5:1). Cloudscapes are a single frame photograph. It can take a minute or more to capture the 9 to 12 frames used to create the Sky Panoramas and thus they are infinitely more difficult to capture than Cloudscape images, especially if clouds are moving at any speed or the light is changing. Post-processing is also more demanding with Sky Panoramas, the files of which range in size between 500MB and 1GB. Sky Panoramas are also difficult to present on screen or on print due to there wide aspect ratio. As a compromise, I often find myself composing Cloudscapes in 16:9 aspect ratio. A third related on-going series, Sky Gradients, includes photographs of the colour gradient of the sky, usually just before sunrise or after sunset when the light is soft and the sky takes on a pastel hue. Sky Gradients are shot on cloudless days, though a slight haze in the atmosphere acts as a colour filter. The majority of a Sky Gradient frame is taken up by the sky, but a strip of horizon often appears at the bottom edge.
I haven’t posted much here recently for two reasons: 1) I’ve been having too much fun with our now 14 month-old baby; 2) when not hanging out with the baby I have been shooting as much photography as possible.
Recently on Canon Rumors a thread was started which posed the question: What do you want to see in the EOS M system? I have been a fan of the EOS M system from the beginning, so here are my answers to this question.
I bought the EOS M as soon as it became available and the M3 as well. I have all the EF-M lenses and a half dozen EF L and non-L lenses as well (macro, fisheye, long zoom, etc.) Canon was running a deal when I got the M3 where they were giving away a free EF to EF-M adaptor, so that was nice (now I have two to play with). Anyway, I’ve given this topic a lot of thought.
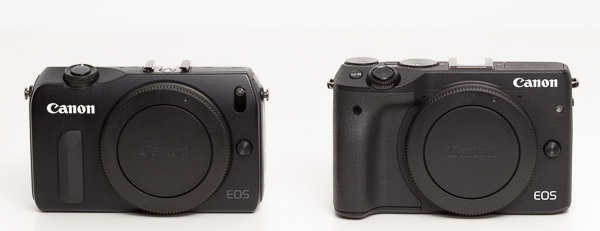
Canon’s APS-C EOS M Mirrorless Interchangeable Lens Camera System
What I like about the current system, and want to see in any future M body:
small, light, portable (the M3 is definitely easier to hold and operate than the M1 was, especially with EF lenses attached)
good enough image quality for the size — never had any complaints
small, high-quality EF-M lenses with the option to use other EF lenses for specific purposes
tilting touchscreen (fully articulated would be better)
tilting EVF (I do a lot of landscape work and this is great for low angle or even chest-level shooting)
ability to use older FD lenses via a glassless adaptor just for fun
seeing the exact same thing on the EVF and touchscreen
Wifi (getting images off for quick sharing without a computer, and been using Cascable to do timelapses recently)
What I don’t like about the M3:
the EVF contacts in the hotshoe broke support for the GP-E2 GPS receiver (doesn’t even work attached via USB). I geotag everything I shoot outside, but now I have to use tracks from my Garmin watch.
button function assignment is not as flexible as it should be
not all menu items are saved in the Custom shooting mode, making it pretty useless
autofocus while zoomed in always switches the display to a zoomed out view
a lot of other nit-picky things, but I can live with them (no camera is perfect)
I travel a lot and spend a lot of time hiking/skiing or in the back-country on extended trips. I would never carry an SLR body. If weight/space is really an issue I might carry only a G7X, but ideally I carry the M3 with a few EF-M lenses, depending what I expect to encounter. For dedicated shooting days I throw in whatever EF lenses I need as well. I have no problem with the bulk of EF and the adaptor on the M3, but I wish AF performance was better.
I think the original question could be a bit broader, as I consider the M-system and a full Canon mirrorless strategy to be two different things.
For the M-system I would like to see the following in the next body (which might be a higher end M in addition to the M3 and M10):
built-in EVF, but still with a 90° up-tilt (can sacrifice the built-in flash if necessary, but EVF centred over lens is better for balance)
built-in GPS or support for the GP-E2 (but built-in might kill the battery, so this is optional)
very slightly larger body or at least slightly different back button layout (my palm often hits the menu button accidentally)
vertical grip option with support for two batteries
use the same battery size as M3, please
more pronounced back focus button (I use back button focus about 90% of the time and the one I can assign on the M3 is hard to locate by touch, especially with gloves)
better than 4 frames RAW buffer (unlimited would be ideal)
better than 4 frames per second continuous shooting (7 frames would be better)
way faster autofocus
Full-frame Canon Mirrorless System
I think there needs to be a larger sensor mirrorless option in addition to the APS-C bodies. I don’t think the EF-M mount can be used with a 36×24 full-frame sensor (based on my measurements), but it could support an APS-H sensor (1.5x the area of APS-C) which would be acceptable in a body the size of the M3 (not sure the current EF-M lenses project a large enough image circle to cover APS-H though). (Canon actually just announced a 250 megapixel APS-H sensor, so we know they are working on this size.) When Canon introduces a full-frame mirrorless body, it probably won’t be in the M series and it probably won’t have an EF-M mount.
I would still be very interested in a full-frame Canon mirrorless system as a compliment to the compact and portable M-system. The market leader here is obviously the Sony A7 series, so really Canon just needs to be competitive with those bodies.
Full-frame sensor body wish list.
Take all the advantages of any of the 1Dx or 5D bodies and remove the mirror, use an EVF, and that ought to about do it.
EF-M mount, if possible, otherwise standard EF mount
If a new mount with a smaller back flange distance than EF and a larger diameter than the EF-M mount is introduced, then it better support EF lenses at full-speed via an adaptor (Canon seems to be going fast and furious on the EF lens upgrade front so I’m not too worried about this one. I would actually be shocked if a third mount was introduced, but the EF mirror box space is such a waste).
Autofocus seems to be the sticking point technology-wise. Getting mirrorless autofocus to be as fast as an SLR, even in low light and with fast moving subjects will be the Holy Grail. Reduce blackout times as well and SLRs will lose almost any advantage. There are times when an optical view-finder has advantages, but for 99% of my shooting, an accurate EVF and Live View are more useable.
Why Mirrorless?
Some people ask, why make a mirrorless camera that just replicates the best of what SLRs already do (and have been doing for a long time)? The inverse question is the answer: why, if you could build a digital sensor mirrorless body with all the features of current SLRs (minus OVF) would you bother making a body with a mirror box and all the mechanics, noise, vibration, size, etc., that come with it? DSLRs only have mirrors because film SLRs had them, no other reason. Its time to move on.
I am not quite sure how it happened, but at some point I started a knife collection. Even when I was a kid and just had my first Victorinox Swiss Army Knife, I appreciated that a knife is not just a crude tool of pure utility but has historical and aesthetic components as well.
Like any tool, a knife can be just a sharpened hunk of metal, in which case its form likely interferes with its function, or it can be a perfect embodiment of its intended purpose, in which case its form and function are likely perfectly cohesive and nothing can be added or taken away from the knife to improve its performance.
I am not a fan of baroque knives with aesthetic design elements added for no other reason than to show of the supposed skill of the maker. I prefer knives in which function dictates form. The knives which draw my attention tend to be simpler in appearance, though their form has been honed by a hundred or a thousand years of cultural development. Often these knives, such as those from Scandinavia, are the product of a culture where resources were scarce, needs simple, and survival the paramount motivator.
I have my share of folding multi-tools (Victorinox and Leatherman mostly), but those I do not categorize as knives in the purest sense of the word. To me they are miniature toolboxes and have there place for repair and maintenance of mechanical gear (bikes, boats, skis, etc.) In other situations (skinning, cutting, chopping, carving), a simple rigid blade and handle is usually the best tool for the job. In this post I am showcasing just a few of these fixed-blade knives.
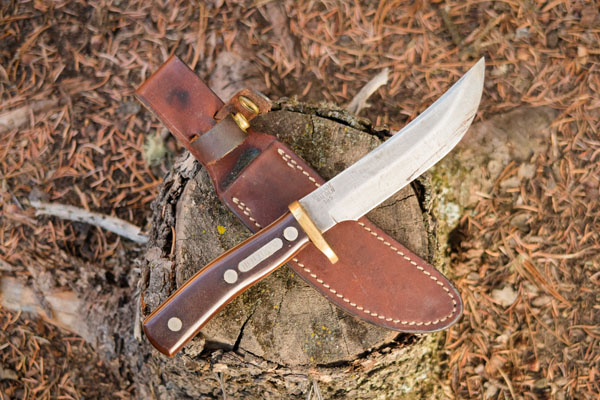
Schrade Walden 165 Old Timer Hunting Knife
My dad brought out this old knife a few days ago. I remember it fondly as the camp knife in our car-camping kitchen outfit from when I was a kid. Our family has never hunted and we wouldn’t carry something this big on backcountry trips, but it was always there in our car-camping gear. Looking at it after I all these years I thought to myself, “This knife has cut a lot of potatoes!”
My dad said he remembers buying it at the “old hardware store”, which probably means the local hardware store on the West Side of Bowness, near where I grew up. (Remember local hardware stores, before the days of Home Depot? If you do you might now be considered old by a vast majority of the population.) According to information I found on BladeForums, non-serialized versions of this knife, with the stamp on the right-hand side of the blade and the sheath strap around the handle, date from around 1973 or later. This makes sense considering my parent’s moved into their house in the spring of 1974 — the year I was born.
The knife is in great shape and still incredibly sharp. The sheath is very well made and in good condition too.
This knife could still be a regular “user”, but for now this 40+ year-old knife is hanging on the wall of our cabin as a collector’s item. Maybe I will use it every once in a while to cut some potatoes.
[table th=”0″] Item,Schrade Walden 165 Old Timer (circa 1974) Price,US$60 to US$120 on eBay Pros,”solid blade, nice comfortable handle shape, heavy-duty sheath” Cons,”heavy (full tang), and not so great in cold weather” Summary,”A nice collector’s knife and still a great heavy-duty performer.” Rating,[rating=4]
[/table]
Lapin Puukko Whittling Knife
I got this compact little fixed-blade Finnish knife a few years ago from Bushcraft Canada. The blade size and shape is great for detail work, but a bit small for general use. However, the blade is incredibly sharp and durable and the handle has a great shape which fits perfectly in my medium- to large-sized hand. I wish I had more time to work with this knife.
[table th=”0″] Item,Lapin Puukko Whittling Knife Price,C$99 Pros,”amazingly sharp blade, ground to a fine point for detailed whittling, comfortably shaped handle” Cons,”handle really only allows one holding position” Summary,”A super-sharp whittling knife, but not a great option for an all-around knife.” Availability,Bushcraft Canada Rating,[rating=4]
[/table]
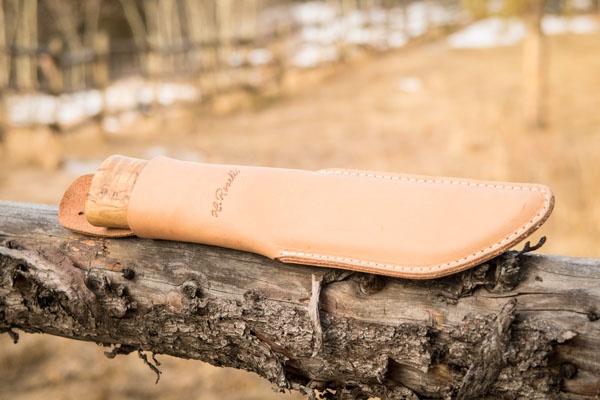
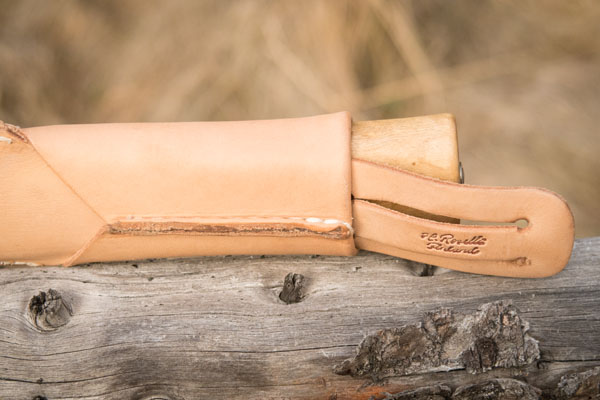
Roselli Leuku
Another Bushcraft Canada purchase. This knife is at the opposite end of the spectrum from the Lapin Puukko Whittling Knife. This is a big 10″ knife, with a fat 5 3/8″ blade. (Roselli make an even larger version with a 7 1/4″ blade!)
The leuku is the traditional knife of the Sami people who live in northern Scandinavia. In much of the traditional Sami territory, trees, if there are any, are not very large. This knife fills the role of axe, hunting knife, and all-around tool. The big handle is good for use with gloves.
I have been carrying mine around our property a lot this winter. We had a snowstorm in September that bent or broke a lot of small aspen. One or two light chops with this knife and a trail is easily cleared. I also cut and dressed some small teepee poles in very little time with this knife. Where a smaller knife would require a lot of force to do the same work, the inertia of the weighty leuku does most of the work once the knife is moving. Delicate work can be performed by choking up and holding the knife by the spine. When chopping, let the knife slide forward so you are gripping the flared pommel/butt with just your pointing and index fingers and your thumb.
I like Roselli’s unique sheath configuration — very simple and secure. As with most Scandinavian knife sheaths, the leuku sits deep in the sheath and is held with simple friction. No fumbling with snaps with gloved hands in -30°C, and the knife is not going to just fall out on its own — an important consideration in a traditional culture where your knife is your only tool and the key to survival in many situations.
[table th=”0″] Item,Roselli Leuku Price,C$150 Pros,”solid blade, oval cross-section symmetrical handle accommodates multiple holding positions, nice sheath” Cons,”none” Summary,”A big knife. Good for chopping or limbing small trees. Great with gloves and in cold weather.” Availability,Bushcraft Canada Rating,[rating=5]
[/table]
Prior to the recent Photokina in Germany there were many rumours about what products Canon might introduce. On the DSLR front, there was much expectation for a new EOS 7D Mark II, and that wish was granted. I think the surprise of the show (simply because nobody was expecting it before-hand) was the the introduction of the PowerShot G7 X. Following the discussions in camera forums after its introduction, it is clear that the high-end compact is an important camera segment and that this camera in particular may have been the most important release by Canon this year.
The high-end compact camera segment sits somewhere below interchangeable mirrorless cameras and above traditional small-sensor point-and-shoots. I have been shooting with Canon S-series cameras for years (S80, S90, S110) and would describe that series as being in the high-end compact segment. They provide full manual control, have fast, wide lenses, and allow you to save raw files. Sony raised the bar several years ago when they introduced the the famous RX100 with it’s large 1 inch-type sensor. I considered the RX100 when I bought my S110 two years ago, but at more than double the price, I wasn’t sure if it was a piece of equipment I wanted to carry with me on canoe trips, backpacking, skiing, or on slightly dodgy travel forays. I went with the S110 and love the pictures and usability of that camera (I also have an EOS M so I have a larger sensor and better lenses when I need them and still in a fairly compact package — no amateur needs a mirrored DSLRs).
When the G7 X was introduced I was immediately intrigued. For the past two or three years the point-and-shoot category has been dying a speedy death due to competition from smartphones. However, for me there will probably always be a place for a quality manual compact camera. Unless the physics of the universe are altered, smartphones will just never a have room for a fast zoom lens and a sensor larger than the head of a pin. (Don’t get me wrong, I love the camera in my iPhone 5 — not to mention the 5S and 6-series — especially with the addition of more manual control in iOS 8.)
The G7X is clearly designed to compete head-to-head with the latest edition of the the RX100 III. The rumour is that it even uses uses the same Sony-built 20.2 megapixel sensor. Couple that large sensor, with an amazing Canon lens with image stabilization, the DiG!C 6 processor with 6-frames per second shooting capability, a tilting screen, and cram all that into a body that is not much larger than the S120, and you are going to have a winner.
Of course I am not the first to review the G7 X, so I won’t cover what others have already said. Instead, I’ll highlight some of the key differences compared to the RX100 (good and bad, based on my very limited hands-on experience) and note some of my favourite features.
The first thing you will notice when handling the the G7 X is that clicky-ness of the large front control ring. While some may enjoy the positive detent action of the ring, forget about using this noise-maker while shooting video. I feel that Canon could have made the click action less aggressive. Based on my experience with the S110, I doubt it will become smoother over time. This may be a deal breaker for some potential buyers. The RX100 front control ring is smooth as butter in comparison. I don’t shoot video, and like other reviewers I prefer some positive detent action in the control ring.
The G7 X does not have an electronic view-finder (EVF). The RX100 does and it seems pretty darn nice. Again, for some buyers this will be the deciding factor. I haven’t looked through a viewfinder in 5 years. I do 90% of my shooting outside (70% of that around water or on snow). While an EVF would be brighter than a naked LCD screen, especially in daylight conditions, squinting through a little hole taking pictures is not my kind of fun, so the EVF is more of a nice-to-have than an important feature for me.
The G7 X screen tilts up 180°. This is great for low angle shots and (god forbid) selfies. I keep wanting it to tilt down too, so I can compose while holding the camera up high, but it doesn’t. I’ll get over it. The RX100 screen tilts both up and down. This is great, though the Canon hinge mechanism is much, much, much simpler and seems less likely to be damaged. The G7 X also has a touchscreen (the RX 100 does not). Try entering a Wifi password with a dial versus the touchscreen keyboard and you’ll realize how valuable this feature is.
The G7 X includes an exposure compensation dial under the mode dial. I love this feature when shooting in aperture or shutter priority modes. The S-series has always had an exposure compensation button which gave one-click access to this feature. The RX100 has a button as well. A dedicated dial is even better though.
By all accounts the Canon lens on the G7 X is fantastic, and my own tests so far confirm this. It has a longer zoom range that the RX100, extending from an equivalent 24 mm to 100 mm. The aperture varies from ƒ/1.8 to ƒ/2.8 depending on the focal length which is nice and fast even at 100 mm. Variable aperture lenses are not all created equal. Sometimes they stop down to smaller apertures fairly early in the zoom range. Not so with the G7 X. I saw a chart, which of course I cannot find now, which compares the maximum equivalent apertures at various focal lengths across the high-end compact segment — the G7 X is the clear winner in this spec compared to the RX100. Couple the zoom range and the fast aperture with image stabilization and the low-noise CMOS sensor and you get great photos even in very low light situations.
[table th=”1″] Zoom range and maximum aperture 24 mm,f/1.8 35 mm,f/2.2 50 mm,f/2.5 85 mm,f/2.8
[/table]
For me the deciding factor when choosing between the RX100 III and the G7 X was Canon’s superior interface usability. Canon’s button and menu system are highly refined. Everything is there when you need it and hidden when you don’t. Button and front control ring functions are highly customizable. Even the icons shown on the settings screen can be moved or hidden (e.g., I never change the compression level so I don’t need to see that setting, ever). While I don’t have a tonne of experience with other camera brands, I have used some that have downright atrocious menu systems. The Rx100 seems very customizable, but Canon is consistently reviewed as having some of the best ergonomics and usability. The touchscreen helps in this regard. And, the fact is, I can pick up any Canon camera and use it’s most basic or most advanced features with out any sort of learning curve. I want shooting to be fun and intuitive. If something is annoying, I won’t use it. End of story.
I can highly recommend the Canon G7 X. You really should also look at the Sony RX100 III. Sony pioneered the 1 inch-type sensor high-end compact segment and it is about time that Canon stepped into the ring. The G7 X and RX100 are both fully-capable manual cameras. If this segment is for you and you are in the market for a new camera, simply buy the one that feels the best in your hands and go out there and shoot something.
Summary
[table th=”0″] Item,Canon PowerShot G7 X Price,C$750 Pros,”wide and fast lens, large sensor, compact body, customizable, touchscreen, ergonomics” Cons,”aggressive detents in front control dial, lack of EVF” Summary,”Finally, a competitor to Sony’s venerable Rx100 series, with an even better lens. If you are a serious amateur looking for a compact manual camera, this could be the one. Long live high-end compacts.” Rating,[rating=5]
[/table]
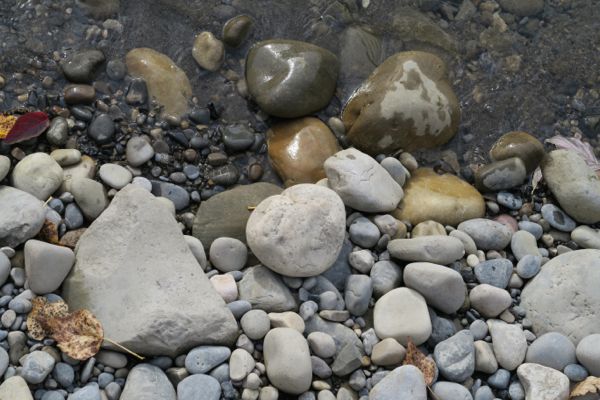
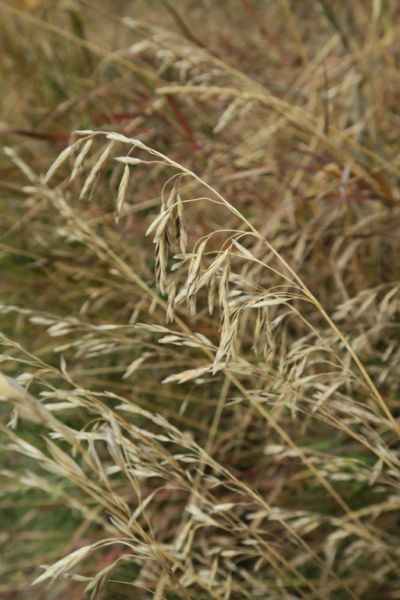
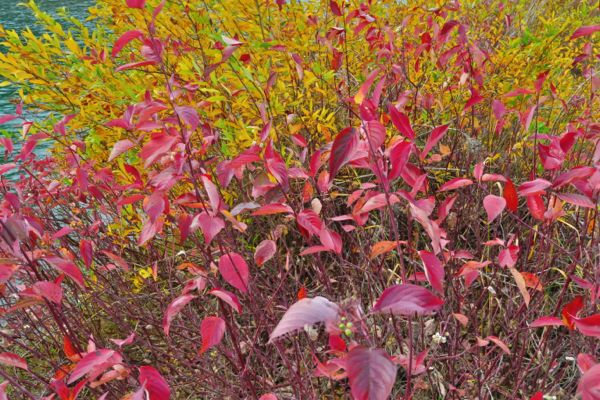
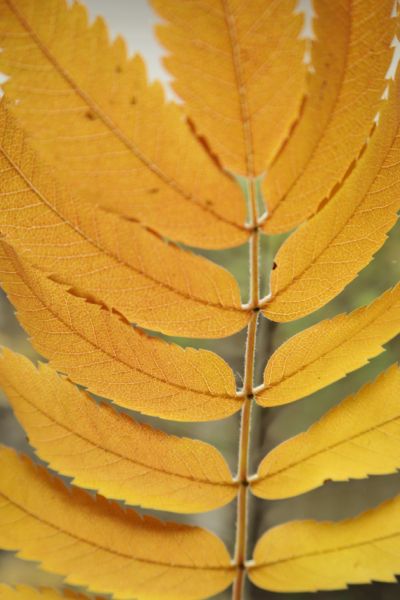
Samples
Some sample images taken over the first few days with the G7 X.
Manual this, auto that
I think the portraits, hands, coffee, rocks, and Rocky Mountain Ash leaves were shot in full manual mode with auto-focus. The flower vase was shot in manual mode with manual focus and focus bracketing. The grass and berries were shot full manual with manual focus. The red leaf bush in front of the gold leaf bush was shot with the in-camera HDR mode — some ghosting is visible due to branches moving in the wind.
ISO
Most images were shot between 125 and 320 ISO. The coffee and leaves on a wooden table were shot at 1600 ISO. The flower vase was shot at 6400 ISO.
White-balance
The hands and the first portrait were shot with “cloudy” white-balance. The coffee through to the last portrait were shot with auto white-balance (I would prefer most of them to be a bit warmer). The ash leaves and flower vase were shot with daylight white-balance (even though they were not taken in direct sunlight).
JPEG
Though I shot RAW+JPEG, these images are all taken straight from the JPEG versions imported into iPhoto (except for the coffee shot which had some manual adjustments applied to recover some shadow detail and tweak the colour balance).
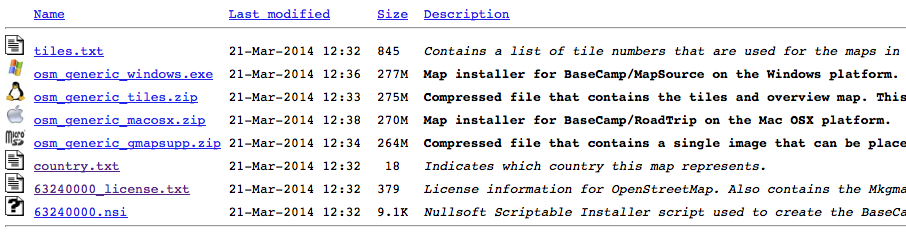
I am a big fan of Open Street Map (“OSM”) Garmin-compatible maps available from garmin.openstreetmap.nl. Whenever I travel, I download OSM maps of where I am going and install them on my GPS receiver.
There is one problem with OSM Garmin-compatible maps: you can only view one OSM map at a time in BaseCamp or on your device. This is because all OSM map files share the same map name and ID. (This is probably a result of how the maps are auto generated, especially ad hoc views which allow you to create a custom map by manually selecting tile segments.)
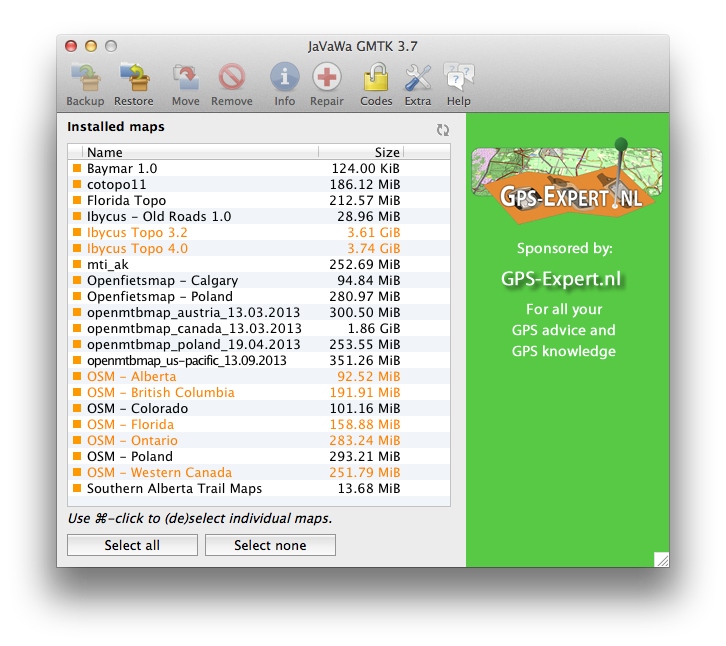
The excellent cross-platform JaVaWa GMTK (Garmin Map Toolkit) to the rescue. With JaVaWa GMTK you can perform a lot of map management tasks, including changing of map name and ID properties.
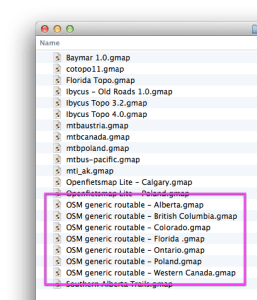
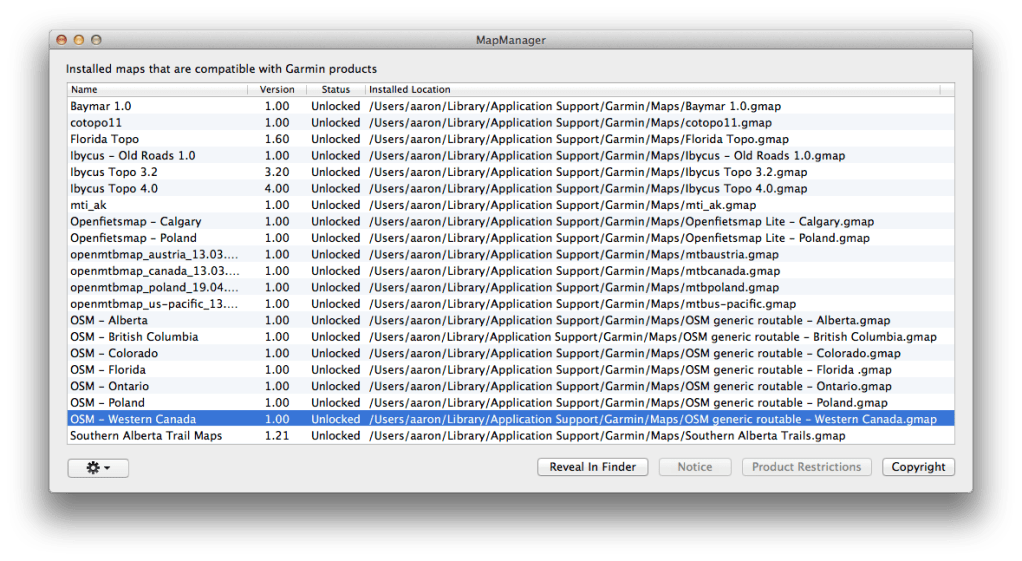
As you can see in the following screenshot, I have multiple OSM maps installed on my computer hard drive (I have renamed each of the .gmap files so I can have several in Garmin’s Maps directory). However, only the first listed OSM file would normally be available in MapManager, MapInstall, and BaseCamp.
Finder – Garmin Maps Folder
MapManager – Before
The process for changing a map’s name and ID is pretty straightforward. Make sure you quit BaseCamp/MapSource and MapManager first. I am doing this on a Mac, but it should be similar on Windows.
Launch JaVaWa GMTK (on OS X 10.8 and later, right-click on the JaVaW MapConverter application icon the first time and choose the “Open” menu item — this will ask you if you want to bypass OS X’s developer signing restrictions — click the “Open” button).
JaVaWa GMTK will scan your installed maps. (On OS X, map files used by BaseCamp are installed in the directory /Users/[username]/Library/Application Support/Garmin/Maps. Any problem maps will be highlighted in orange or red.
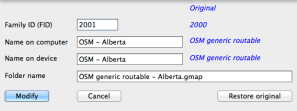
Click the map you want to edit and then click “Extras” in the toolbar and choose “Change map name and ID” from the drop down menu.
In the dialog, set a unique Family ID (this must be unique across all your maps — GMTK will warn you if you enter a duplicate ID), and descriptive names to be displayed in BaseCamp and on your GPS receiver.
Click the “Modify” button to save your changes.
That is it. Repeat steps 4 to 6 with the rest of your OSM maps. Quit JaVaWa GMTK and launch MapManager, BaseCamp, or MapInstall. All of the OSM maps will be available for viewing on your computer and installing on your GPS receiver.
For some legacy reason, the file formats for Garmin-compatible maps differs between Windows and Mac OS X. Even Garmin’s own Mac BaseCamp application does not support Windows’ BaseCamp maps.
There are two methods for converting Windows Garmin-compatible maps to BaseCamp for Mac: 1) on a Windows XP or later computer, or 2) on a Mac.
On a Windows XP or later computer
If you have maps on a Windows computer already, and would like to move them to a Mac, then you are in luck. Simply download and install Garmin’s MapConverter on your Windows computer. Apparently it can convert your maps to the Mac format.
On a Mac
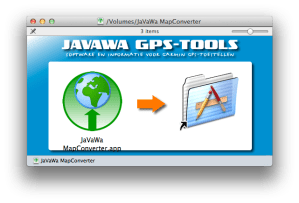
If you only have a Mac computer, there are two free utilities available to that convert Windows Garmin-compatible maps to the Mac BaseCamp-compatible format: JaVaWa MapConverter and Gmapibuilder. Both have a graphical user interface, but I found JaVaWa MapConverter easier to use. You will of course need Java installed on your Mac, which it may not be by default.
I use the Ibycus Topo Canada map as my main map for off-the-beaten-path adventures. Because this is a very large map, Ibycus does not distribute the files directly. You need to download a copy using BitTorrent. I was able to find a copy of version Ibycus 3.2 for Mac, but I could only ever find the Windows version of Ibycus 4.0. Today, I was able to convert Ibycus 4.0 to Mac .gmap format, and I thought I would use that as an example of converting Garmin Windows maps for use on a Mac. (Caveat: since JaVaWa is a free tool and not supported by Garmin, it is not guaranteed to work, and I have no idea how it works with locked maps). I will assume you have your Windows map files already.
Launch JaVaWa MapConverter (on OS X 10.8 and later, right-click on the JaVaW MapConverter application icon the first time and choose the “Open” menu item — this will ask if you want to bypass OS X’s developer signing restrictions — click the “Open” button).
Ibycus Topo 4.0 is downloaded as an ISO file (this is a DVD disk image). Double clicking the ISO file will mount a new disk on your computer.
Copy the entire contents of the Ibycus Topo 4.0 disk image to folder on your hard drive — you are going to move some files around and the disk image is read-only.
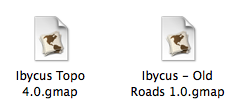
Move the following files from the folder you created in step 3 and into the “imgs” folder.
Ibycus Topo 4.0.img
Ibycus Topo 4.0.MDX
Ibycus Topo 4.0.TDB
Now, drag the “img” folder onto the JaVaWa MapConverter window.
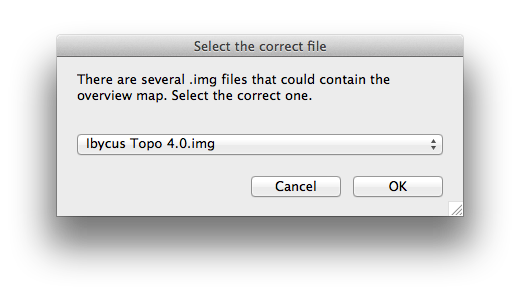
When asked to select the “.img” file, choose “Ibycus Topo 4.0.img” from the drop down menu.
JaVaWa MapConverter should now be ready to convert the file. Click the “Convert” button and choose where to save the .gmap file.
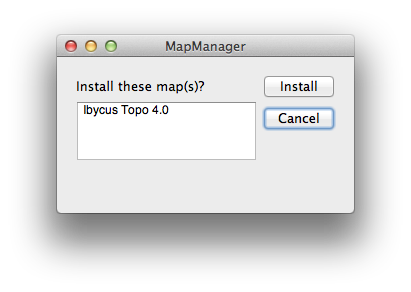
After JaVaWa MapConverter is finished, in the finder, go to the saved .gmap file. Double-clicking it will open Garmin’s MapManager application which will ask you if you want to install the map. Click “Install”.
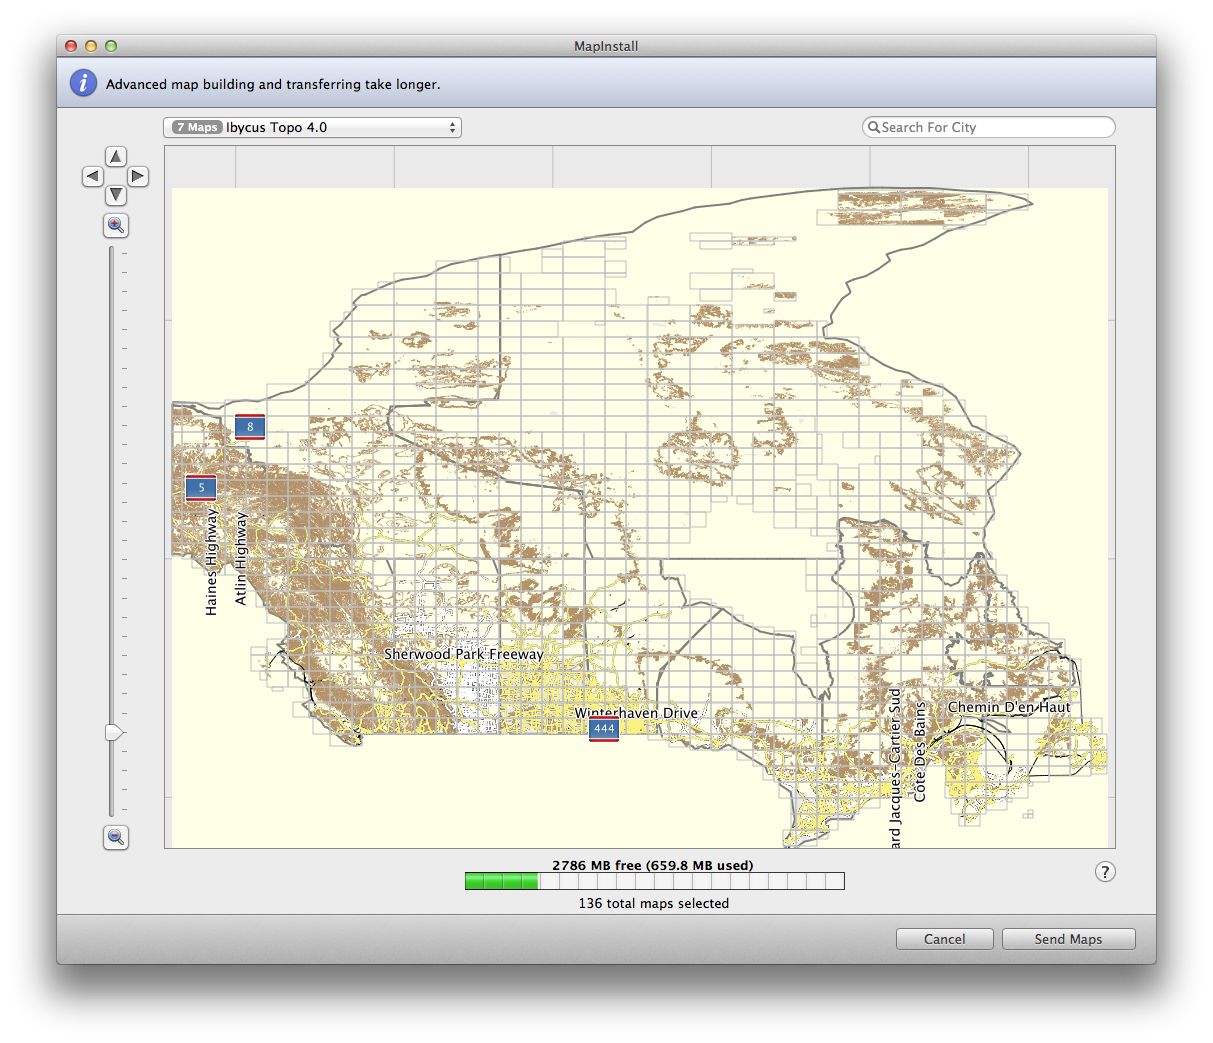
You can now relaunch BaseCamp and use the map. You can also run Garmin’s Map Install application to install Ibycus Topo 4.0 map segments onto your GPS receiver.
You can now eject the disk image mounted in step 3 and delete the folder created in step 4. You might want to keep the “IbycusTopo40.iso” and the “Ibycus Topo 4.0.gmap” files for later.
There is another map on the ISO that you might want to convert as well. Repeat steps 2 through 10, this time with the files named “Ibycus – Old Roads 1.0.img”, “Ibycus – Old Roads 1.0.MDX”, and “Ibycus – Old Roads 1.0.TDB”. This Map contains old roads that were removed from the Government of Canada datasets between versions of Ibycus Topo. Personally I don’t have a need for the “old roads” map, but it is there if you want it.
Depending on the source of the Windows Garmin map, the file and folder layout may differ slightly. As the JaVaWa MapConverter documentation states, it is simply critical that the .tdb and .img files be in the same location. The .mdx and other files are optional, but if they are provided, JaVaWa MapConverter will use them. For JaVaWa MapConverter all the files need to be in a single folder. Gmapibuilder seems more flexible — you can locate the required files individually.
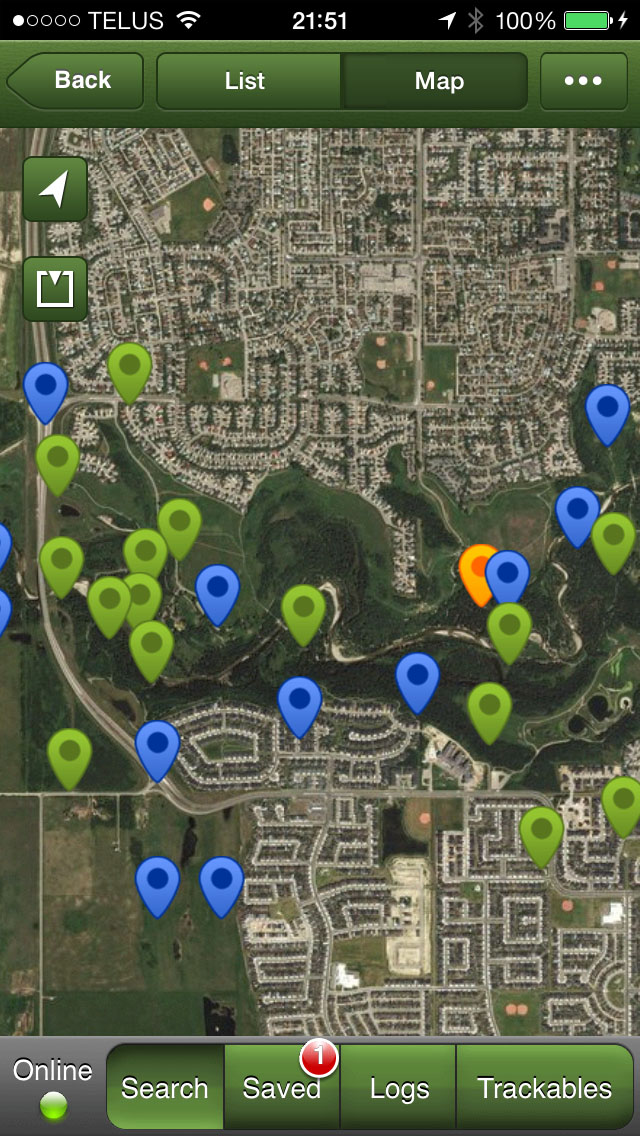
Today I went for a walk in at Fish Creek Provincial Park with a friend and I brought my GPS receiver (GPSr) along. I almost always run my GPSr when walking, cycling, or canoeing — even in familiar areas. My friend was curious so I shared my thoughts on GPS, the benefits of non-commercial maps and my enthusiasm for geocaching, geotagging, navigation, athletic training, etc.
I wanted to share today’s GPS track and data with my friend. I thought I would make it even more useful by sharing it here, as I think it is a good explanation of why I like using a GPS to record my adventures (no matter how close-to-home or seemingly insignificant).
Cheap GPS
When I first bought my GPS, I made it a goal not to pay for maps. I had three reasons for this:
commercial maps are expensive (and, from what I have heard, often not very good quality);
I believe that map data from government sources should be freely available to citizens (i.e., it was already paid for with taxes);
Open Source maps, updated and prepared by millions of people, are better than most commercial maps, and more up-to-date than most government data.
Free and Almost Free Maps
I have a Garmin eTrex 30 GPSr and use the following free maps:
Open Street Map (global Open Source map data, compiled for Garmin devices, generic and cycling versions)
Ibycus Topo (complete Canadian topographical map based on NRC data)
Other free topo maps for countries, states, and cities as found at gpsfiledepot.com
I also subscribe to openmtbmap.org because I think the operator does a worthwhile service packaging up OpenStreetMap based mountain biking maps.
My wife just complete a canoe trip along the Gulf coast in the Florida’s Everglades National Park. Before she left I found a free Florida topographic map that contained depth soundings for the area she was going to be in. Just today I discover OpenSeaMap, an open source initiative to provide free global nautical charts — they have Garmin downloads, but I haven’t tried them out yet. Looks interesting.
Of course, each map source provides different features. There is no ideal map — the best map to use will depend on your activity.
(Not strictly GPS related, but I today I also discovered OpenWeatherMap — an Open Source weather mapping initiative. See the embedded sample at the bottom of this post. Just yesterday I completed the build of a Phidgets-based weather station. I will have to look at OpenWeatherMap in more depth.)
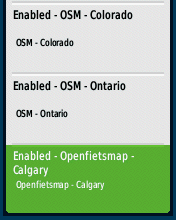
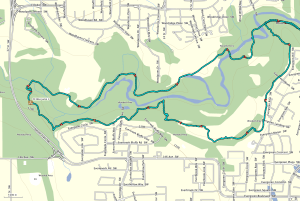
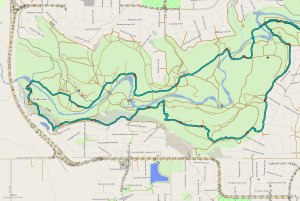
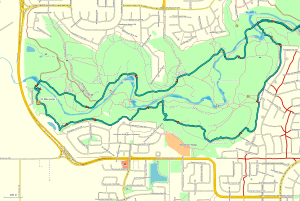
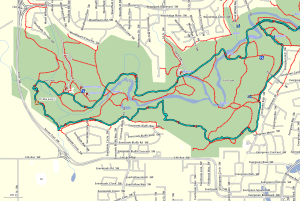
Global Base Map
Ibycus Topo 3.2
OpenMTB Map
OSM Cycle Map
OSM Generic
Southern Alberta Tail Maps
Track Data
As you can see in the above screen shots, once you get home it is easy to review the GPS track (recording of where you went with the GPSr), but what else can you do with such a track? Well, I like to take a look at the speed and elevation plots of the track just to get a sense of of my performance, especially after a bike ride. I don’t use my GPSr as a religious training tool, though a lot of athletes do. I also use the track data to geotag any photos I take on my adventures. I use PhotoLinker to merge my track location data with any un-geotagged photos. In the case of today’s walk, I only shot a few photos with my iPhone, so those were already geotagged by the camera.
Here is the track data from today’s walk:
GPX (GPS Exchange format — compatible with most GPS receivers and software)
(Note: Below, the second spike in the Speed graph up to 8 km/h, is me sliding on my butt down a frozen, mossy, leaf covered hill in the trees then coming to a sudden stop with my feet against a log just before I would have hit a tree. The dangers of walking on icy, north facing trails never ends. The subsequent lull in movement for 15 minutes is my GPSr sitting idle under the aforementioned log while my friend and I continued our walk, unaware that the GPSr had been ripped off my belt. When I realized it was missing we knew exactly where to look for it. Previously, I always carried my GPSr in a pocket or in my pack, and I will do so from now on. The first spike might be an error, because I don’t ever remember running that fast — and I only fell down a hill once.)
Track Points
Speed
Elevation
Geocaching
Geocaching is a great way to get familiar with a new GPSr. If you expect your GPSr to save your butt on a glacier in a whiteout, then its use better be like second-nature to you. Geocaching is also a fun hobby in its own right. When I go looking for geocaches I always learn something new about an area — wether it is half-way around the globe or in my own back yard — even if I don’t actually find the cache I am looking for (which happens quite often). Today, I didn’t have geocaches in Fish Creek Park loaded on my GPSr, so I just used the Geocaching iOS app, which is a great place to start if you just want to try out geocaching but don’t own a dedicated GPSr.