Welcome to my on-line Photography Museum. I do not strictly classify myself as a collector of photographic equipment, but as an avid photographer I have amassed a considerable collection of gear since becoming serious about photography around 1991. I thought it would be fun to document this gear and share its history.
I love functional gear and don’t hesitate to acquire something if I will use it a lot. I do feel guilty if I buy something and it just doesn’t get used sufficiently. Thus I am quite spare in my purchases.
For most of my photographic journey taking pictures has been a hobby. The return on my investment comes in the form of satisfaction of creating images. Lacking financial justification I have avoided buying full-on professional cameras for the most part.
Lenses are another matter and I don’t mind paying for good quality glass, though I often put a higher priority on compactness and portability than on outright performance (try hiking or travelling with a suite of ƒ/2.8 zoom lenses and you’ll understand).
I’ve been a fan of the Canon EOS M-series since it was introduced in 2012. After several iterations the camera bodies and system have come a long way, but in some respects still lag behind competitors.
Cautious Optimism
When the EOS M5 was announced September 15, 2016, I was intrigued, but did not instantly consider an upgrade from the M3. I mostly shoot landscape photographs. The EOS M5 sensor size and quality is essentially unchanged form the M3 and while the addition of dual-pixel (phase-detection) auto-focus (DPAF) to the M5 is fantastic I wasn’t sure if it would benefit me.
One of the best (and for some photographers, most annoying) features of the M3 is the optional/detachable tilting electronic viewfinder (EVF). I spent many years shooting exclusively with my iPhone and the Canon PowerShot S-series of compact cameras. When I started shooting with the original EOS M I did not miss a viewfinder at all, and, unlike many, had no problem shooting exclusively with the fixed rear screen. Thus, I felt the M3 gave me that best of both worlds: an ultra-compact inter-changeable lens camera (ILC) and the ability use a viewfinder when needed. I cannot understate how amazing the tilting function of the EVF is on the M3. It works so wonderfully at chest-level, when using a compact tripod, or for shooting ground-level landscapes and macros.
While I was looking forward to a more substantial grip on the M5 (I do occasionally shoot with larger EF lenses via the EF to EF-M adaptor), I was concerned about the added bulk of the built-in EVF and the lack of EVF tilting.
Canon EOS M3 w/ EVF vs. Canon EOS M5 (Front)
The other area of concern turned out to be a non-issue exacerbated by poor reviews. The M3 rear screen tilts up 180 degrees and down 90 degrees. While I have no interest in selfies, having a screen that tilts both up (for use on small tripods, at chest level, and low angle) and down (for shooting high-angles) is now essential for me. On the M5 the screen now tilts down 180 degrees, but every review (while quick to point out the selfie compatibility and video-blogger incompatibility of this camera) omitted wether or not the screen tilted up at all. A screen that does not tilt up seems like nonsense, but I thought maybe the EVF eyepiece interferes with tilting up in someway. This would have been a deal breaker for me. Alas, the M5 rear screen does tilt up 85 degrees (90 degrees would be better but the EVF would then be in the way a bit).
Wishes Granted
In early 2016, a thread on canonrumors.com asked, “What Do You Want to See in the EOS M System?”
Having a very compact option already in the form of the M3, I was most interested in the M-series including a beefier premier body that borrowed more form Canon’s enthusiast DSLR bodies.
Let’s review my wish-list from last year and see if the M5 delivers.
built-in EVF — check
…with 90 degree tilt — nope, but I didn’t really think it would happen
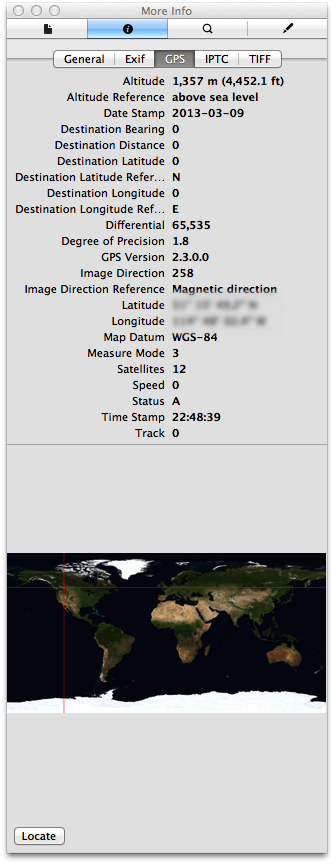
built-in GPS or support for the GP-E2 (but built-in might kill the battery, so this is optional) — no
very slightly larger body — check
…at least slightly different back button layout (my palm often hits the menu button accidentally) — better and definitely more intuitive, but my palm still presses the menu button when holding larger lenses
vertical grip option with support for two batteries — nope, and this is still one of my major wish list items since I plan to use this body with a longer lens
use the same battery size as M3, please — check, yeah!
more pronounced back focus button (I use back button focus about 90% of the time and the one I can assign on the M3 is hard to locate by touch, especially with gloves) — better, the thumb-grip is more pronounced and the still-flush buttons are easier to locate
better than 4 frames RAW buffer (unlimited would be ideal) — check, 17 RAW or 26 large JPEG shots.
better than 4 frames per second continuous shooting (7 frames would be better) — check, 9 FPS or 7 FPS with Servo-AF
way faster autofocus — check, DPAF is a dream compared to the old sensor and on par with the Canon 80D DLSR from which it is borrowed
There were a few things I didn’t like about the M3 that I wanted changed:
the EVF contacts in the hotshoe broke support for the GP-E2 GPS receiver (doesn’t even work attached via USB) — GP-E2 mounts on the M5 but is still not recognized by the camera
button function assignment was not as flexible as it should be — much improved, almost any button can have any assignment (except the * button which is either exposure lock or focus in several different combinations along with the main shutter button). The multi-function top control dial and DIAL FUNC. button borrowed from the G-series and S-series is a brilliant addition.
not all menu items were saved in the Custom shooting mode, making it pretty useless — fixed, all shooting menu settings and anything added to MyMenu, including Custom Function items, can be saved in either C1 or C2.
autofocus with the screen magnified always switched the display to a zoomed out view — fixed
Canon EOS M5 w/ Canon EF-M 11-22mm 1:4-5.6 IS STM (Back)
Big Brother Is Watching
Canon is not a company with a reputation for pandering to user requests. They are firmly entrenched as the professional DSLR
market leader (particularly in sports and editorial segments) and seem loathe to make radical changes to there camera body lines for fear of alienating their user base or, worse, messing up their profit margins. This is the common opinion in the blogosphere anyway. In some respects I agree, but am a little more lenient.
While Canon does seem to be a little cautious, they have actually been iterating quite quickly for the past three years. Proven features from pro-/enthusiast-DLSR bodies are trickling down the line and innovative functions from lower camera lines are being adopted by higher-end bodies. To me, the M-series is the middle ground where proven DSLR tech and innovations like touch-UI or the multi-function control dial can merge.
Canon don’t often offer firmware updates with feature additions, unlike, for example, Fujifilm. Canon firmware updates usually address performance issues (like the update to the original M which significantly improved AF). As cameras continue to be more about software choices though I can see this changing for Canon.
The fact that 11 of my fourteen wish-list and gripe-list items have been addressed in the EOS M5 show that Canon is, in some way, listening to its customers. (Also, none of my favourite features were removed. Yeah!) The three items that were not address (built-in GPS, tilting EVF, and vertical grip) are mostly forgivable omissions. I’d really like the grip, but understand the market for this accessory might not be substantial.
Auto-focus Overhaul
The DPAF system is a welcome if obvious improvement on the M5. The flagship M-body should always have Canon’s flagship live-view technology. Full-stop.
When shooting with the EVF the M5 allows you to use the touchscreen as a touch-pad control of the autofocus point (Touch & Drag AF). You can choose to use the full screen as the touch-pad, half the screen, or any quadrant. You can also choose to select the focus point via absolute position (like touching a smart phone display) or by relative position (like a laptop trackpad). I use the right-half of the screen in absolute mode and it is brilliant.
The M5’s subject recognition and tracking is pretty good, but Touch & Drag AF makes it so much better we will soon wonder how we ever shot without it. At the moment it is class leading. (Canon’s touchscreen adoption has always been one of the primary reasons I have chosen their MILC and compact cameras over Sony’s).
The M5’s improved auto-focus system (especially with adaptor-mounts lenses) combined with the EVF and easier to hold body led me to bight the bullet and acquire a Tamron SP 150-600mm f/5-6.3 Di VC USD G2 super-telephoto zoom lens. I’ve wanted a lens in this class for a while but it never made sense on the smaller M-Series bodies. With he M3 I could really only wrap two fingers around the grip while my index finger was on the shutter button. With the M5 I can wrap three fingers around the grip — a big improvement that facilitates hand-holding this long lens.
The M5’s increased FPS and shot buffer also facilitate more action oriented shooting.
Other Noteworthy (Minor) Features
Bluetooth
Canon’s smartphone integration has always been okay (better than competitors I understand) but not brilliant. The inclusion of Bluetooth LE and ability to use the iPhone as a wireless remote control is a nice addition to the M5. The Bluetooth remote is much faster than initiating a Wifi connection and even faster than digging my wireless remote out of the camera bag.
Shooting Display Settings
I don’t do a lot of studio shooting these days, and when I do I use my Speedlites 90% of the time, but occasionally I need to use my studio strobe lights. With the M3 it was difficult to use strobes because, while the exposure was set to match the flash, composing and focusing used the much dimmer modelling lights and the screen/viewfinder image appeared very dim. With optical viewfinder (OVF) cameras the viewfinder is always as bright as it can be. The M5’s “Exposure simulation” setting allows you to turn of screen dimming with slow shutter speeds or smaller apertures so the screen/viewfinder remains bright under the modelling lights.
The M5 EVF shows a nice combination of information. It is not huge though and with glasses on I struggle to see the corners of the image in the EVF. Luckily the “VF display format” setting allows you to shrink the sensor image display by about 80% for greater eye relief. (The side shooting info icons stays in the same absolute position when the image display is shrunk, now displayed on black for better contrast. The bottom shooting exposure data is always displayed on a black bar at the bottom of the EVF.) It’s little customizations like this that make an EVF more flexible compared to an OVF.
Auto ISO
The M5 is the first in the M-series to include Auto ISO. The control of this feature is limited however, providing only the ability to set the maximum automatic ISO. This is very far behind the competition.
Frankly, I have never understood what all the fuss of Auto ISO is about. I shoot in Manual exposure mode 99% of the time. Occasionally I use Aperture or Shutter priority but I am rarely satisfied with the results. I understand Auto ISO gives you better creative control, letting you to lock in both the shutter speed and the amount of desired depth of field while allowing the camera to deal with changes in scene brightness, however, I feel that if you want that level of control you are better off switching to full manual exposure. People who swear by Auto ISO also tend to put a high importance on a dedicated Exposure Compensation dial, as this seems to be how they control the brightness of the image. Doesn’t an easy to change ISO dial do the same thing?
If Auto ISO (or Av or Tv) was so brilliant then I’d expect it to handle gross scene brightness changes such as the subject moving from direct light to shade and during burst shooting each frame should have relatively similar exposures. This is not the case though and when I shoot auto-anything bursts I too often end up with the best composed frame being over or under exposed and the best exposed frame being the one with less than perfect composition/timing.
On the M5 the top control dial can be set to default to ISO adjustment. Thus a photographer can have a dedicated shutter speed dial (front main dial), a dedicated aperture dial (rear dial), and a dedicated ISO dial (top dial). Adjust for brightness using the ISO dial rather than the exposure compensation dial.
I judge exposure via the histogram 99% of the time. I make sure the whites are not clipping (except if a light source is in the scene) and boost my shadows in post-processing if needed (which is most of the time for average- or high-contrast scenes). I don’t understand why there is not an option to indicate over/under-exposure on the histogram.1 I can’t quickly check both the histogram and exposure indicator since they are always on opposite sides of the display. Thus I use the over/under-exposure indicator as a secondary indicator at best and don’t often use the exposure compensation dial.
If I did use auto-exposure more often then perhaps I would care if Auto ISO had more configuration options. As it is, I don’t.
In-Camara Raw Processing
New to the M5 is in-camera RAW processing (also added to the G7 X Mark II which makes a tempting upgrade). I shoot RAW 99.99% of the time. The only time I shoot JPEG is if I use the built-in HDR function or if (in the past) I needed a faster burst rate. When Canon started including Wifi on there bodies I switched to shooting RAW+JPEG when travelling without a laptop so I could easily transfer images to my iPhone/iPad for mobile sharing. I’d delete the JPEGS once transferred to the computer. Adobe Lightroom Mobile’s support for RAW images and processing largely make the RAW+JPEG workflow redundant. Now, with in-camera RAW processing I can just shoot RAW and generate JPEGs in camera for the few images I want to share but don’t want to bother processing in Lightroom Mobile. Less wasted card space. Less wasted buffer and camera processing. Faster desktop offloading.
(The first step in my RAW workflow is to apply a custom Camera Calibration created specifically for a given camera with an X-Rite ColorChecker Passport calibration target. For in-camera JPEGs I create a custom PictureStyle which mimics the custom Camera Calibration profile and install that Picture Style on my camera. In other words, I never use Canon’s built-in JPEG colour processor.)
Video
The M5 is limited to 1080p video. I personally think 4k video is overkill the majority of the time and frankly I maybe shoot 3 minutes of video a year (and use about 15 seconds of that), so video features mean little to me. I can imagine that Touch & Drag AF would be particularly useful for shooting video as other reviewers have stated. The M5 does include 5-axis in-body image-stabilization (IBIS) for video only, adding stabilization to non-stabilized lenses, or better stabilization to compatible already stabilized lenses. I have not tested this functionality but it is nice to know it is there.
Room for improvement
After several weeks of almost continuous use I haven’t found too many problems I’d like to see addressed in future iterations or firmware updates. The M5 is a solid camera.
Tilting EVF
I so rarely use the built-in flash I wouldn’t mind sacrificing it to have a tilting EVF. Besides low-angle macro/landscape work, a tilting EVF is handy for chest-level shooting. I am a bit over average height and shooting people from eye-level means either looking down on my subject or getting a soar back. This is a major reason why many famous photographers, including Diane Arbus, Cecil Beaton, Robert Capa, Robert Doisneau, Alfred Eisenstadt, Vivian Meier, Imogen Cunningham, and Richard Avedon used Rolleiflex TLR cameras — people should generally be shot straight-on and this means lower than photographer eye-level. Of course, on 35mm or APS-C, a tilting EVF would not help in portrait orientation, and a solid hot shoe is always a higher priority.
Being forced to use the eye-level viewfinder now I was also “forced” to acquire a new larger tripod (Manfrotto MT055CXPRO3). (Honestly, I needed a stiffer tripod for use with the Tamron 150-600mm, so I can’t completely blame the EVF.)
EVF/Liveview Blackout
Even though the AF and drive system of the M5 is much improved over its predecessors, the M5 still lags (pun intended) behind the competition when it comes to screen blackout during continuous shooting. EVF will never replace OVF for sports and action until this is sorted out. Its an industry-wide problem, but Canon should be at least as good as the strongest MILC competition at this point.
EVF/Screen Auto-switching
By default the M5 is configured to automatically switch between the EVF and the rear screen display when the camera is raised/lowered. This is facilitated by a proximity sensor near the EVF. The auto-switching function works great if the rear screen is used in the flat/stored position. If I tilt the screen up, then my thumb tends to trigger the proximity sensor often, which is nothing but annoying. In reality, the camera should switch to the rear screen anytime the screen is moved from the stored position as the EVF physically cannot be used. This is something that can be fixed with a firmware update and has been noted by other reviewers. For now, I have turned off the auto-switch and assigned a manual switch to the trash button during shooting (I have to remember to switch screens before entering playback mode).
DIAL FUNC. In Playback Mode
In playback mode the DIAL FUNC. button is inactive and the top control dial is dedicated to increasing/decreasing magnification, which defeats the purpose of having a MULTI-FUNCTION dial. And since I can assign magnification to the * and AF Point buttons I would like to be able to assign another function, such as EVF/Screen switching to the top control dial. During playback other possible assignable functions of the top control dial include star-rating, image protection, rotation, creative filters, etc. And off course magnification.
Touch Actions In Playback
The G7X has a nice feature in Playback mode called Touch Actions. When viewing a recorded image you can touch and drag up or down and then towards one of the screen corners to select a user-assignable action (e.g., favourite, protect, erase, rotate, send to connected device, or jump through images). For the travelling photographer these functions are very handy as a lot of image editing and management takes place in-camera. I am shocked that the M5 does not have this feature. Touching the big, beautifully touchscreen during playback does nothing but scroll through images or an image index. The EVF is not a barrier to adding Touch Actions as the rear screen could still be used as a touchpad, vis-a-vis Touch & Drag AF,during playback.
Lenses
The EF-M lens line-up continues to grow but there a few obvious gaps.
The lens that came in my M5 kit, the 8.3x super-zoom EF-M 18-150mm 1:3.5-6.3 IS STM, is another nice addition. With this lens I don’t have to choose which zoom range to carry, though probably with the trade-off of a bit of speed and sharpness. This lens is not natively supported by Lightroom yet and I am still in the process of creating a custom lens profile so I haven’t come to any hard conclusions about it.
The compact Canon EF-M 28mm F3.5 Macro IS STM is also interesting lens, but I have not yet had a chance to try it out.
The big gap in the EF-M lens line-up is obviously fast-anything. The 22 f/2 is the lone prime in the line-up but it is relatively slow focusing.
The following wide/normal primes in f/1.8 or f/2 would be welcome options: 15mm, 18mm, 35mm (equivalent to 25mm, 28mm, and 56mm respective in FF).
A fast f/1.4 or f/1.8 portrait lens would also be appreciated, in the 55mm range (an 85mm FF equivalent).
The current line-up of image-stabilized zooms are compact and good for all-round photography, but for lower light and action (indoor and sports) a fast f/2.8 suite would be ideal: 11-22mm (2x), 18-55mm (3x), 55-165mm (3x).
The majority of the Canon EF-M lens lineup as of the end of 2016. From left to right: 22m f/2 pancake, 11-22mm f/4–5.6 wide-angle zoom, 18-55mm f/3.5–5.6 standard zoom, 18-150mm f/3.5–6.3 telephoto super-zoom, and 55-200mm f/4.5–6.3 telephoto zoom. The EF-M 28mm f/3.5 macro and 15–45 mm f/3.5–6.3 zoom are not shown.
Conclusion
The Canon EOS M5 is a significant update over its predecessor, the M3, and is arguably Canons first formidable entry in the MILC market. It is also a very well-built, adaptable, and enjoyable camera in its own right. Initially I hesitated to upgrade, but now I will not likely be using my M3 except when I need a very compact camera body or a back-up (the M3 image quality is essential the same as the M5).
I’d still be interested in a full-frame mirrorless interchangeable lens (MILC) body from Canon. We mays see this in 2017 or early 2018. There are currently rumours of a Canon EOS M6 announcement slated for this month, but not many details about what that body might entail.
The over/under exposure indicator is a logarithmic scale while the histogram is a linear scale, so one indicator can’t really take on both rolls. However, it would be nice to see at least a pointer indicating mean exposure as part of the histogram. For centre-weighted average exposure metering the pointer would essentially indicate the weighted-mean of the histogram. For spot metering, the pointer would indicate the location of the measured spot brightness relative to the rest of the histogram.
Cloudscapes is a photographic series that builds upon my previous Sky Panoramas series1. The photographs depict portions of the sky containing interesting clouds, colours, lighting, etc. I consider cloudscapes a sub-genre of landscape photography, but with my lens pointed towards some point in the sky instead of the ground.
Light and colour are often the main subjects, rather than just an aspect of sculpted solid surfaces as in landscapes. Clouds replace mountains. The inky blue of space replaces lakes, rivers, or seas.
One could say that photographing clouds is the same as photographing water. Clouds are a fluid medium that reflect and filter light.
Unlike the land, which is sculpted by light but remains substantially static (at least during the instant of a photograph), the sky is extremely dynamic. The shape and position of clouds changes from second to second. The position of the sun is constantly moving. Land is frozen. The sky is liquid.
When photographing the land, vantage points and compositions can be very limited (depending on what one is trying to capture). Move a few centimetres left or right, a few metres forward or back, and the composition changes or disappears. A branch fails to frame a pond. A rock no longer lines up with the mountain peak. A leading line doesn’t guide the eye into the scene.
In a wide-open space the sky is viewed as an uninterrupted hemisphere, 180 degrees across and 360 degrees in circumference. A photographer can point their camera towards the sky in any direction. They can shoot with a wide angle or telephoto lens to crop or expand the captured scene. There is no horizon that must be kept level. No trees that must remain upright. Clouds move and create an ever changing canvas of colour and light. But in all this freedom there must be constraints. Choices must be made. Balance must be found.
Some skies lend themselves to a painterly presentation. Colourful gradients, soft edges, and limited depth create an impressionistic or abstract quality. Some skies are dramatic, with raking or filtered light. Some skies seem less dramatic, but with a telephoto lens the photographer can isolate crisply detailed structures in fluffy cumulus clouds — distant sculptural castles floating in space.
Cloudscapes are ephemeral. They sometimes exist for a fraction of a second. They can be captured by the camera’s lens in that one instant and will never be seen again.
Sky Panorama #3, 2007
I first became aware of photographing the sky while studying photography in university. In a photography history class I became acquainted with Alfred Steiglitz’s cloud photos — the so-called Equivalent series.
“I wanted to photograph clouds to find out what I had learned in forty years about photography,” wrote Stieglitz in an artist statement2.
While Stieglitz’s reasons for photographing clouds differ from my own, I immediately had an affinity for his subject matter.
Silverview 2017-01-06 08:29
I have another on-going photographic series called Silver View in which I record the ever changing view out my living room window which looks out on a natural park. In those photographs the scene is often dominated by an interesting sky or atmospheric phenomenon (e.g., fog, a rainstorm, a snowstorm, or a dramatic sunrise), but always the sky is shown in relation to the land. The Silver View series is very much rooted in place. It is about recoding the view from one particular location.
The Sky Panoramas, and by extension the Cloudscapes, question the notion of place and our identification with it. Does the sky represent the land over which it hangs? Can the sky over my house be differentiated from the sky over a Parisian suburb? Can we recognize the sky as belonging to a place or is the sky a separate space all together? Are we travelling through the sky as we are rooted to the land? Are we shaped by the sky (does it mold our identity) as we so often seem to be shaped by the land?
Cloudscape 2017-01-30
As with many series, there is no actual limit to how many Cloudscapes I can photograph or for how long I can continue exploring this theme. Therefore I impose limits in other ways. The primary limits appear in post-processing.
Images are not just taken out of the camera and printed or shared. While it is often difficult to capture the dynamic range of both the land and the sky in a single photograph, the dynamic range of a small portion of the sky may be extremely limited. Atmospheric perspective may reduce contrast to the point were a portion of the sky appears as a flat, featureless field. This would be a boring photograph indeed.
To add dynamic range and contrast I primarily manipulate the white and black points of the image. Delicate colours that are nearly invisible to the casual viewer begin to appear as the contrast increases. Structures with shape and modelling begin to form. While each final image can be considered dramatic it must still be a realistic representation of the scene. An image not pushed far enough will be flat and featureless. One pushed too far will be destroyed. Knowing how far to push an image is the art.
It is sometimes hard to know at the moment of capture if an image will stand up in post-processing. Some images that seem dramatic in the viewfinder are just too contrasty to tame. Some images that seem mildly intriguing become favourites when a little processing starts to reveal subtle colours or playful compositional relationships. Therefore I shoot a lot of frames and keep only a few of the very best results.
Spring Shower 1, 2006 (Sky Panoramas series, but really also the first Cloudscape)
To be clear, I do not look for recognizable shapes in clouds. I look for abstract compositions in the sky.
The average landscape photographer knows that there are select few hours around sunrise and sunset that are “best” for shooting. Trust me, I relish those times. I can’t always schedule my day to shoot during those “golden hours” so I have learned to make the best of any time of day. On sunny days I shoot black and white and capture the dramatic shapes and shadows of trees and rolling hills. On overcast days I focus on the colours and delicate details in close forests.
With the sky as the subject, selecting good times to photograph is more difficult. On blue-sky or overcast-sky days there is nothing to photograph. Better then to shoot traditional landscapes or macros. Sunrise and sunset are not guarantees of finding a good sky subject either. The sun might be too intense and colours too saturated. Clouds might not be in the right place in relation to the rising/setting sun to filter or reflect the light in a compelling way. In other words, opportunities to shoot images for the Cloudscapes series are not overly common.
It is hard to say what compels me to pick up my camera at any given moment and point it towards the sky. I can’t schedule a Cloudscapes photography session. In a very zen way I have to wait for the right moment. The sky dictates when it wants to be photographed.
Sky Gradient 2016-01-08 #4
Sky Panoramas is a series of stitched multi-frame panorama photographs. The images have a very high aspect ratio (up to 5:1). Cloudscapes are a single frame photograph. It can take a minute or more to capture the 9 to 12 frames used to create the Sky Panoramas and thus they are infinitely more difficult to capture than Cloudscape images, especially if clouds are moving at any speed or the light is changing. Post-processing is also more demanding with Sky Panoramas, the files of which range in size between 500MB and 1GB. Sky Panoramas are also difficult to present on screen or on print due to there wide aspect ratio. As a compromise, I often find myself composing Cloudscapes in 16:9 aspect ratio. A third related on-going series, Sky Gradients, includes photographs of the colour gradient of the sky, usually just before sunrise or after sunset when the light is soft and the sky takes on a pastel hue. Sky Gradients are shot on cloudless days, though a slight haze in the atmosphere acts as a colour filter. The majority of a Sky Gradient frame is taken up by the sky, but a strip of horizon often appears at the bottom edge.
I haven’t posted much here recently for two reasons: 1) I’ve been having too much fun with our now 14 month-old baby; 2) when not hanging out with the baby I have been shooting as much photography as possible.
Recently on Canon Rumors a thread was started which posed the question: What do you want to see in the EOS M system? I have been a fan of the EOS M system from the beginning, so here are my answers to this question.
I bought the EOS M as soon as it became available and the M3 as well. I have all the EF-M lenses and a half dozen EF L and non-L lenses as well (macro, fisheye, long zoom, etc.) Canon was running a deal when I got the M3 where they were giving away a free EF to EF-M adaptor, so that was nice (now I have two to play with). Anyway, I’ve given this topic a lot of thought.
Canon’s APS-C EOS M Mirrorless Interchangeable Lens Camera System
What I like about the current system, and want to see in any future M body:
small, light, portable (the M3 is definitely easier to hold and operate than the M1 was, especially with EF lenses attached)
good enough image quality for the size — never had any complaints
small, high-quality EF-M lenses with the option to use other EF lenses for specific purposes
tilting touchscreen (fully articulated would be better)
tilting EVF (I do a lot of landscape work and this is great for low angle or even chest-level shooting)
ability to use older FD lenses via a glassless adaptor just for fun
seeing the exact same thing on the EVF and touchscreen
Wifi (getting images off for quick sharing without a computer, and been using Cascable to do timelapses recently)
What I don’t like about the M3:
the EVF contacts in the hotshoe broke support for the GP-E2 GPS receiver (doesn’t even work attached via USB). I geotag everything I shoot outside, but now I have to use tracks from my Garmin watch.
button function assignment is not as flexible as it should be
not all menu items are saved in the Custom shooting mode, making it pretty useless
autofocus while zoomed in always switches the display to a zoomed out view
a lot of other nit-picky things, but I can live with them (no camera is perfect)
I travel a lot and spend a lot of time hiking/skiing or in the back-country on extended trips. I would never carry an SLR body. If weight/space is really an issue I might carry only a G7X, but ideally I carry the M3 with a few EF-M lenses, depending what I expect to encounter. For dedicated shooting days I throw in whatever EF lenses I need as well. I have no problem with the bulk of EF and the adaptor on the M3, but I wish AF performance was better.
I think the original question could be a bit broader, as I consider the M-system and a full Canon mirrorless strategy to be two different things.
For the M-system I would like to see the following in the next body (which might be a higher end M in addition to the M3 and M10):
built-in EVF, but still with a 90° up-tilt (can sacrifice the built-in flash if necessary, but EVF centred over lens is better for balance)
built-in GPS or support for the GP-E2 (but built-in might kill the battery, so this is optional)
very slightly larger body or at least slightly different back button layout (my palm often hits the menu button accidentally)
vertical grip option with support for two batteries
use the same battery size as M3, please
more pronounced back focus button (I use back button focus about 90% of the time and the one I can assign on the M3 is hard to locate by touch, especially with gloves)
better than 4 frames RAW buffer (unlimited would be ideal)
better than 4 frames per second continuous shooting (7 frames would be better)
way faster autofocus
Full-frame Canon Mirrorless System
I think there needs to be a larger sensor mirrorless option in addition to the APS-C bodies. I don’t think the EF-M mount can be used with a 36×24 full-frame sensor (based on my measurements), but it could support an APS-H sensor (1.5x the area of APS-C) which would be acceptable in a body the size of the M3 (not sure the current EF-M lenses project a large enough image circle to cover APS-H though). (Canon actually just announced a 250 megapixel APS-H sensor, so we know they are working on this size.) When Canon introduces a full-frame mirrorless body, it probably won’t be in the M series and it probably won’t have an EF-M mount.
I would still be very interested in a full-frame Canon mirrorless system as a compliment to the compact and portable M-system. The market leader here is obviously the Sony A7 series, so really Canon just needs to be competitive with those bodies.
Full-frame sensor body wish list.
Take all the advantages of any of the 1Dx or 5D bodies and remove the mirror, use an EVF, and that ought to about do it.
EF-M mount, if possible, otherwise standard EF mount
If a new mount with a smaller back flange distance than EF and a larger diameter than the EF-M mount is introduced, then it better support EF lenses at full-speed via an adaptor (Canon seems to be going fast and furious on the EF lens upgrade front so I’m not too worried about this one. I would actually be shocked if a third mount was introduced, but the EF mirror box space is such a waste).
Autofocus seems to be the sticking point technology-wise. Getting mirrorless autofocus to be as fast as an SLR, even in low light and with fast moving subjects will be the Holy Grail. Reduce blackout times as well and SLRs will lose almost any advantage. There are times when an optical view-finder has advantages, but for 99% of my shooting, an accurate EVF and Live View are more useable.
Why Mirrorless?
Some people ask, why make a mirrorless camera that just replicates the best of what SLRs already do (and have been doing for a long time)? The inverse question is the answer: why, if you could build a digital sensor mirrorless body with all the features of current SLRs (minus OVF) would you bother making a body with a mirror box and all the mechanics, noise, vibration, size, etc., that come with it? DSLRs only have mirrors because film SLRs had them, no other reason. Its time to move on.
Prior to the recent Photokina in Germany there were many rumours about what products Canon might introduce. On the DSLR front, there was much expectation for a new EOS 7D Mark II, and that wish was granted. I think the surprise of the show (simply because nobody was expecting it before-hand) was the the introduction of the PowerShot G7 X. Following the discussions in camera forums after its introduction, it is clear that the high-end compact is an important camera segment and that this camera in particular may have been the most important release by Canon this year.
The high-end compact camera segment sits somewhere below interchangeable mirrorless cameras and above traditional small-sensor point-and-shoots. I have been shooting with Canon S-series cameras for years (S80, S90, S110) and would describe that series as being in the high-end compact segment. They provide full manual control, have fast, wide lenses, and allow you to save raw files. Sony raised the bar several years ago when they introduced the the famous RX100 with it’s large 1 inch-type sensor. I considered the RX100 when I bought my S110 two years ago, but at more than double the price, I wasn’t sure if it was a piece of equipment I wanted to carry with me on canoe trips, backpacking, skiing, or on slightly dodgy travel forays. I went with the S110 and love the pictures and usability of that camera (I also have an EOS M so I have a larger sensor and better lenses when I need them and still in a fairly compact package — no amateur needs a mirrored DSLRs).
When the G7 X was introduced I was immediately intrigued. For the past two or three years the point-and-shoot category has been dying a speedy death due to competition from smartphones. However, for me there will probably always be a place for a quality manual compact camera. Unless the physics of the universe are altered, smartphones will just never a have room for a fast zoom lens and a sensor larger than the head of a pin. (Don’t get me wrong, I love the camera in my iPhone 5 — not to mention the 5S and 6-series — especially with the addition of more manual control in iOS 8.)
The G7X is clearly designed to compete head-to-head with the latest edition of the the RX100 III. The rumour is that it even uses uses the same Sony-built 20.2 megapixel sensor. Couple that large sensor, with an amazing Canon lens with image stabilization, the DiG!C 6 processor with 6-frames per second shooting capability, a tilting screen, and cram all that into a body that is not much larger than the S120, and you are going to have a winner.
Of course I am not the first to review the G7 X, so I won’t cover what others have already said. Instead, I’ll highlight some of the key differences compared to the RX100 (good and bad, based on my very limited hands-on experience) and note some of my favourite features.
The first thing you will notice when handling the the G7 X is that clicky-ness of the large front control ring. While some may enjoy the positive detent action of the ring, forget about using this noise-maker while shooting video. I feel that Canon could have made the click action less aggressive. Based on my experience with the S110, I doubt it will become smoother over time. This may be a deal breaker for some potential buyers. The RX100 front control ring is smooth as butter in comparison. I don’t shoot video, and like other reviewers I prefer some positive detent action in the control ring.
The G7 X does not have an electronic view-finder (EVF). The RX100 does and it seems pretty darn nice. Again, for some buyers this will be the deciding factor. I haven’t looked through a viewfinder in 5 years. I do 90% of my shooting outside (70% of that around water or on snow). While an EVF would be brighter than a naked LCD screen, especially in daylight conditions, squinting through a little hole taking pictures is not my kind of fun, so the EVF is more of a nice-to-have than an important feature for me.
The G7 X screen tilts up 180°. This is great for low angle shots and (god forbid) selfies. I keep wanting it to tilt down too, so I can compose while holding the camera up high, but it doesn’t. I’ll get over it. The RX100 screen tilts both up and down. This is great, though the Canon hinge mechanism is much, much, much simpler and seems less likely to be damaged. The G7 X also has a touchscreen (the RX 100 does not). Try entering a Wifi password with a dial versus the touchscreen keyboard and you’ll realize how valuable this feature is.
The G7 X includes an exposure compensation dial under the mode dial. I love this feature when shooting in aperture or shutter priority modes. The S-series has always had an exposure compensation button which gave one-click access to this feature. The RX100 has a button as well. A dedicated dial is even better though.
By all accounts the Canon lens on the G7 X is fantastic, and my own tests so far confirm this. It has a longer zoom range that the RX100, extending from an equivalent 24 mm to 100 mm. The aperture varies from ƒ/1.8 to ƒ/2.8 depending on the focal length which is nice and fast even at 100 mm. Variable aperture lenses are not all created equal. Sometimes they stop down to smaller apertures fairly early in the zoom range. Not so with the G7 X. I saw a chart, which of course I cannot find now, which compares the maximum equivalent apertures at various focal lengths across the high-end compact segment — the G7 X is the clear winner in this spec compared to the RX100. Couple the zoom range and the fast aperture with image stabilization and the low-noise CMOS sensor and you get great photos even in very low light situations.
[table th=”1″] Zoom range and maximum aperture 24 mm,f/1.8 35 mm,f/2.2 50 mm,f/2.5 85 mm,f/2.8
[/table]
For me the deciding factor when choosing between the RX100 III and the G7 X was Canon’s superior interface usability. Canon’s button and menu system are highly refined. Everything is there when you need it and hidden when you don’t. Button and front control ring functions are highly customizable. Even the icons shown on the settings screen can be moved or hidden (e.g., I never change the compression level so I don’t need to see that setting, ever). While I don’t have a tonne of experience with other camera brands, I have used some that have downright atrocious menu systems. The Rx100 seems very customizable, but Canon is consistently reviewed as having some of the best ergonomics and usability. The touchscreen helps in this regard. And, the fact is, I can pick up any Canon camera and use it’s most basic or most advanced features with out any sort of learning curve. I want shooting to be fun and intuitive. If something is annoying, I won’t use it. End of story.
I can highly recommend the Canon G7 X. You really should also look at the Sony RX100 III. Sony pioneered the 1 inch-type sensor high-end compact segment and it is about time that Canon stepped into the ring. The G7 X and RX100 are both fully-capable manual cameras. If this segment is for you and you are in the market for a new camera, simply buy the one that feels the best in your hands and go out there and shoot something.
Summary
[table th=”0″] Item,Canon PowerShot G7 X Price,C$750 Pros,”wide and fast lens, large sensor, compact body, customizable, touchscreen, ergonomics” Cons,”aggressive detents in front control dial, lack of EVF” Summary,”Finally, a competitor to Sony’s venerable Rx100 series, with an even better lens. If you are a serious amateur looking for a compact manual camera, this could be the one. Long live high-end compacts.” Rating,[rating=5]
[/table]
Samples
Some sample images taken over the first few days with the G7 X.
Manual this, auto that
I think the portraits, hands, coffee, rocks, and Rocky Mountain Ash leaves were shot in full manual mode with auto-focus. The flower vase was shot in manual mode with manual focus and focus bracketing. The grass and berries were shot full manual with manual focus. The red leaf bush in front of the gold leaf bush was shot with the in-camera HDR mode — some ghosting is visible due to branches moving in the wind.
ISO
Most images were shot between 125 and 320 ISO. The coffee and leaves on a wooden table were shot at 1600 ISO. The flower vase was shot at 6400 ISO.
White-balance
The hands and the first portrait were shot with “cloudy” white-balance. The coffee through to the last portrait were shot with auto white-balance (I would prefer most of them to be a bit warmer). The ash leaves and flower vase were shot with daylight white-balance (even though they were not taken in direct sunlight).
JPEG
Though I shot RAW+JPEG, these images are all taken straight from the JPEG versions imported into iPhoto (except for the coffee shot which had some manual adjustments applied to recover some shadow detail and tweak the colour balance).
Today I went for a walk in at Fish Creek Provincial Park with a friend and I brought my GPS receiver (GPSr) along. I almost always run my GPSr when walking, cycling, or canoeing — even in familiar areas. My friend was curious so I shared my thoughts on GPS, the benefits of non-commercial maps and my enthusiasm for geocaching, geotagging, navigation, athletic training, etc.
I wanted to share today’s GPS track and data with my friend. I thought I would make it even more useful by sharing it here, as I think it is a good explanation of why I like using a GPS to record my adventures (no matter how close-to-home or seemingly insignificant).
Cheap GPS
When I first bought my GPS, I made it a goal not to pay for maps. I had three reasons for this:
commercial maps are expensive (and, from what I have heard, often not very good quality);
I believe that map data from government sources should be freely available to citizens (i.e., it was already paid for with taxes);
Open Source maps, updated and prepared by millions of people, are better than most commercial maps, and more up-to-date than most government data.
Free and Almost Free Maps
I have a Garmin eTrex 30 GPSr and use the following free maps:
Open Street Map (global Open Source map data, compiled for Garmin devices, generic and cycling versions)
Ibycus Topo (complete Canadian topographical map based on NRC data)
Other free topo maps for countries, states, and cities as found at gpsfiledepot.com
I also subscribe to openmtbmap.org because I think the operator does a worthwhile service packaging up OpenStreetMap based mountain biking maps.
My wife just complete a canoe trip along the Gulf coast in the Florida’s Everglades National Park. Before she left I found a free Florida topographic map that contained depth soundings for the area she was going to be in. Just today I discover OpenSeaMap, an open source initiative to provide free global nautical charts — they have Garmin downloads, but I haven’t tried them out yet. Looks interesting.
Of course, each map source provides different features. There is no ideal map — the best map to use will depend on your activity.
(Not strictly GPS related, but I today I also discovered OpenWeatherMap — an Open Source weather mapping initiative. See the embedded sample at the bottom of this post. Just yesterday I completed the build of a Phidgets-based weather station. I will have to look at OpenWeatherMap in more depth.)
Global Base Map
Ibycus Topo 3.2
OpenMTB Map
OSM Cycle Map
OSM Generic
Southern Alberta Tail Maps
Track Data
As you can see in the above screen shots, once you get home it is easy to review the GPS track (recording of where you went with the GPSr), but what else can you do with such a track? Well, I like to take a look at the speed and elevation plots of the track just to get a sense of of my performance, especially after a bike ride. I don’t use my GPSr as a religious training tool, though a lot of athletes do. I also use the track data to geotag any photos I take on my adventures. I use PhotoLinker to merge my track location data with any un-geotagged photos. In the case of today’s walk, I only shot a few photos with my iPhone, so those were already geotagged by the camera.
Here is the track data from today’s walk:
GPX (GPS Exchange format — compatible with most GPS receivers and software)
(Note: Below, the second spike in the Speed graph up to 8 km/h, is me sliding on my butt down a frozen, mossy, leaf covered hill in the trees then coming to a sudden stop with my feet against a log just before I would have hit a tree. The dangers of walking on icy, north facing trails never ends. The subsequent lull in movement for 15 minutes is my GPSr sitting idle under the aforementioned log while my friend and I continued our walk, unaware that the GPSr had been ripped off my belt. When I realized it was missing we knew exactly where to look for it. Previously, I always carried my GPSr in a pocket or in my pack, and I will do so from now on. The first spike might be an error, because I don’t ever remember running that fast — and I only fell down a hill once.)
Track Points
Speed
Elevation
Geocaching
Geocaching is a great way to get familiar with a new GPSr. If you expect your GPSr to save your butt on a glacier in a whiteout, then its use better be like second-nature to you. Geocaching is also a fun hobby in its own right. When I go looking for geocaches I always learn something new about an area — wether it is half-way around the globe or in my own back yard — even if I don’t actually find the cache I am looking for (which happens quite often). Today, I didn’t have geocaches in Fish Creek Park loaded on my GPSr, so I just used the Geocaching iOS app, which is a great place to start if you just want to try out geocaching but don’t own a dedicated GPSr.
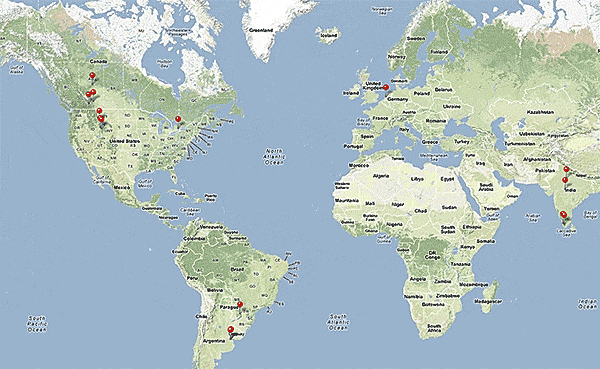
Last year, after I started geotagging my photos, I did a few visual art projects combining photography and GPS technology. I am fascinated by maps, how we imagine the world around us, how we communicated that world to others, etc.
A GPS receiver (including many smartphone apps) can record a GPS track — that is, a series of linked points recorded at regular intervals or distances as you move. Normally, these tracks are used for navigation — record where you have been so you can later retrace your route and thus find your way back home. These track files are also good for post-adventure analysis. Your can plot your speed, heading, elevation, etc. You can also use the point data in the track to geotag your photos so that you, and others, can see exactly where a particular photo was taken.
Beyond their practical uses, however, GPX tracks, when displayed as a line on a map, have an aesthetic value as well. They are a virtual mark on the land — the mark of an adventurer expressing some desire to explore. In this way they are not unlike the marks an artist makes on paper or canvas. Lines creating shapes, outlining objects, representing barriers overcome or avoided. Lines demarcating space and time. Tracings and recordings of life.
A Walk In The Park
After a long walk at Bowness Park last March, I overlaid photographs I had taken with the abstract and graphically rich tracings of my GPS tracks. Typically, one displays geo-located photos on a map — saying “this is where these photos were taken.”
But the map is not the terrain. The map is not the location.
Instead, I am displaying the map (in the form of the track overlay) on the photo. This gives the photo context. The image exists in concert with — because of — my movement across the land.
Photo Walking
The other project I started, is a series of large scale conceptual drawings. By walking a path across the land tracing the shape of a word, I am making visible some thought, some meditative idea. The word — the path — is not visible to others even though it’s creation is a very concrete act. However, by capturing the path in the form of a GPS track, I am able to share the act with others. The track image, is combined with photos taking during the walk so the viewer can experience the original event.
I’m pretty picky about colour. I spend a lot of time fine-tuning my colour management workflow from camera to print. Of course making sure you have well calibrated devices is a critical step in ensuring colour accuracy. But what is calibration? Calibration is the process of tweaking your camera or scanner, monitor, and printer to consistently represent an image to the best of the equipment’s abilities within your viewing environment. I’ve dealt with digital camera calibration in the past. Today I will focus on the next link in the chain — computer monitor colour calibration.
Monitor Calibration Primer
While I will try to make this article as simple as possible, I do assume a certain familiarity with colour calibration terminology. I will deal only with LCD displays, because discussing CRT displays would be like learning about horse carriages in an automotive class — CRT technology is so 20th century. I also place the caveat that I only work with OS X operating systems and Apple Cinema Displays. While these procedures can certainly be transferred to other operating systems and display manufacturers, you will have to figure that out on your own.
Of course, computer monitor calibration has been dealt with by numerous articles in the past. Therefore I will focus on techniques or concepts which I think are novel, unique to my workflow, and helpful to others. Specifically, I will show you how to use your digital camera to assist with monitor calibration. I also touch on using Philips Hue lights to tailor your workspace lighting.
There seem to be two schools of thought regarding monitor calibration. One school says you should be setting up your monitor to match some theoretical viewing standard. The other school says you should be setting up your monitor to work well in the ambient lighting of your environment. I stand firmly in the latter school for two reasons: one, you can much more easily evaluate prints if your monitor matches the ambient light conditions of your workspace; and two, I find there is much less eye strain if your monitor is not excessively bright or dim compared to the ambient light and if the overall monitor colour temperature is as close as possible to the room ambient colour temperature. I will therefore show you how to achieve a calibration which matches your monitor to your work environment.
There are four primary variables that can be adjusted in relation to monitor calibration: brightness or luminance (both minimum and maximum); white point (temperature in degrees kelvin); gamma (overal output curve); and individual red, green, and blue colour response curves.
The monitor manufacturer’s default settings (based partly on ISO standards ISO 3664:2009 and ISO 12646:20081) are usually a maximum luminance between 80 and 120 candela, a white point temperature of 5000K or 6500K, and a gamma of 2.2. 6500K is the approximate colour temperature of noon-day summer sky lighting. A luminance value of 120 cd is equivalent to an average home interior.
The target gamma of 2.2 matches the sRGB specification which is the default colour space use by most cameras and HD televisions and is therefore probably the most appropriate choice.2
Throwing Out The Rulebook – Sort Of
For those rare people whose workspace is lit by dim daylight (an oxymoron to be sure) the manufacturer’s default will probably be fine. For everyone else, some tweaking, or even major adjustments to these defaults is required. Remember, calibration is about getting things to look consistent in your work environment. In order to do this you need to understand two things about your environment. One, how bright is your work area, and two, what is the colour temperature of the ambient light in your work area.
If you are a photographer and are selling or displaying prints of your work, then I would start by trying to set up your work environment to match the conditions most commonly found where your prints are shown. If you sell in a gallery, then create a bright space using the same types of lights that the gallery uses. If you hang your prints in your living room to share with friends and family, then match your office/studio lighting to that of your living room. Matching room lighting to the display area is not critical to the monitor calibration process, but it makes print evaluation much easier — you will be viewing your fresh prints under the same conditions as they will be displayed.
If you don’t do much printing, or if your prints will be displayed in a wide range of environments, then just set up the lighting around your computer so you are comfortable — moderately bright with standard incandescent lighting (or better yet, make the switch to LED).
If you primarily work on a laptop computer and in several different locations, then do the calibration under the most common working conditions.
Now, most of us are not going to end up with a 6500K work space illuminated by 120 candela worth of ambient lighting.
In my small home office, for instance, the two 60 watt tungsten bulbs in the diffuse ceiling fixture produce about 40 candela — nowhere near the standard 120 cd. If I set my monitor luminance to output white at 120 cd I would probably go blind from the brightness of the monitor compared to the ambient light.
On the other hand, an ambient brightness of 40 cd is quite dim. Setting the monitor luminance to 40 cd would also be problematic because LCD displays tend to have quite bad colour accuracy at lower brightness settings. I can dial my Cinema Displays down to 40 cd, but I loose about 10% of the sRGB gamut in doing so. The monitors also exhibit visible colour artifacts at this setting.
What to do? I started by adding several more incandescent bulbs in lamp fixtures throughout the room. I was aiming for a nice diffuse light with a luminance of about 60 cd.
The colour temperature of my office lighting was also nowhere near the 6500K default. In fact, using the Custom White Balance feature of my digital camera and the neutral card off my X-rite ColorChecker Passport, I measured the colour temperature of my office as 2300K under tungsten lighting. This is quite a warm (amber) colour. In fact it is quite warm compared to the ~2800K usually expected from 60 W tungsten incandescent lightbulbs. I attributed the warmth to three factors — the colour of the diffuser glass on the light fixture, the warm eggshell tone of the “white” walls, and reflections off the light birch wood furnishings.
Now, I would not mind matching my monitors to 2300K. I have the window mostly covered, keeping out excess sunlight, and thereby reducing colour temperature variation. However, the DataColor Spyder4 software that I use for monitor calibration only allows a minimum target white point value of 3000K. Using this setting, my monitors were still slightly blue compared to the room light, though much better than a setting of 6500K or even 5800K (the colour temperature of noon-day summer sun with out the influence of blue sky). However, after running my monitors calibrated to a white point of 3000K I was unsatisfied. The Apple Cinema Displays produced too many artifacts at this temperature. Still images and video displayed properly, but scrolling text exhibited a dreadful red ghosting that was just unacceptable.
In other words, you are unlikely to be able to properly calibrate a monitor to match the colour temperature of pure incandescent tungsten lighting.
In the end I swapped my tungsten bulbs with Philips Hue LED lights which can have their colour adjusted. I have played around with several colour temperatures and settled on 4800K (Hue’s Energize setting) as an acceptable compromise between warm home interior lighting and excessively blue daylight.
Calibrating Your Computer Monitor To Match Your Workspace Ambient Lighting Conditions
Calibrating your monitor to match your workspace ambient lighting conditions is a simple process requiring few specialized tools. In summary, you will: evaluate the brightness and colour temperature of your workspace lighting using your digital camera; calibrate your monitor using the measured settings; and double-check that the calibrated monitor matches your workspace lighting, again using your digital camera.
You will need:
a digital camera with custom white balance function (the ability to create a custom white balance from a photo, not just by entering degrees kelvin), histogram, manual and aperture priority modes, and the ability to save RAW files;
photo editing/viewing software which allows you to review the colour temperature setting stored in a RAW file (such as Adobe Camera Raw);
a grey card or white balance card (neutral photo card);
a bright white piece of paper (may be used in place of neutral photo card); and,
monitor calibration hardware and software that will accept white point and brightness/luminance target values (you could also us OS X’s built-in assistant)
Preparation:
Turn on your computer monitor and allow it to warm up at least 1/2 hour before starting the calibration. You can perform the workspace set-up and evaluation steps in the meantime.
Procedure:
Workspace Set-up
Turn on the room lights and allow them to warm up.
Your workspace should be moderately bright — not candlelight dim and not daylight glaring.
Try to avoid too much window light as this will cause the brightness and colour of the ambient light to vary too much throughout the day.
For more efficient lighting, neutral white walls and ceilings are preferred.
Do not allow bright direct light to fall on the monitor surface. Overall diffuse lighting is best.
I personally prefer and recommend a dark neutral virtual desktop background for all photographers and graphic designers.
Workspace Lighting Evaluation
Workspace Brightness Evaluation
Turn on your camera with the the following settings:
live view on (preferred)
histogram on
RAW image capture on
white balance appropriate for your workspace (probably tungsten or custom)
aperture priority mode
ISO 100
aperture ƒ/5.6
Use your camera to take a meter reading of the area in front of our computer (around the keyboard). This will give you an idea of the ambient light levels. You can use trust your camera’s evaluative metering mode for this, or you can meter the light falling on a grey card. Check the exposure with the camera histogram — there should be no clipping of the highlights or blacks. Do not allow the computer monitor to cast a strong light on the metered area during this step. If required, temporarily cover the monitor with a neutral coloured shirt or towel.
Compare the metered shutter speed with the following list.
2 sec., 4EV, 40 cd/m2, dim, candle light
1 sec., 5EV, 80 cd/m2, low, night home interior
1/2 sec., 6EV, 160 cd/m2, medium, bright home interior
1/8 sec., 8EV, 640 cd/m2, very high, very bright interior with fluorescent lights
You need enough light to achieve a shutter speed between 1 second and 1/8 of a second. Outside this range and your monitor will not be able to match the ambient light levels. You can either add more lights and do the evaluation again, or accept that your monitor brightness will differ front the ambient brightness and simply continue to step the Workspace Colour Temperature Evaluation step.
In this example, my camera is reading 2 seconds at ƒ/5.6 and ISO 100 (4EV or 40 cd/m2). Obviously my workspace is still quite dim and I would have a hard time matching my monitor luminance to the ambient brightness.
Workspace Colour Temperature Evaluation
For this evaluation you will use the same camera settings as above, but you will have to increase the ISO to 3200 or 6400 in order to capture a photograph without excessive camera shake (or use a tripod). You can also change the metering mode to manual if you prefer.
Once again, meter the area around your keyboard.
Place your neutral photo card or piece of paper on your keyboard, again taking precautions to prevent monitor light from casting on this area.
Use your camera’s custom white balance function to get a white balance reading from the card/paper. The custom white balance procedure varies by manufacturer and I will leave it to you to figure out. Once you have the custom white balance set, if your camera displays the colour temperature in degrees Kelvin then you can skip the next step.
Take a photo with the custom white balance. It doesn’t matter what is in the frame — you just need to record the colour temperature in a photograph so you can retrieve it. To that end, make sure you are shooting in RAW mode. Load the RAW file into your photo viewer/editor and note the colour temperature that was used.
Will the measured colour temperature work with your monitor? A measurement between 4000K and 6500K should be fine. If the reading is below this range then the monitor probably will suffer colour artifacts of some sort. This is sad, because in my experience home lighting is usually in the 2600K to 3500K range. Office lighting is probably in the 3400K to 6500K range. Why manufacturers can’t or won’t make a monitor that is capable of good performance in the home office environment I do not know. If your ambient colour temperature is below 3500K you have three choices: 1) calibrate your monitor to the ambient colour temperature and see if the colour performance is acceptable to you; 2) calibrate to a higher/cooler colour temperature and accept that your monitor and ambient light will not match (print evaluation will be more difficult); 3) change the colour of your ambient lighting by switching to “cool white” tungsten bulbs, switching to halogen lighting, or using colour changing LED lights like Philips Hue (you need a bulb that produces a good “white”).
Some common colour temperatures:
2800K = 60 watt incandescent tungsten bulb
3200K = halogen
3400K = photoflood
4800K = daylight blue photoflood
5400K = average summer sunlight at noon
6500K = average summer sunlight with the effect of the blue sky
8000K = summer shade on a blue sky day
Hue recipe colour temperatures:
Relax = 2200K
Reading = 2800K
Concentrate = 3700K
Energize = 4800K
I am currently using Philips Hue bulbs in my office with one of the standard Philips recipes — Energize — which has a measured temperature of about 4800K.
Monitor Calibration
If your workspace ambient light brightness and colour temperature are in an acceptable range, then you can move on to calibrating your monitor.
Launch your calibration software and follow the on screen instructions. Use whatever mode allows you to set a target white balance and target brightness/luminance.
In my case I am using Spyder4Elite and I set the target white point to 4800K and the target white luminance to 60 candela (brighter than my room, but the darkest my monitor will tolerate) in the Expert Console (see the screenshot). Alternatively, you can use the calibration tool in the Displays panel in System Preferences (turn on Expert Mode) on OS X. In my experience a hardware calibrator is easier to use and more accurate, but visual calibration using Apple’s Display Calibrator Assistant is acceptable.
The left monitor shows the Spyder4 result. The right monitor shows the Display Calibrator Assistant result — slightly warm.
Calibration evaluation
Now it is time to evaluate the results of calibrating your monitor to your workspace ambient light conditions.
Calibration Brightness Evaluation
Open an empty document on your monitor. You can use an empty word processing document or empty Photoshop document. What you want is a pure white background that fills most of the monitor. Another option is to set your desktop background temporarily to solid white.
Point your camera towards the white part of the monitor and adjust the exposure settings so the camera histogram peak corresponding to the monitor white is near, but not touching, the right edge of the histogram.
Now place a piece of white paper in front of the monitor or on your keyboard.
Maintaining the camera exposure settings, point the camera so that both the white document on the monitor and white piece of paper are in the frame.
Compare where the highlight peaks occur in the camera histogram. Ideally, the computer screen maximum brightness and paper maximum brightness should coincide. If the peak from the paper occurs somewhere between the middle of the histogram on the left and the monitor white spike on the right, then this is probably still acceptable, though your monitor is slightly brighter than the ambient light. If the paper is brighter than the monitor, then something went wrong during calibration and you need to start over. If the paper spike appears to the left of the mid-point of the histogram, then the contrast between the monitor and ambient brightness is quite high and will likely lead to eye fatigue and difficulty evaluating prints.
Calibration Colour Temperature Evaluation
Place a colourful photographic print or colour chart of some sort on your keyboard. I use the Xrite ColorChecker Passport for this step. Any card or photo with a broad spectrum of colours will suffice.
Photograph the colour sample using the same camera settings as in the Workspace Colour Temperature Evaluation step and the measured ambient colour temperature/white balance setting.
Load the colour sample photograph you captured in step 2 into your photo viewer/editor software. Expand the image to fill the monitor.
Take one final photograph framing both the physical colour sample on your desk and the virtual colour sample photograph displayed on your monitor in step 3. Base the exposure settings on the brightness of the monitor image.
There should be little if any colour cast between the physical sample and the virtual one. If the room ambient brightness is lower than the monitor brightness then the physical sample will be darker — too dark and it will be difficult to evaluate any colour differences (this is the same trouble you will encounter when trying to evaluate prints!) If the room and monitor brightnesses are quite close then your eyes should actually have difficulty determine which sample was on the desk and which one was on displayed on the monitor. If you set the calibration target white point to the same as the measured white balance, but the virtual sample and physical sample colours differ significantly, then something went wrong somewhere and you will have to start over.
Conclusion
It should be apparent that using your digital camera to assist in monitor calibration has a few benefits. It is a readily accessible tool for measuring both brightness and colour temperature. Today’s photographic sensors are very good, but they are still not as adaptive or dynamic as the human eye. This is actually a benefit in this case, as the photographic image captured by your camera can highlight brightness and colour differences between the ambient workspace light and your computer monitor for which your brain might simply compensate.
Philips Hue lights seem to be a good, if expensive, way to tailor your workspace lighting conditions. They are high quality LED bulb and if you are making the switch to LED you might as well pay the extra money to get a much more advanced lighting system. I already had Hue installed in parts of my home and was planning to switch over my office lighting anyway. It is easy to set up different light recipes and to switch between them while you tailor your workspace lighting.
1. http://www.metalvortex.com/chart/
2. sRGB is based in part on the output capabilities of CRT televisions, the most common display technology at the time of sRGB’s introduction. CRTs did not have a particularly large gamut and therefore could not represent a very wide range of colours. AdobeRGB is a much larger colour space, which many cameras are capable of shooting. If you are primarily producing prints within your own studio environment then you might want to investigate switching to AdobeRGB throughout your workflow. This will however cause some colour compression when you go to display images on the Internet because the vast majority of web browsers assume sRGB images. Some web browsers, such as Safari, will respect embedded colour profiles, but embedding colour profiles increases the image file size and therefore load times. It is also a gamble whether or not photo sharing websites will maintain the embedded profiles when creating thumbnail images. For these reasons, I stick with the inferior, but painless, sRGB colour space throughout my workflow.
I went for a walk at Bowness Park yesterday. Bowness Park is a major regional park in Calgary. In the mid-twentieth century it was part of the small village of Bowness and was a weekend getaway for city dwellers looking for some rest and relaxation. In 1963, the village and the park were merged into the growing metropolis. The park remains a relaxing destination.
The main park is covered by manicured lawns, open forests, walking paths, picnic areas, and a well-known lagoon. Adjacent to the park is the Bowness Forest, a wild and natural treed land clinging to a precipitous hillside adjacent to the Bow River.
The natural area is home to one of two stands of Rocky Mountain Douglas Fir trees in Calgary — the eastern most stands of this magnificent conifer species. The Bowness grove, known officially as Wood’s Douglas Fir Tree Sanctuary, is a provincial Heritage Place listed in the Alberta Heritage Registry:
The inland variety of the Rocky Mountain Douglas fir is a majestic, imposing tree; the largest species of tree in Alberta, it can measure over 1 metre in diameter and rise up to 45 metres tall. With a potential lifespan of up to 400 years, the Rocky Mountain Douglas fir tree is also one of the most enduring tree species in Alberta. Some trees in the sanctuary are several centuries old.
On the very chilly second day of Spring, 2013, I made the grove of Douglas Fir trees my destination. I have started a project to locate and photography the Calgary trees listed as Heritage Trees by the Heritage Tree Foundation of Alberta, and these Douglas Fir Trees are on this list. So, with fairly rough GPS co-ordinates (the trees are discernible in Google satellite images), I headed into the park to explore, enjoy nature, and snap a few pictures.
Having spent most of my childhood free-time roaming wild in the Bowness forest I knew that it was dense and dark place. I knew that nothing but an ultra-wide lens would be capable of capturing the entirety of the massive Douglas Firs. However, I wanted to travel light so I just took my iPhone 5 and ōlloclip 3-in-1 fisheye/wide-angle/macro adapter. As It turns out, the space is so confined and the trees are so large that there really is no way to photography the entirety of these trees.
Bowness Park is currently undergoing renovations and the nearest parking lot is quite far from the Doulas Fir grove. That is for the best I suppose. I got a lot of nice shots walking to and from the grove, so I was happy.
The Douglas Fir trees appear in photos 23 to 29, and 31.
I blame my father in-law. He keeps dissing the iPhone’s geotagging functions. Apparently, on his Android phone, it is easier to see where a photo was taken. Alas, this appears to be true.
On iOS, in the built-in Photos app you can choose Places and see all your photos on a map, but you can’t do the reverse (i.e., choose a photo and see it on a map). You have to install Apple’s iPhoto for iOS ($4.99CAD) to get the ability to click on a photo to see it on a map (see screenshot to the right).
Fathers, like customers, are always right.
The problem is, he got me interested in geotagging. Geotagging is something I have casually investigated before, but not something I got into seriously. I have become intrigued and after some intensive goofing around I spent the last week compiling what I now know about geotagging. Enjoy!
[toc]
How-to Geotag Photos
To paraphrase the clerk at my camera store, GPS tagging of photos is still in its infancy. While not really true (geotagging has been going on since the dawn of smartphones) geotagging falls under the category of “techy” at the moment. It should be more ubiquitous, but the technology is not as prevalent, or easy to use, as it should be. In the current state you have several geotagging options to explore.
Drag-and-drop Geotagging
The simplest, but perhaps the least inviting way to geotag is the drag-and-drop method. First, you need software that lets you drag photos onto a map (Flickr has this feature, as do Google’s Picasa and Apple’s iPhoto).
To geotag a photo, simply navigate the software’s map to the location where a photo was taken, drag the photo onto the map, and the software writes the geolocation data for that location into the photo. Do this for all your photos and you will be able to explore them on a map.
Flickr drag-and-drop geotagger
Their are two downsides to this method. One, it takes some time to do. Two, it is error prone. Many people (not me) are not very spatially aware and might have trouble remembering exactly where a photo was taken. Also, do you drag the photo onto the location where the photographer was standing (e.g., somewhere along the Avenue des Champs-Élysées in Paris), or the location of the photograph’s subject (e.g., the Arc de Triomphe)?
Additionally, if you use a photo site (such as Flickr) to geotag your photos, then your original photos (presumably backed up on your computer) will not be geotagged.
Smartphone Photography
Of course mobile phones and tablets almost all geotag by default. They have either built-in GPS receivers, use Wifi to mimic global position (WPS), or combine these two approaches. If you haven’t played around with your geotagged mobile photos then this is a good place for you to start exploring. Try using iPhoto’s Places feature.
GPS-equipped Cameras
This should be the future of geotagging. Every camera should have a built-in GPS receiver and Wifi. These microchips are cheap.
Currently, there are several dozen consumer-grade cameras with built-in GPS. The main concern with using built-in GPS seems to be deteriorated battery life.
My wife has a Panasonic waterproof camera with GPS, but we never use that function for fear of depleting the camera’s battery. She uses the camera primarily on canoe trips and a battery recharge could be days, or even a week away.
Buil-in GPS is the simplest option though and is really the only viable option for the average consumer.
(If you use Eye-Fi Wifi-enabled SD cards you can take advantage of WPS geotagging, which in urban areas is going to be almost as accurate as GPS. Outside of urban areas, or away from any wireless access points, WPS geotagging will not work.)
Combination of Camera and External GPS Receiver
If your camera does not have a built-in GPS receiver then you can still geotag your photos with the help of an external GPS receiver (logger). This is more cumbersome than having built-in GPS, but more accurate than manually geotagging with the drag-and-drop method.
I’ll break down this method into two categories: using your GPS equipped cellphone as a logger, or using a stand-alone GPS receiver (i.e., a receiver that is not also a web browser, email client, and espresso maker).
Smartphone GPS Logger
I can quite easily do geotagging with my iPhone and my Wifi Canon PowerShot S110 via Canon’s CameraWindow iOS app. All I need to do is start the geo logging function in CameraWindow and then go shoot some photos. When done shooting, I stop geo logging, connect my iPhone and PowerShot S110 via Wifi, and tell CameraWindow to tag all the new photos on the camera. Done.
Canon’s Camera Window app for iOS, which works with their Wifi-capable cameras, has a major flaw — you cannot export your geo location log. You can only tag photos that are on your Canon camera by connecting it to the iPhone via Wifi after generating a log. I can’t, for example, use the CameraWindow app to tag photos from my EOS M.
GPSPhotoLinker GPS Data Viewer
Thankfully, there are other apps available that geo log and allow you to export your logs. I’ve been trying out Geotag Photos Pro. The app’s logger fits in the functional category — full featured but not pretty. (The same company’s off-line desktop Java app for marrying the log data with your photos blows chunks. Their on-line version of the app is even scarier. Avoid them.)
After you create your log, you need to do something with it. The workflow generally looks like this: log with your smartphone while you take some photos; export the log to your computer (usually via email); and, on your computer run the log and your photos through some software to automatically geotag your photos.
Most logging apps export logs in standard GPX (GPS eXchange) format so you can use them in whatever software you choose. Adobe Lightroom has a geotagging feature that supports GPX logs. I currently use Adobe Bridge and Adobe Camera Raw for my workflow, neither of which natively support geotagging. I did find a plug-in script for Bridge by photographer Yagor Korzh that accepts GPX logs as input. It is no frills, but it seems to work fine in the few tests I ran. However, on OS X, I’ve settled on GPSPhotoLinker as my third-party geotagging software.
Traveling, which I have been doing a lot of recently, plus photography, just screams for geotagging. I almost always have an iPhone and a camera with me wherever I go, so I would like this geotagging method to work for me.
Apps that use GPS for extended periods have a tendency to deplete your phone battery rather quickly. When I am travelling I just never know when I might be able to recharge, so phone battery conservation is a high-priority. Thus, I have not used this method extensively in the real world.
This method also requires that you remember to start and stop logging. It seems like a lot of work.
(Here is a quick travel tip: charge your iPhone faster with Apple’s larger and more powerful 12 watt USB power adaptor (the kind that comes with the iPad) rather than with the slower 5 watt iPhone-standard power adaptor. Make the most of those few minutes in the airport boarding lounge. Carry the larger adaptor and you’ll also be ready to save a fellow traveller with an iPad in need of juice.)
Stand-alone or Dedicated GPS Receiver/Logger
If your camera does not have built-in GPS and/or you do not want to use your smartphone as a GPS logger, then you have two other options: use a stand-along GPS receiver that can log tracks and export those logs to your computer (e.g., a Garment eTrex); or, buy a dedicated external GPS receiver that is designed to work directly or indirectly with your camera model.
If you already have a suitable stand-alone GPS receiver, start there.
Canon GP-E2 GPS Receiver
Preview.app GPS Info Pane illustrating the plethora of geotag data added by the Canon GP-E2
At the moment I do not have a Garmin, Magellan, or other GPS receiver. As a Canon user my first option is the Canon GP-E2 GPS Receiver. The GP-E2 is a hotshoe mountable GPS receiver that is specifically designed to work seemlessly with Canon’s current line-up of EOS cameras. Thankfully, that includes my EOS M.
With the GP-E2 mounted on the EOS-M, photos are tagged with latitude, longitude, and direction of shot (thanks to a digital compass) the moment each photo is written to the camera’s SD or CF card. The GP-E2 also has a log mode which periodically writes location data to its own memory.
GP-E2 battery longevity is essentially a non-issue. On a single AA battery it can log every 15 seconds for up to 39 hours. If I shot four hours a day, I could get 9 days out of a single Ni-MH rechargeable. 1, 5, 10, 15, or 30 second, and 1, 2, or 5 minute intervals are also available.
I won’t have to worry about daily logs filing up the device either. Using the default 15 second interval, 69 days worth of logs can be stored on the device. At longer intervals, up to 128 days worth of logs are kept. That is plenty of time to get back to the computer to backup the logs. When the device memory is full the oldest logs are deleted to free up space.
This all sounds great, but there are a few downsides to the GP-E2.
One, it is bulky. On professional or pro-consumer EOS bodies it won’t really be noticed, but it sticks out like a sore thumb on my EOS M, especially if I use the tiny EF-M 22mm pancake lens. Though, at only 81 grams, weight is not a problem. Also, it can be used off-camera by attaching via the DIGITAL ports with either the supplied 25 cm or 1.5m cables.
Two, it is expensive. At $350CAD, the price is as high as the GPS satellites it communicates with. For $259CAD I can get a great stand-alone Garmin GPS that has almost all the features of the GP-E2 and then some (more on this option in a minute).
Three, while tagging photos in-camera on the EOS is super simple, using the logs to tag images from non-EOS cameras is a bit of a pain, to say the least (again, more on that later on).
Other GPS Receivers
As I mentioned above, the Garmin eTrex-series is very enticing. I have investigated the eTrex 30. It is relatively compact, which makes it a good option for travelling. If I had one, I would also use it while backpacking, canoeing, and mountain biking.
As a GPS logger, a device like the Garmin eTrex 30, would work essentially the same as any of the smartphone apps available, with one exception. A stand-alone GPS receiver is going to have substantially better battery longevity — 25 hours on two standard AA batteries, according to Garmin.
Where Am I? (Pun Intended)
Yesterday, I decided I would not get the Canon GP-E2 or a Garmin eTrex. I decided I would play around with iOS loggers for a little while longer.
Today, I changed my mind. My credit card company thanks me, I’m sure.
After purchasing the GP-E2, I took it home and put it through its paces. Though happy with the final results, I had a frustrating time getting it to do all that I wanted. Rather than keep that suffering/knowledge to myself, I decided I would share so others might have an easier time of things. Beneficence or catharsis — you decide.
Canon GP-E2 GPS Receiver Hack-a-thon
For the price I paid for the GP-E2, I rationalized that it would have to be a fully-capable device. It had to do the following, or I would consider returning it:
tag images on my EOS camera while mounted on the hotshoe;
easily log tracks, and allow tagging of images from my other Canon cameras;
allow exporting of track logs for use in other software if I choose not to use the Canon’s MapUtility;
and finally, allow tagging of photos from non-Canon cameras (contrary to the marketing material).
Geotagging Is For Techies
Canon MapUtility GPS Track
I’m a pretty sophisticated guy. I was a CTO and VP of Technology in a former life. At least I think I know computers and gadgets. However, it took several hours of Googling and goofing around before I was able to do all the things I wanted with the GP-E2.
First, the Canon MapUtility that comes with the GP-E2 isn’t as bad as most reviewers would have you believe. (Heck, it is not as bad as most software Canon produce.)
There is a gap in the GP-E2 manual though — they don’t actually tell you how to connect the GPS unit to the computer. So, let’s start there (I assume you’ve installed the included MapUtility software already).
Loading GP-E2 Log Data Onto Your Computer
If you are using the log mode of your GP-E2 you need to get the log onto your computer:
First, plug a mini-USB cable (which Canon does not supply) from your computer into the DIGITAL port on the GP-E2.
Then, turn the GP-E2 mode switch to ON.
Next, launch MapUtility.
Finally, import your logs. In the upper left of the application window, select the “GPS log files” tab. At the bottom of said tab, there is a button with a grey box and a blue arrow. Click this button to import your logs from the GPS device (you can also perform this operation using the File menu).
Congratulations, you now have your logs. What to do with them?
If you have photos shot with a Canon camera during the log timeframe, then you can simply drag them into MapUtility and have them automatically geotagged. Like all other geotagging utilities, MapUtility simply matches the time the photo was taken with the corresponding time in the log and assigns the most relevant location to your photos.
For example, I went outside to shoot some photos with my EOS M with the GP-E2 installed. I had the GP-E2 in LOG mode. As I shot photos on my EOS M, they were immediately tagged with location and direction data. I also had my PowerShot S110 along. While the GP-E2 was logging, I shot a few photos with the S110.
Back at my computer, I imported the geotagged EOS M photos and the non-geotagged S110 photos. I loaded the S110 photos and the GP-E2 log into MapUtility, and voila, the S110 photos are now geotagged.
Skirting Canon’s Proprietary-ness
What if you want to use your GP-E2 logs outside of MapUtility? Maybe you want to use the map features in Lightroom instead. Or, what if you want to use your GP-E2 logs in MapUtility, but with a non-Canon camera?
In these cases you will need to either, a) get your logs out of MapUtility; or b), get MapUtility to play nice with your non-Canon photos.
This is where things start to get messy.
Exporting and Translating the GP-E2 Logs
First, getting your logs out of MapUtility.
If you select a log in MapUtility’s “GPS log files” tab an enticing button becomes available which offers to “Export file for Google Earth”. Unfortunately this button does not do what you want it to. It exports a KMZ GPS track file which is stripped of any and all timestamp information. This KMZ can be converted into a KML file, and then into a GPX file, but your geotagging software will not be able to use the GPX file to match photos via date and time alignment.
This is where I found myself banging my head on my desk and preparing to return the GP-E2. At that moment however, I happen to open iPhoto, which I don’t use that often, and which really only contains my iPhone Photo Stream.
In a mapping sort of mood, I clicked on iPhoto’s Places. I saw a map plotting where each of my recent iPhone photos had been shot — on four continents in just five months! I was a bit taken aback and a bit impressed.
As I looked at a map, I saw a pin at a location where I didn’t recall taking any iPhone photos. I clicked the pin and saw photos of my wife huddled in her sleeping bag in the back of my pick-up truck a few hours before we started paddling down the White River last September. I clicked other pins, in strange or distant places and memories started flooding back. I never drive down that side-street, I thought. And then I saw pictures of my wife rolling our canoe towards the river on a crazy urban adventure. I don’t mind saying I had tears in my eyes.
I wanted to be able to explore all my photos that way. I was more determined to make the GP-E2 work for me. I had figured out how to tag photos from any Canon camera, EOS or not. Maybe I didn’t want to use MapUtility, but I could.
I decided to make one more attempt at exporting the GP-E2 for use in an alternative geotagger.
At the bottom of a forum thread I had already read, I re-examined a post that I had previously glossed over. I had already found the location of the log files on my computer and taken a look at them. They were in plaintext which was promising. The post I found made things clearer. The Canon GP-E2 is an NMEA-0183 compliant device. There is an excellent free utility available — GPSBabel — that can convert NMEA files to GPX. I quickly tried out the on-line version of GPSBabel and found myself with a lovely GPX file.
I loaded the GPX file and some sample photos into GPSPhotoLinker, and lo and behold I had geotagged photos.
So in short, to convert your GP-E2 logs to GPX format:
import your logs from the GP-E2 into MapUtility as described above;
located the imported logs on your computer (on a Mac they are in /Users//Documents/Canon Utilities/GPS Log Files, on Windows try C:/users//Documents/Canon Utilities/GPS Log Files);
use GPSBabel to convert the log file from NMEA-0183 to GPX.
On OS X, when you download and install the GPSBabelFE.app GUI, then the command-line executable binary is located at /Applications/GPSBabelFE.app/Contents/MacOS/gpsbabel. If you use the command-line version of gpsbabel, the conversion command will look something like:
If you use the on-line version of GPSBabel then the conversion form should look something like this:
Using Canon MapUtility to Geotag non-Canon photos
But what if I want to use Canon’s MapUtility to geotag non-Canon photos rather than exporting the GPS track log to another program? Well, I figured that out too.
Map Utility simply uses the EXIF “Make” tag contents (the name of the camera manufacture stored in each photo when it is produced) to restrict geotagging to photos taken with Canon cameras. Lame. Are Canon afraid that users will mess up existing goetags from other manufactures? Maybe, but this restrictions seems useless.
I used OS X Terminal.app and ExifTool to read the contents of of the “Make” tag on a sample photo…
exiftool -Make Non-Canon-Photos-Folder/photo1.jpg
Make : Panasonic
…temporarily changed the tag contents of a bunch of photos to “Canon”…
As you can see, with exiftool you can easily batch manipulate EXIF data. You are not limited to JPEGs. ExifTool works with almost any file format that can contain EXIF, IPTC, etc.
Also, in the exiftool command you have the option of specifiing a single file as your source, a directory of files, or a list of files identified using wildcards.
In the above examples, the original files are renamed and kept as backups, but you can turn off this behaviour.
And finally, ExifTool can be used to geotag your photos using the data from your GPX or NMEA log files, allowing you to skip the MapUtility altogether. I think I’ll be working on a script to automate this soon.
If you are not comfortable using the command line, then I’m sure there is a GUI utility out there for you. Unfortunately Adobe Bridge does not let you modify EXIF camera data such as the “Make” tag. Not sure about Lightroom.
Conclusion
I’ve always loved cartography, globes, and paper maps. Maybe this is why I am so late to the GPS game. Except for navigating with digital maps on my phone, which I use when travelling in foreign cities, I’ve not used GPS much.
Last year, on a canoe trip, while navigating a huge lake, we got turned around and disoriented (well some of the group got disoriented). I knew which way we were supposed to be going because I photographed the sun rising that morning and I knew which way was North. We were supposed to be heading North. At that moment we were heading Southwest. The low autumn sun and the monotonous topography had confused people. One person had a handheld GPS receiver along and they simply confirmed the position I gave them. You see, GPS (technology) isn’t everything.
In the world of digital photography, however, I’m finding that GPS can be an interesting tool for documenting, remember, and telling a story.
This is what I have learned so far about geotagging. Well, actually just about getting photos geotagged in the first place. There is a lot still to be learned.


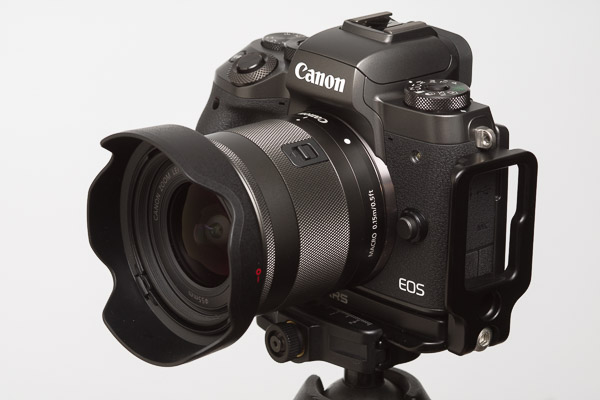


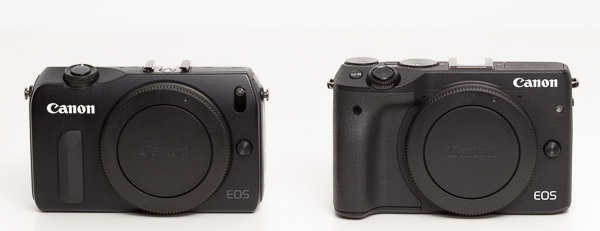

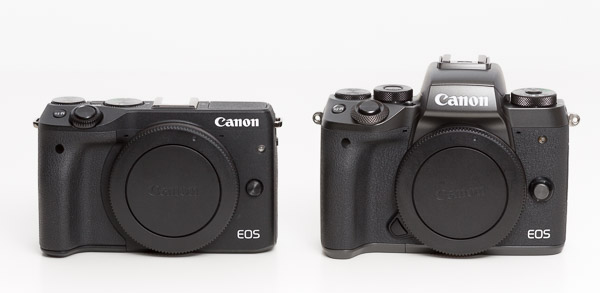


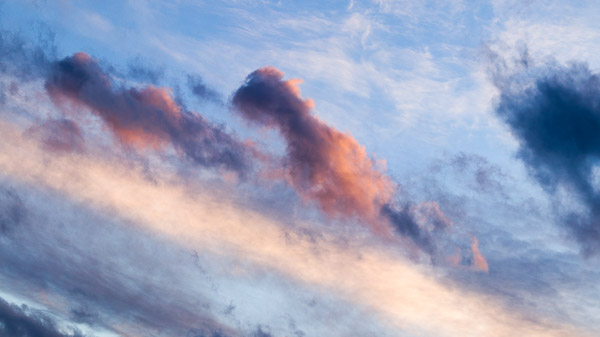
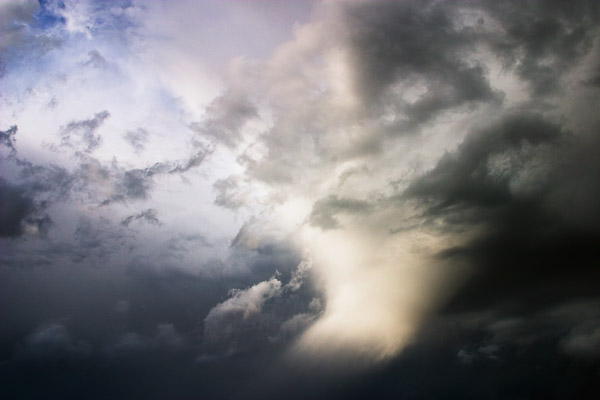


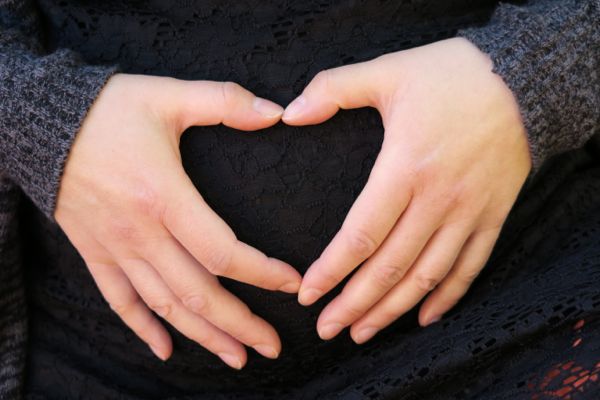


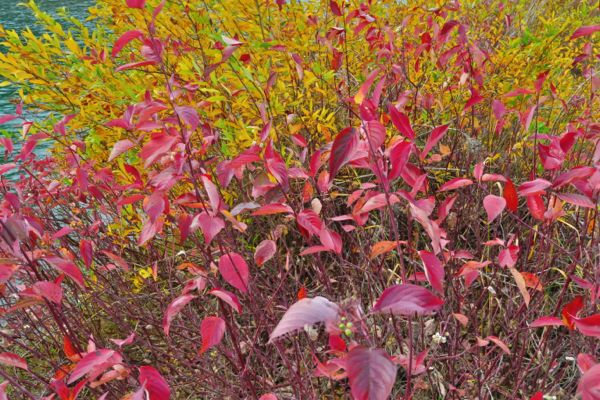
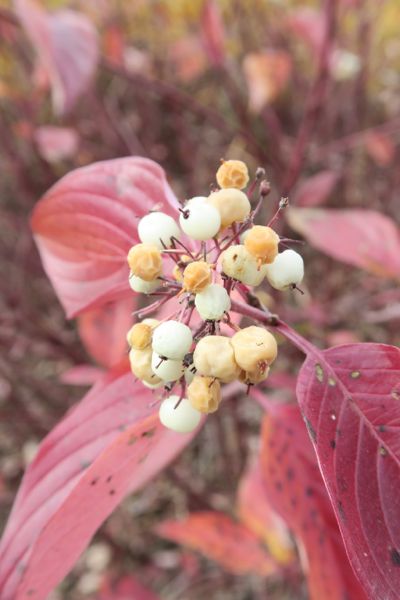


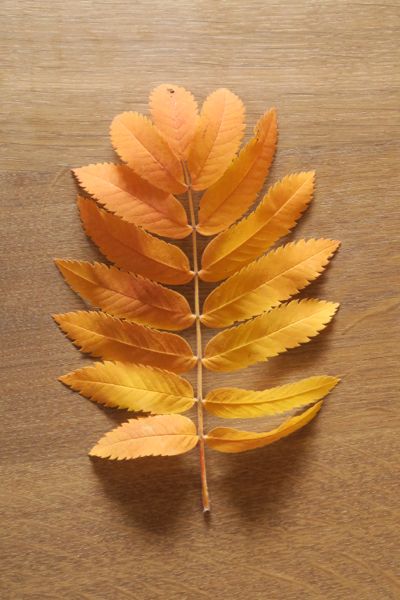
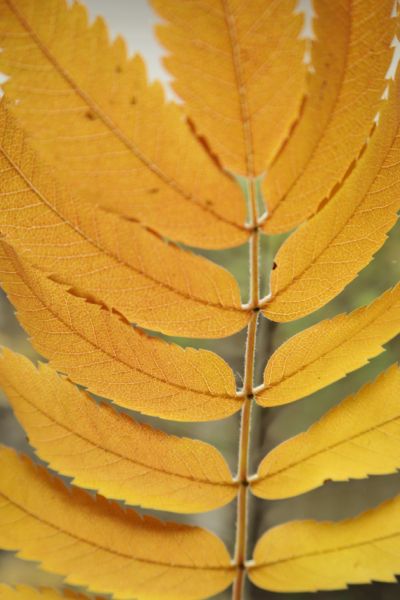
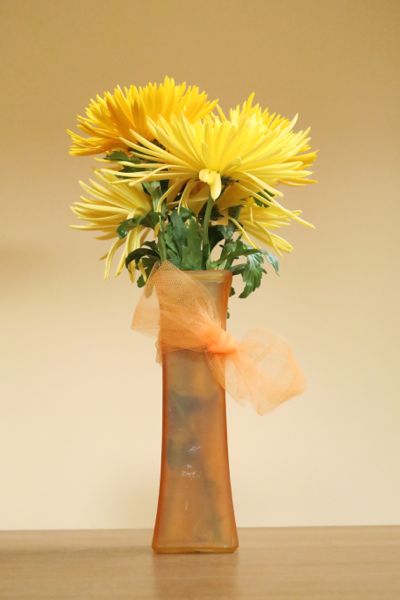


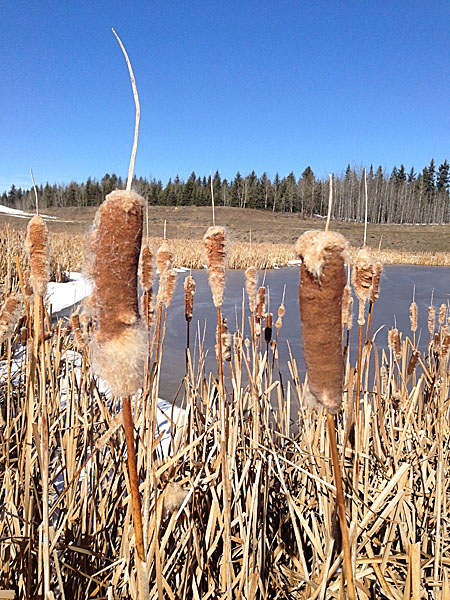

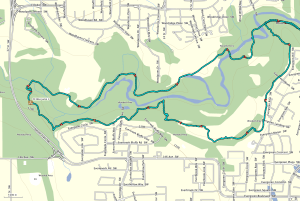
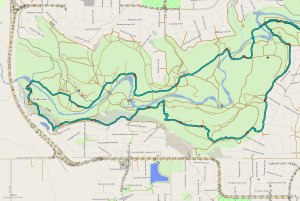
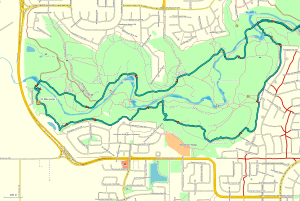


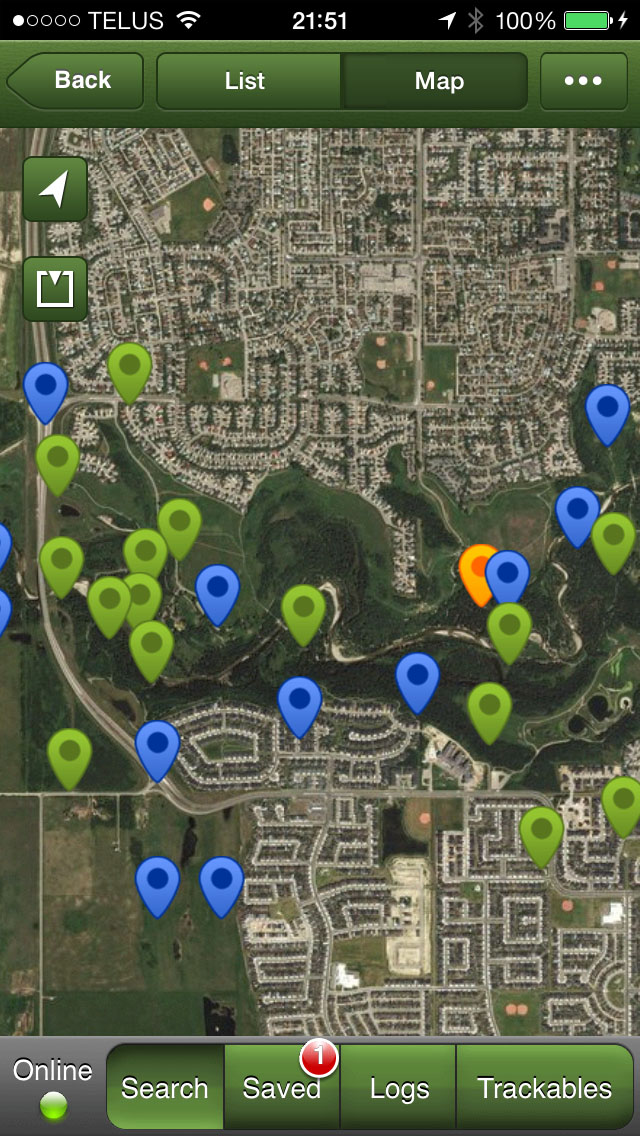


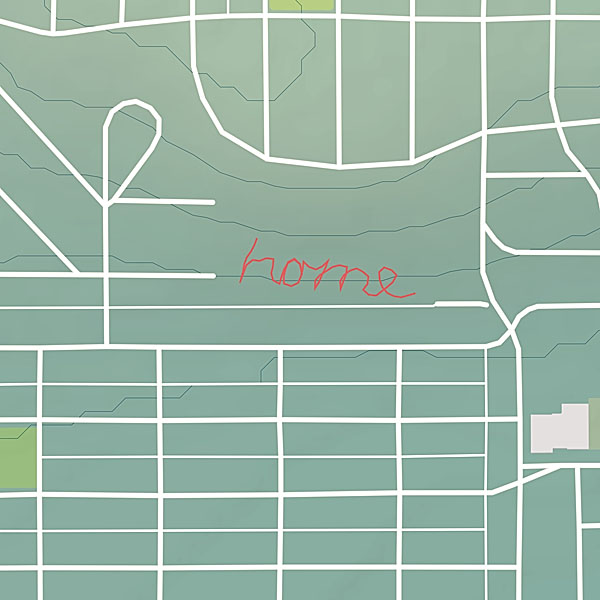


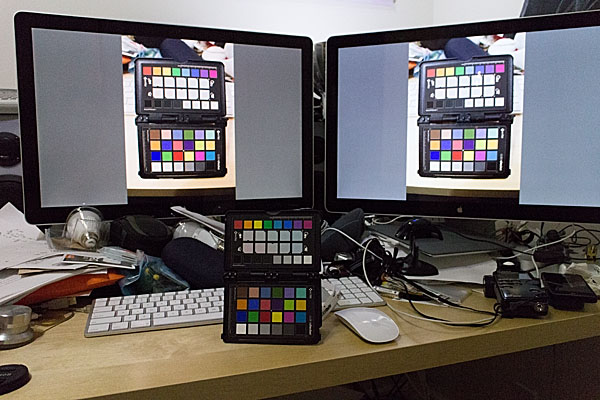
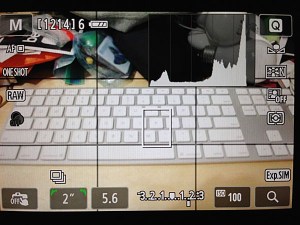
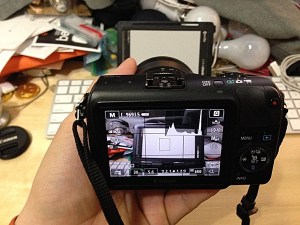
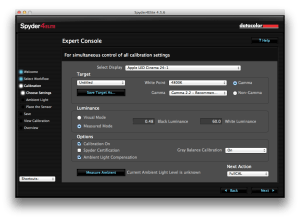
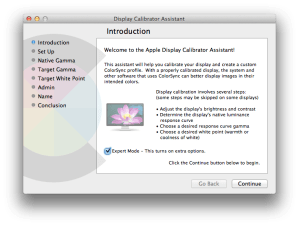 In my case I am using Spyder4Elite and I set the target white point to 4800K and the target white luminance to 60 candela (brighter than my room, but the darkest my monitor will tolerate) in the Expert Console (see the screenshot). Alternatively, you can use the calibration tool in the Displays panel in System Preferences (turn on Expert Mode) on OS X. In my experience a hardware calibrator is easier to use and more accurate, but visual calibration using Apple’s Display Calibrator Assistant is acceptable.


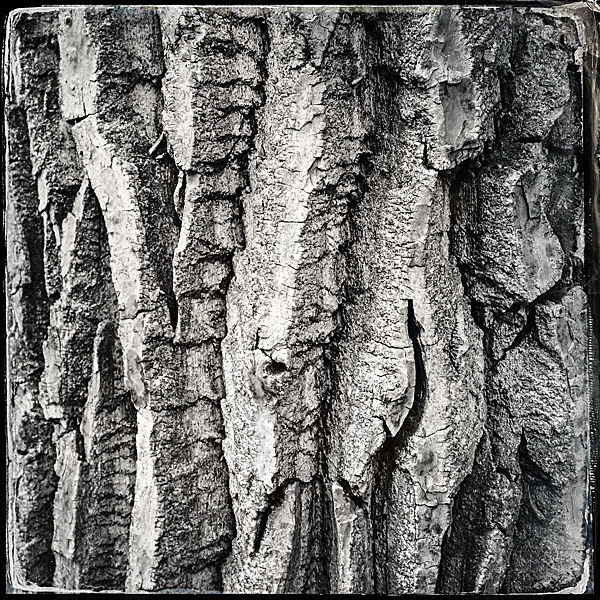


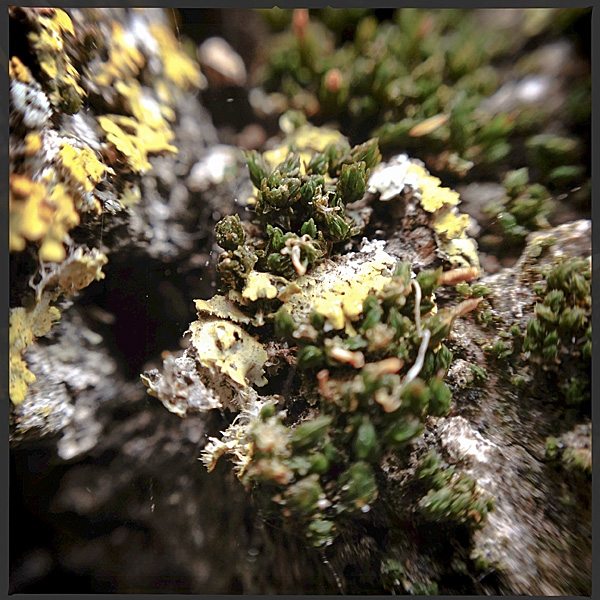
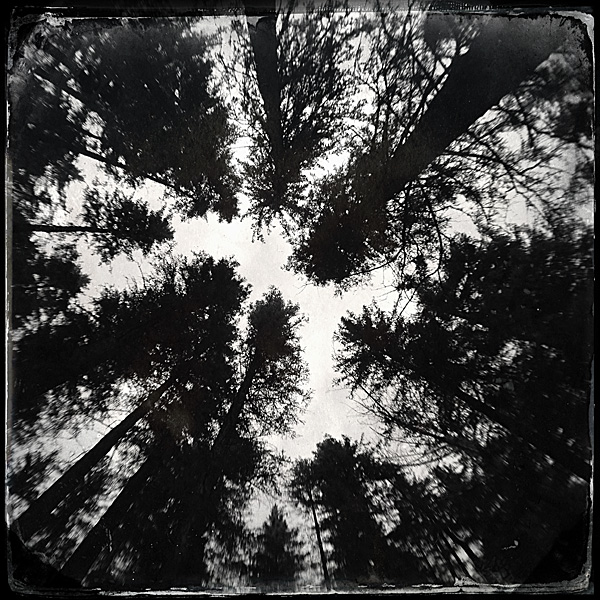
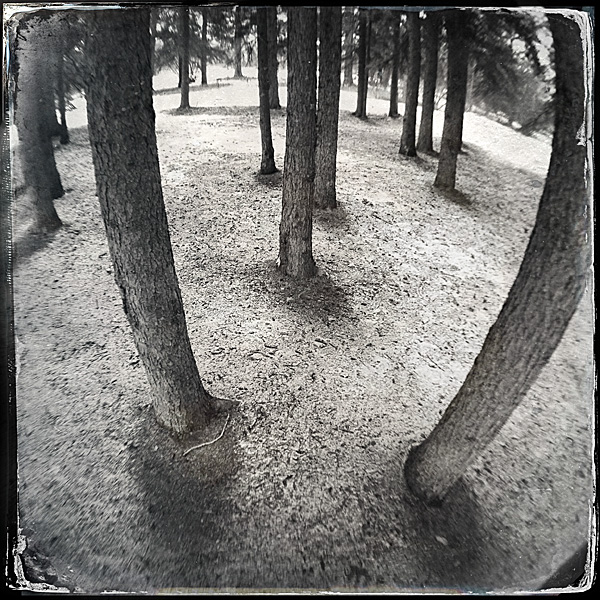
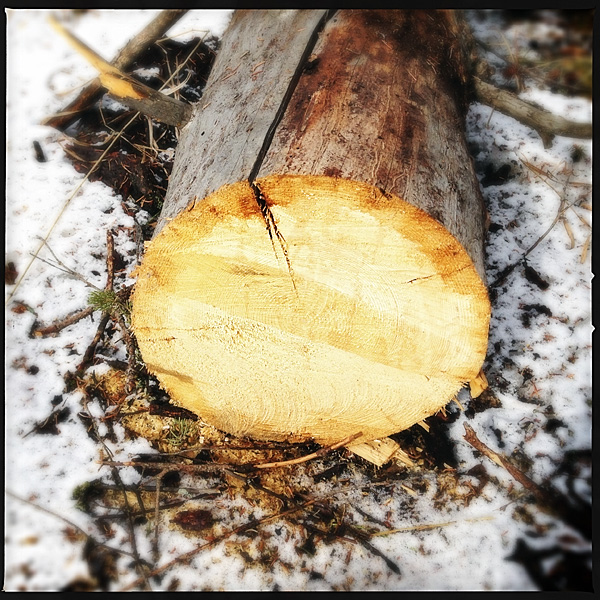

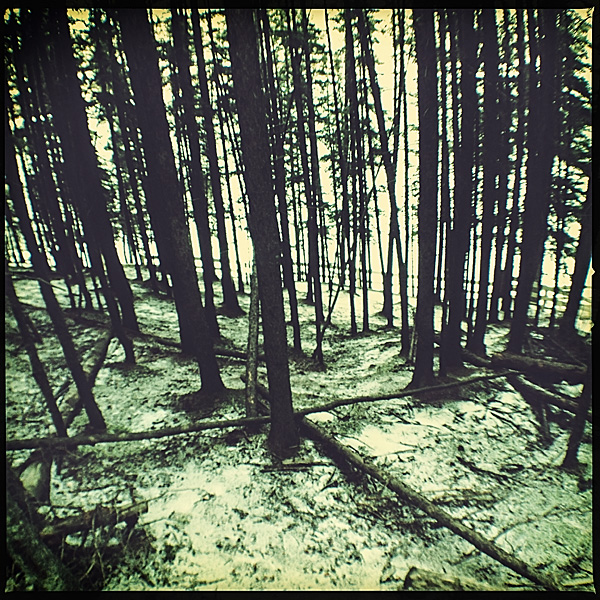


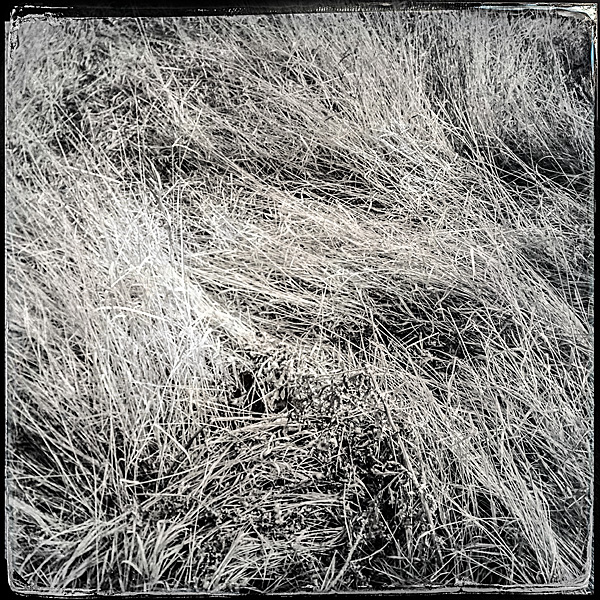
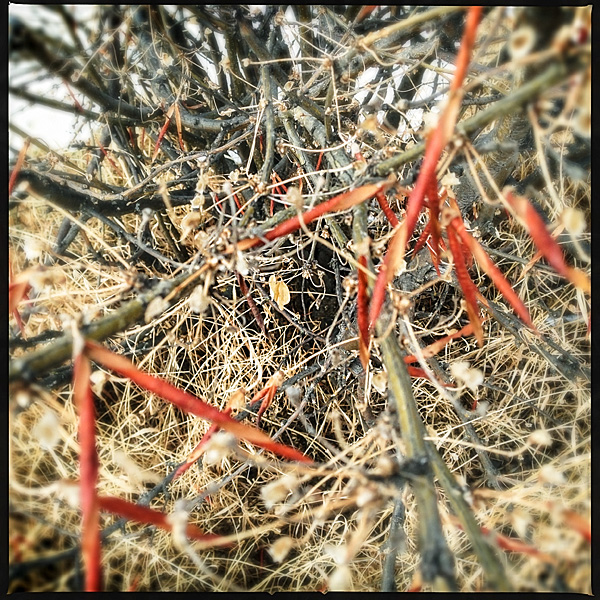


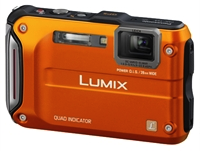 This should be the future of geotagging. Every camera should have a built-in GPS receiver and Wifi. These microchips are cheap.

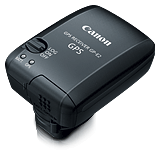 If your camera does not have built-in GPS and/or you do not want to use your smartphone as a GPS logger, then you have two other options: use a stand-along GPS receiver that can log tracks and export those logs to your computer (e.g., a Garment eTrex); or, buy a dedicated external GPS receiver that is designed to work directly or indirectly with your camera model.